In the dynamic landscape of enterprise solutions, the need for seamless data synchronization between Oracle Fusion and custom tables has become increasingly crucial. Businesses often deal with vast amounts of data stored in Oracle Fusion, and the challenge lies in efficiently transferring this data to custom tables using Oracle’s Business Intelligence Cloud Connector (BICC).
In this blog, we will explore the steps and best practices for syncing millions of records, ensuring a smooth and optimized data integration process. Before we proceed, let us understand why we need the BICC approach and how it can help us.
Advantages of BICC Approach
- To extract medium to high volumes of data to a data warehouse from Oracle Applications Cloud subscription.
- The BICC approach enables you to perform an initial data extraction, followed by incremental extracts with the help of BICC Data Stores for Oracle Cloud ERP. It is possible to schedule one-time or recurring data extracts depending on your business requirements.
- It can easily manage large data volumes, supports incremental extraction for swift updates, offers consistency across ERP, SCM, HCM, and CX modules, and can seamlessly integrate with external systems.
- BICC acts as a centralized hub for reporting and analytics. It consolidates data from various Oracle Fusion modules, allowing organizations to create comprehensive and cross-functional reports that provide a holistic view of their business operations.
- Oracle BICC adheres to Oracle Cloud’s security and compliance standards. It ensures that data extracted from Oracle Fusion applications is handled securely, meeting regulatory requirements, and providing a secure environment for sensitive information.
- BICC minimizes latency in accessing data from Oracle Fusion applications. By providing a dedicated and optimized connection, it streamlines the data retrieval process, reducing the time it takes to bring the data into the analytics environment for reporting and analysis.
Now, let’s check the step-by-step process to use Oracle BICC approach to consume large data from Oracle Fusion.
Step1: Create and Manage an Offering
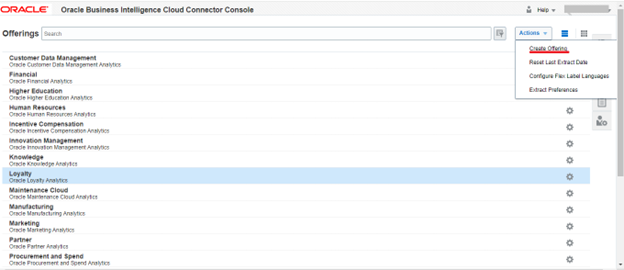
Step 2: To create and oversee an offering, navigate to the Offerings dialog and select “Actions > Create Offering.
In the Manage Offering dialog, you’ll encounter several fields as below:
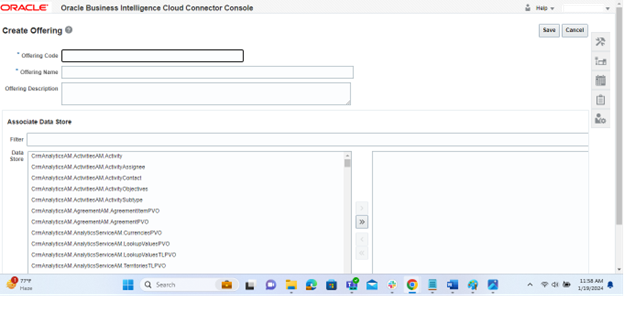
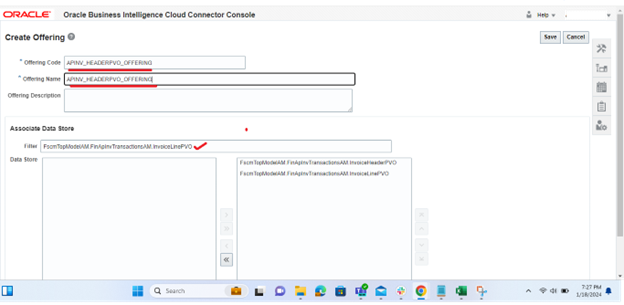
Offering Code: Input a unique code to represent the offering.
Offering Name: Specify a name for the offering. This name will be visible in the list of Business Intelligence Applications Offerings within the Configure Cloud Extract dialog.
Offering Description: Optionally, provide a description for the offering.
Now, in the “Associate Data Store” section of the dialog:
Filter and Select: Use the provided options to filter and locate the desired data store.
Also Read: How to Create an Employee Expense Report in Oracle Fusion?
Save Changes: Click the “Save” button to finalize the association between the offering and the selected data store.
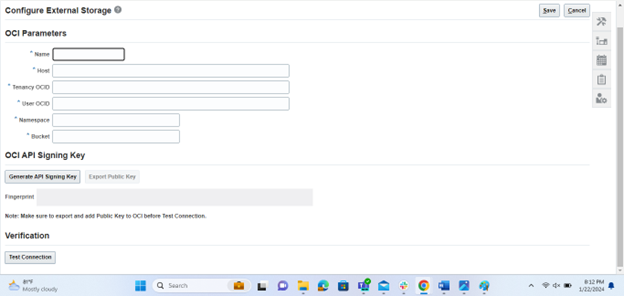
Step 3: Configure external storage. To set up external storage configurations, access the panel tab and click on the “Configure External Storage” button. Then, choose the “Configure External Storage” link to open the corresponding dialog box.
Step 4: For instance, if you want to load data into Oracle Cloud Storage Service instances, navigate to the Storage Service Connection Configuration tab.
To configure connections related to Cloud Infrastructure, go to the OCI Object Storage Connection Tab and fill the required details as below:
Alternatively, if you need to configure connections to the Universal Content Management (UCM) Server, select the UCM Connection Configuration tab. This flexibility enables you to tailor your external storage settings based on your specific requirements and preferences.
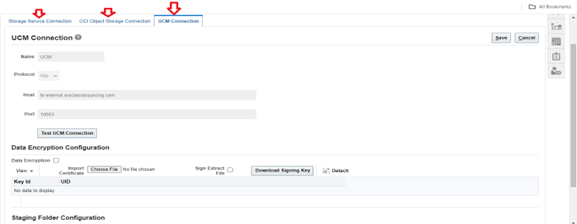
Regarding the “Storage Type — UCM,” you’ll need to examine the connection details for Universal Content Management (UCM).
Protocol: Indicate whether to use http for non-SSL or https for SSL. If you choose https, ensure that HTTPS is also enabled on the UCM server using the UCM Server Console.
Host: Displays the host name for the UCM Server. For instance, it might be something like myserver.companyname.com.
Port: Optionally, specify the port number of the UCM Server. For example, it could be 7012.
Test UCM Connection: Utilize this option to verify the connectivity with the UCM server.
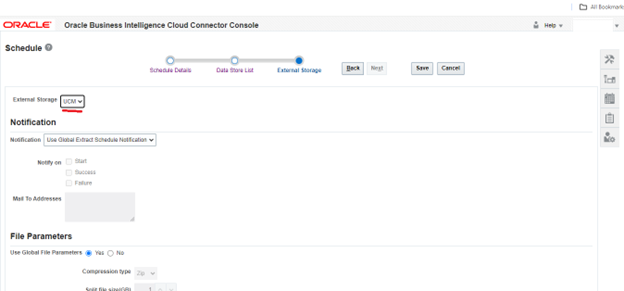
Step 5: Schedule Extracts and Jobs. To initiate and manage jobs, allowing for the specification and control of their associated data stores, along with scheduling and execution using refresh metadata at the job level, follow these steps:
1.Navigate to the “Manage Jobs” panel tab and click on the “Manage Jobs” link.
2. On the “Manage Jobs” page, select the “Add” button to create a new job.
3. On the “Add Jobs” page, input the following details to define the new job and manage its refresh metadata:
Name: Enter a name for the job.
Description: Provide a description for the job.
Offerings: Choose the offering from the list that contains the data stores you wish to include in the job.
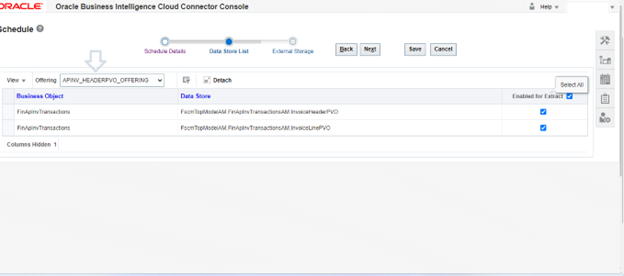
d) Enabled for Extract: Check the box for the data store you want to enable for extraction.
e) Click “Save.” This action adds the job, and the page redirects to the “Manage Jobs” page.
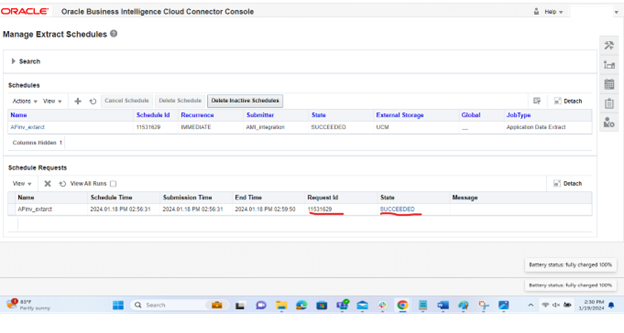
Step 6: click on the job to Run the job.
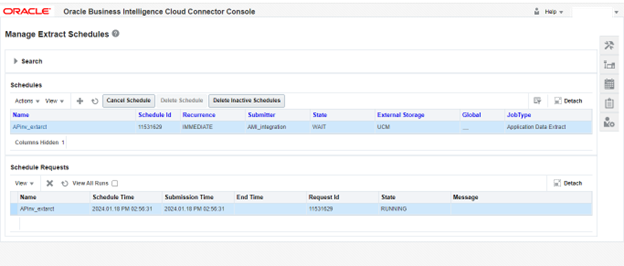
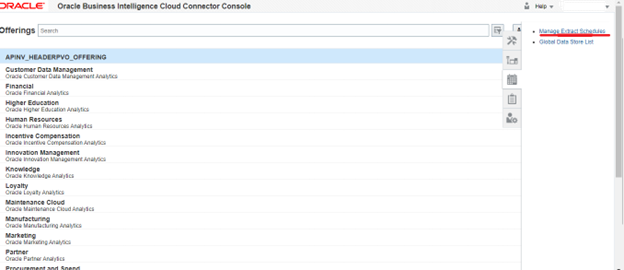
To check the last run status of a Cloud Data Extract, follow these steps in the Manage Extract Schedules dialog:
- 1.Click on “Actions” and choose the last run status for a specific run type. This allows you to access logging and status information for each View Object (VO) associated with the last extraction job. The ESS Request Id identifies the extraction job in question.
- 2.If needed, click “Detach” to expand the dialog to full size for a more detailed view.
Statuses are displayed as follows:
ERROR: Indicates that the extract failed, with the specific error message shown in the Message column.
EXTRACT_SUCCESS: Signifies that the extract process ran successfully.
UPLOAD_SUCCESS: Indicates that the upload to external storage was successful.
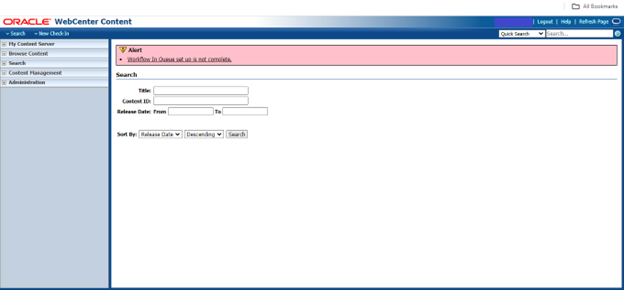
Step 7: Navigate to the page “fusion instance/cs” to view list of extracts.
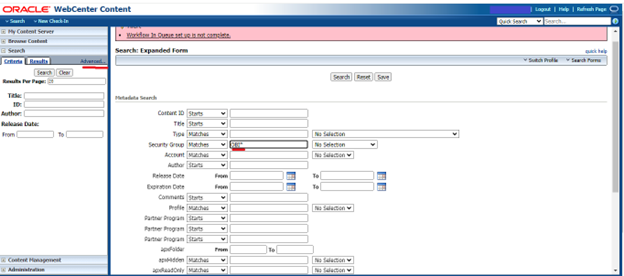
Step 8: Follow the path Search -> Advanced-> Security Group-> put OBI* to list the extracted files.
Step 9: Download and Process Content from UCM.
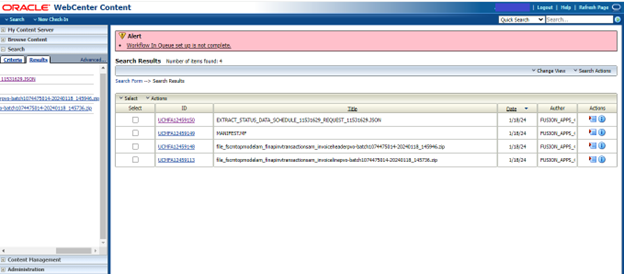
a) Download Manifest Files:
Search for files with the name “DOCTITLE MANIFEST.MF” in UCM.
Sort the results by “DOCDATE” in descending order to get the manifest UCM files.
Download each MANIFEST file using the unique identifier “docid.”
b) Parse Manifest Files:
Parse the lines in the manifest files to identify data files using their respective “UCM document ids.”. Use the “md5_check_sum_value” to verify the content of downloaded files.
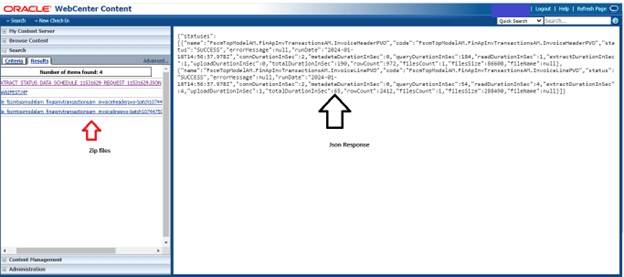
c) Unzip and Process Data Files:
Unzip the downloaded files and process each data file based on its file extension (e.g., .csv,.mdcsv, .pecsv).
d) Rename and Expire Files:
Rename the corresponding MANIFEST.MF file in UCM by adding a timestamp prefix in the format [TIMESTAMP]_MANIFEST.MF to avoid reuse.
Conclusion:
Syncing large data from Oracle Fusion to custom tables using BICC is a complex but manageable task if implemented with careful planning and execution.
By following the above steps and incorporating best practices, businesses can establish a robust data synchronization process that ensures accuracy, efficiency, and data integrity across the enterprise.