
In this blog, we will learn how to add pagination control for a table in Oracle Visual Builder (VBCS). Here, we will be using Array Data Provider to populate data in our table.
But first, let us understand the most common problem and advantages of adding pagination control in Oracle VBCS.
Problem Statement
The most common problem faced by developers is to scroll through large amount of table data in the web page.
Solution
Pagination control helps in controlling the number of rows provided and scrolling through them.
Some Advantages of Pagination:
- Enhanced User Experience: Pagination control in Oracle VBCS contribute to a smoother and more responsive experience by breaking down large sets of data into manageable chunks.
- Improved Performance: Pagination control helps in optimizing performance by loading and displaying a limited number of records at a time which improves response time significantly.
- Seamless Navigation: By using pagination, you can easily navigate through different sections of data.
- Compatibility with Large Datasets: For applications managing large datasets, pagination controls ensure that the user interface remains responsive and doesn’t impact performance. This enables users to access specific portions of data without experiencing delays or lag.
Now, let’s see how to add pagination control for a table in Oracle VBCS.
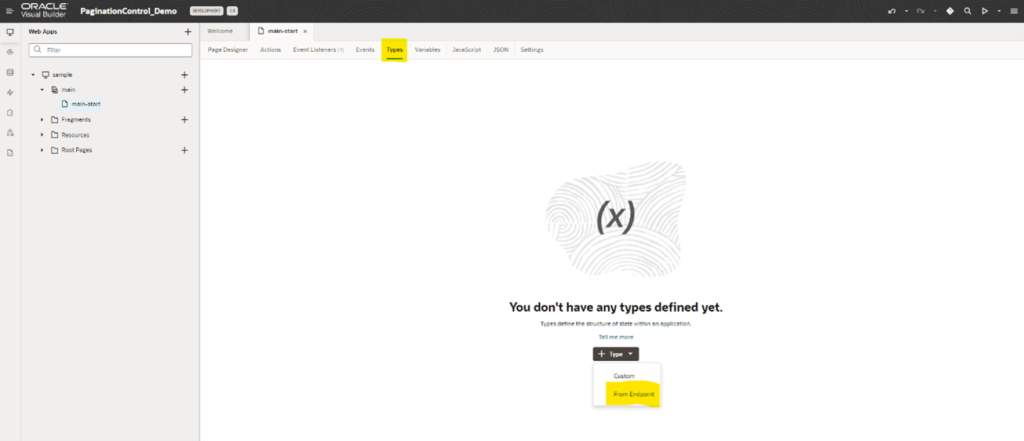
Step 1: In the main-start page, navigate to Types and click on +Type to create an Endpoint from business object.
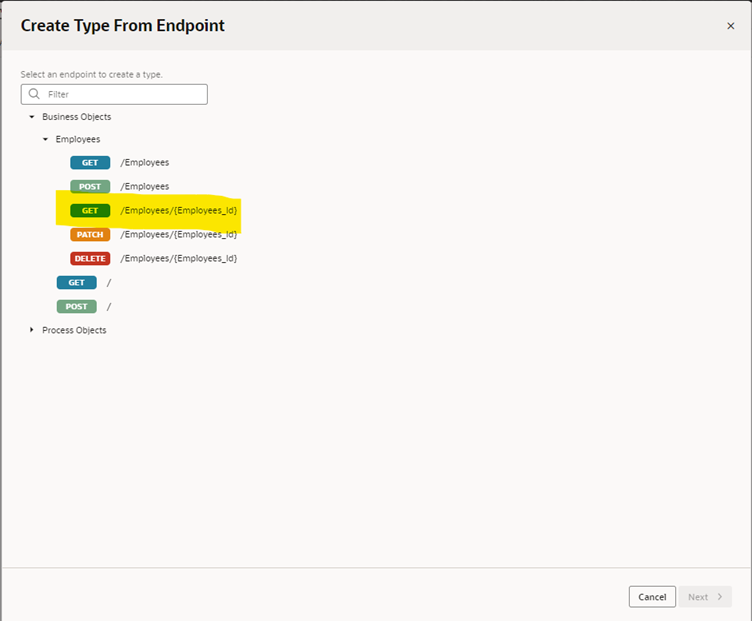
Step 2: Once you click From Endpoint, a dialogue box will appear with all the Business objects, Process objects, and service connections. In our case, we will be using Business Objects BO. Select get employees/{Employees_id} endpoint of employees business object.
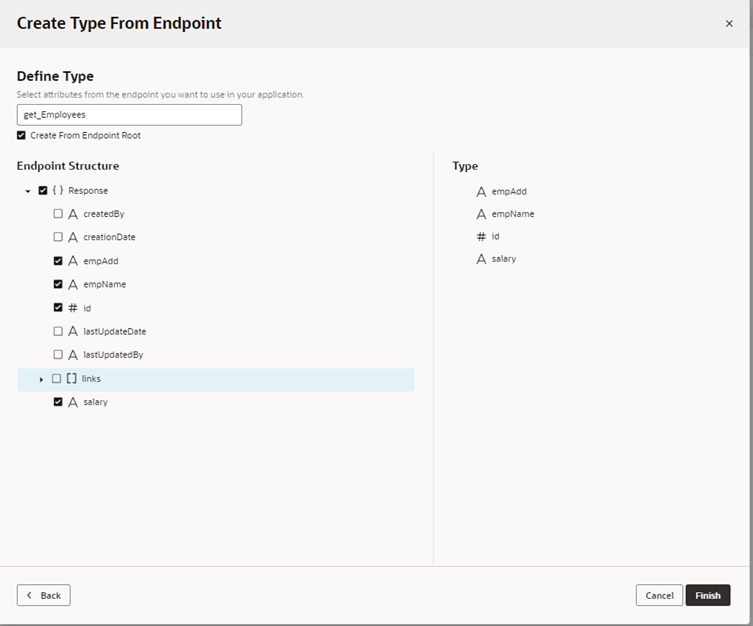
Step 3: Select the required fields from Response and click on Finish.
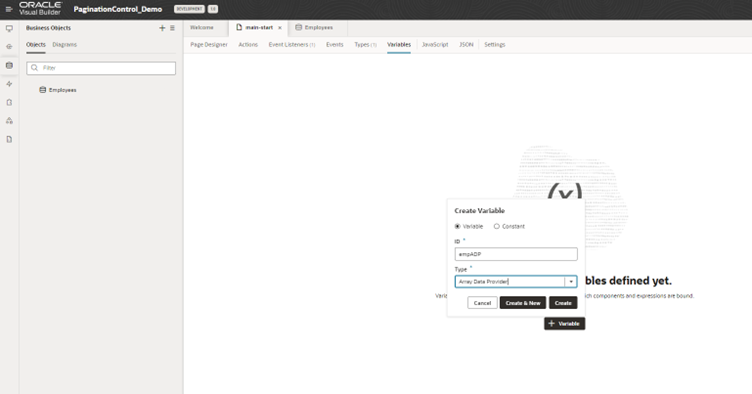
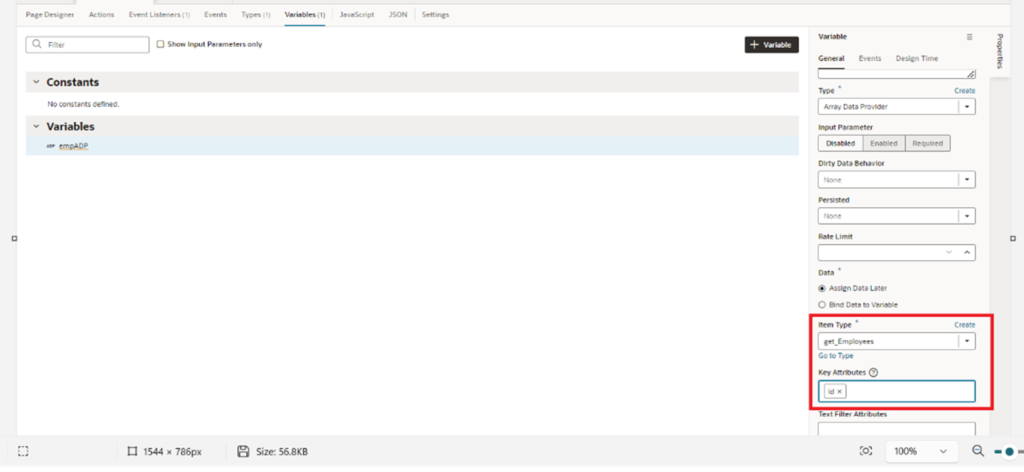
Step 4: In the main-start go to Variables Tab and click on +Variable. Enter ID and select Type as Array Data Provider and click on create.
Step 5: Select the variable created in the previous step, on the right side in general properties panel select ItemType as get_Employees (Created in above steps) and in Key attribute, select a unique column. In our case we have selected id as key attribute.
Recommended for you: How to Upload/Download Excel file in Oracle VBCS?
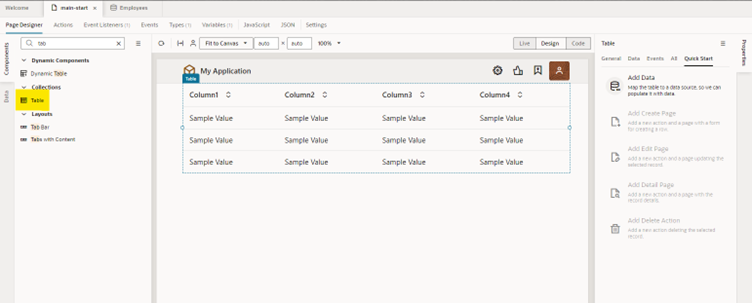
Step 6: Now in Main-start page, go to Page designer tab. Drag and drop table component in the page.
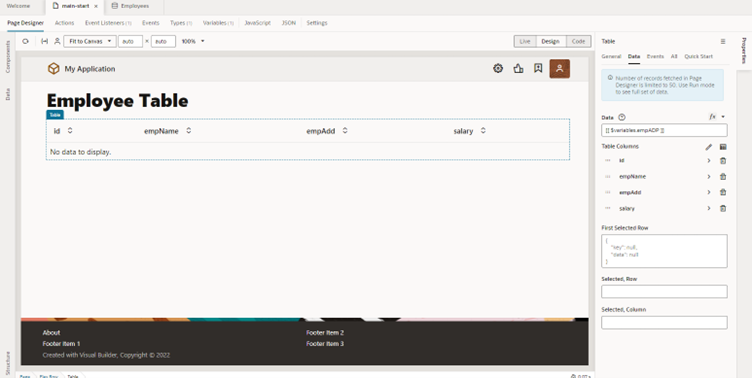
Step 7: Select the table created from page designer and on the right side go to data panel on Properties. Select the empADP variable that we created.
Then select the table columns that you would like to display. The table column names will be visible.
Now let’s load data in table.
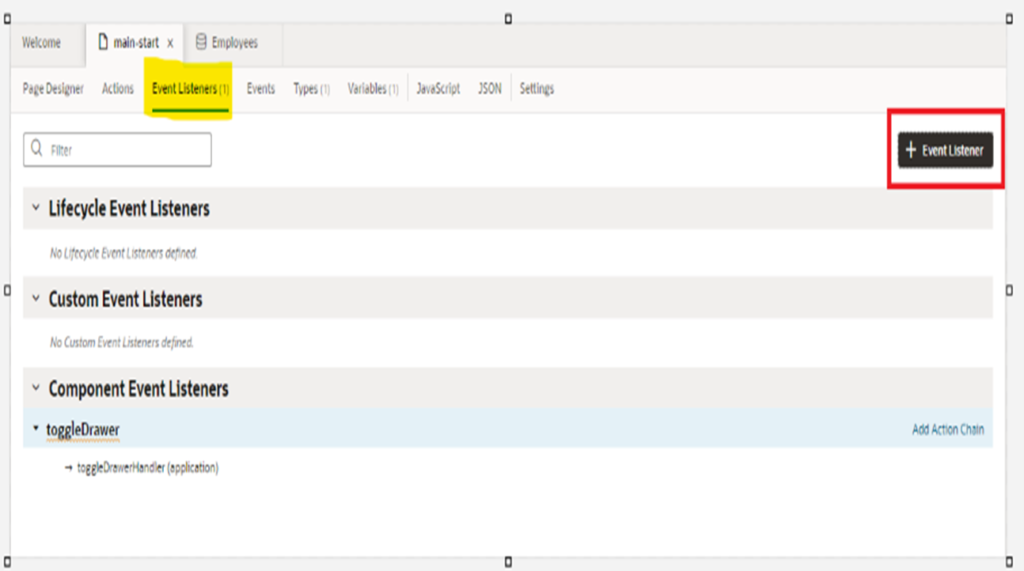
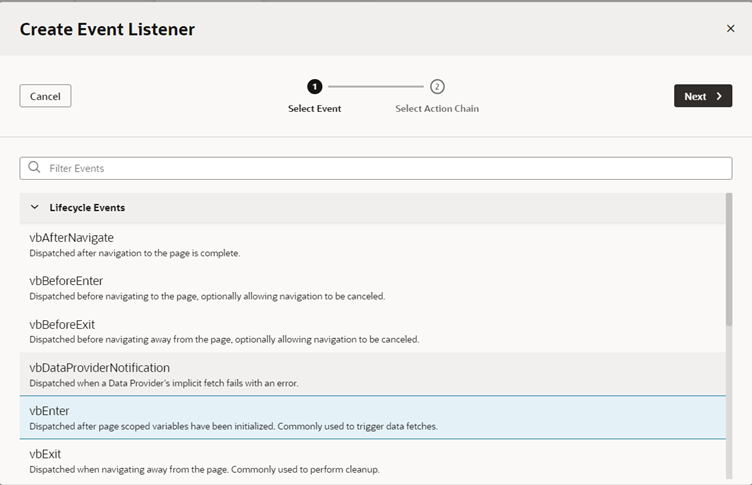
Step 8: We need to create an Event to fetch the data into ADP variable that we have created. From Main-start, go to Event Listeners tab and click on the +Event Listener.
Step 9: Once you click create Event Listener button, a dialog box appears with all the events. Please select vbEnter and click on Next.
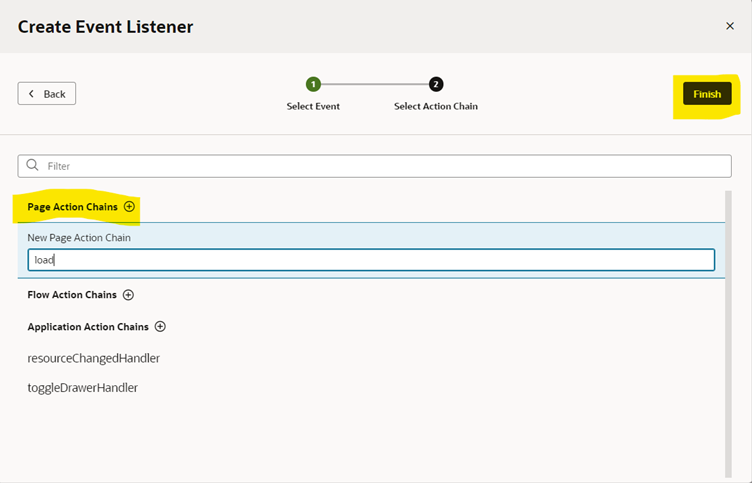
Step 10: In the next page, click on Page Action chains+ to create a page action chain. Give the action chain id and click on Finish.
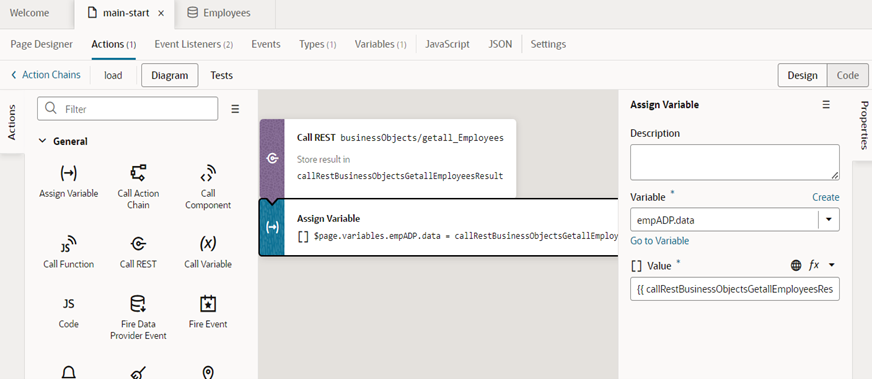
Step 11: Go to load action chain and drag and drop call Rest action in the diagram canvas and enter ID in the properties panel.
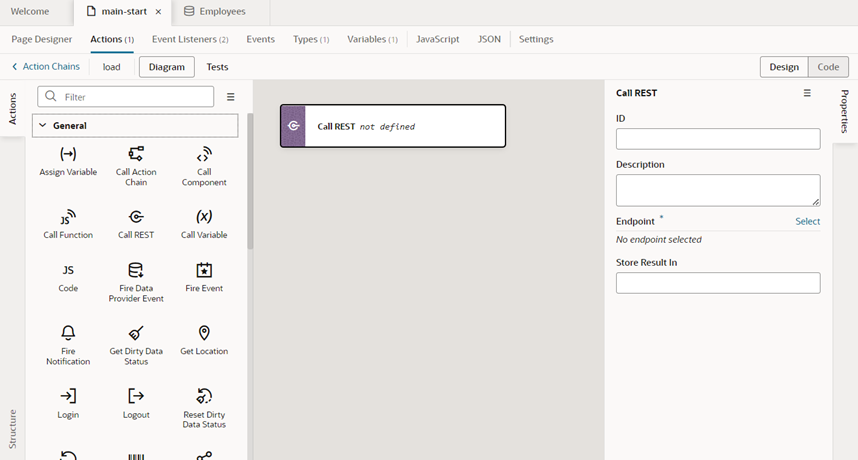
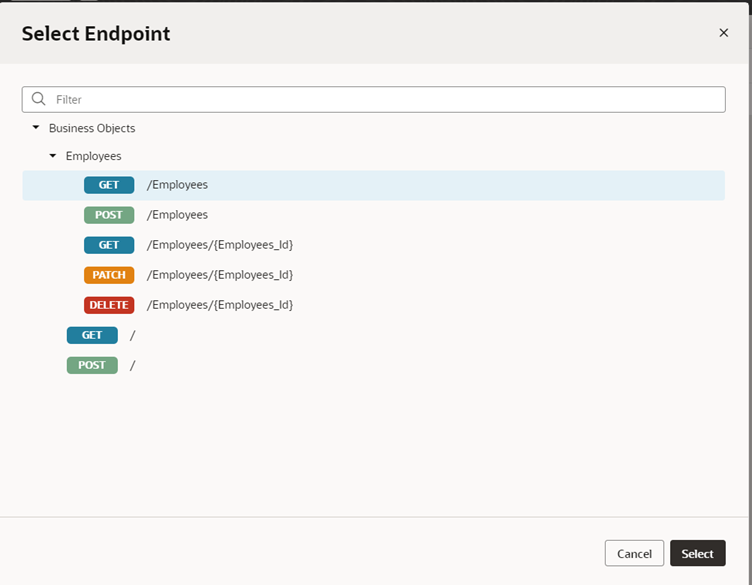
Step 12: In the right side from properties panel, select Endpoint. A dialogue box appears with all the endpoints. Select Get /Employees and click on Select.
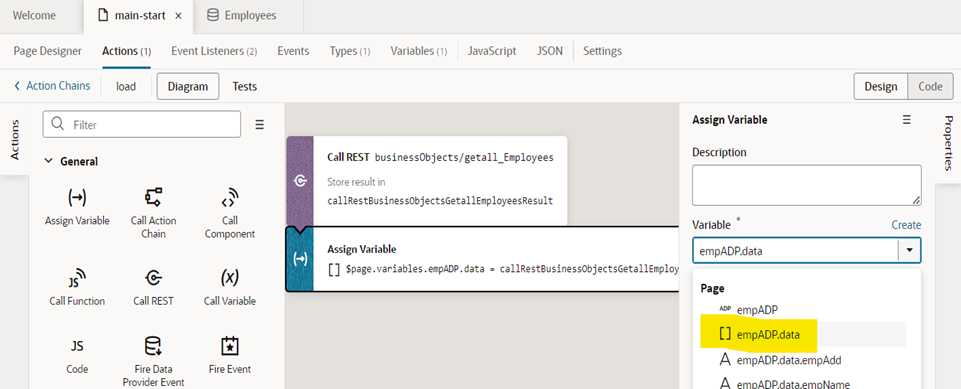
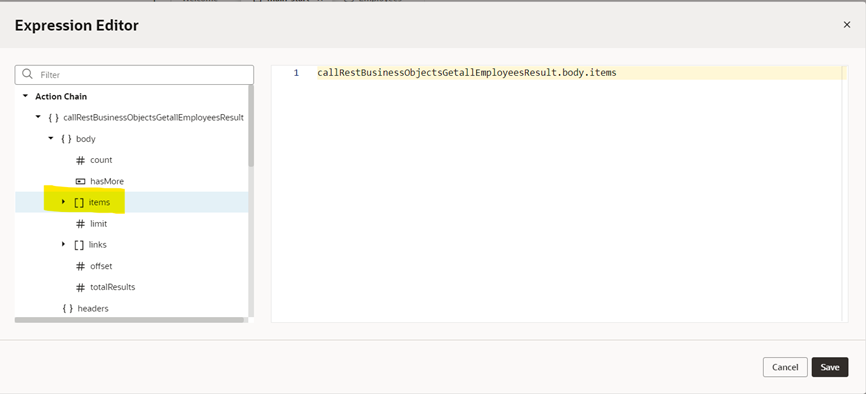
Step 13: Drag and drop Assign Variable action in the canvas. Select []empADP.data in variable and in Value map the []items response from callRestBusinessObjectsGetallEmployees Result.
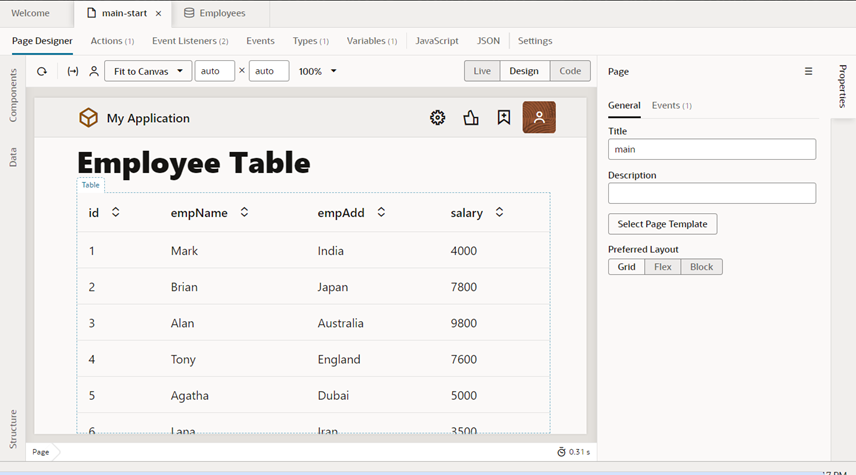
With this we are done with the population of table based on ADP. Go to page designer, the table will display details as below.
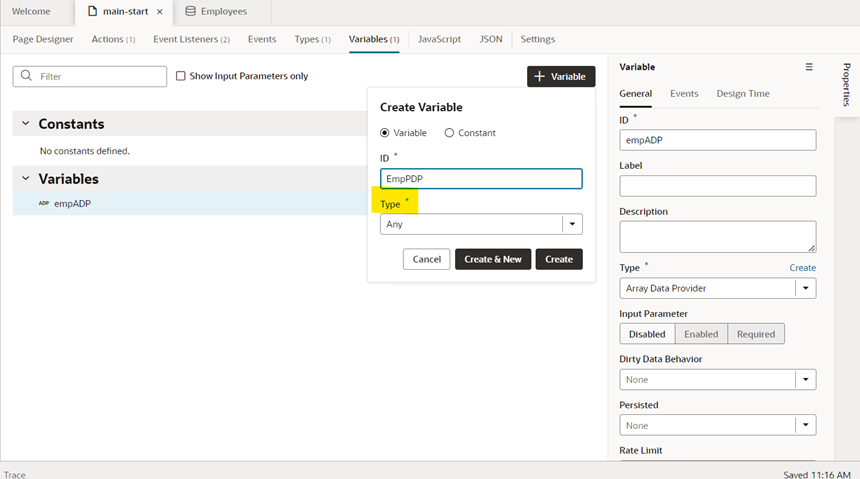
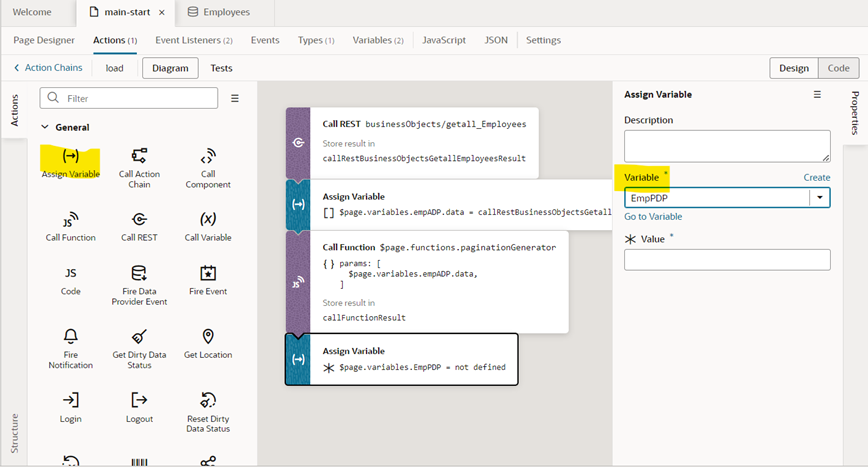
Step 14: From main-start, go to Variables tab and click on +Variable to create a new variable EmpPDP of Type “Any”.
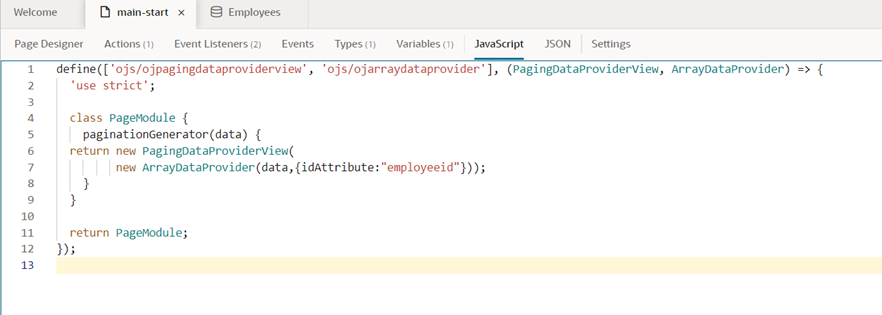
Step 15: From main-start, navigate to Javascript tab to add the following JC code to add pagination attribute.

Step 16: Now add define section of Javascript code in the page as below.

The Javascript page looks like below.
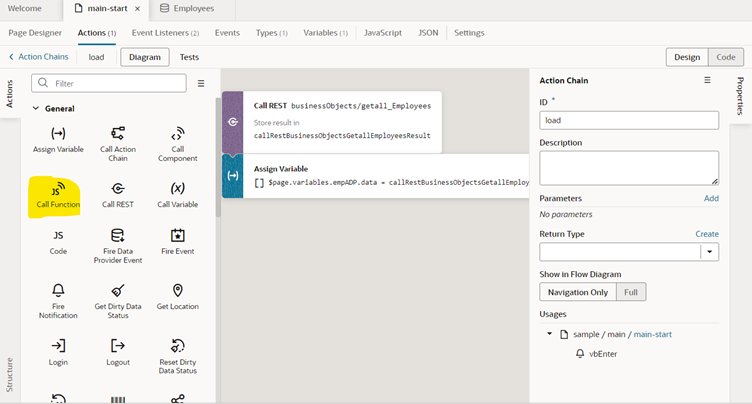
Step 17: Now go to load action chain drag and drop and Call Js action after assign variable.
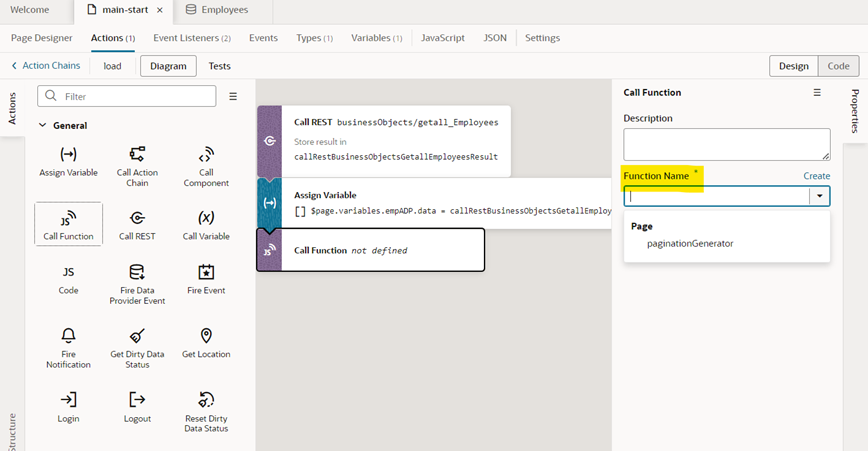
Step 18: In the right side from properties panel, select the Function name PaginationGenerator.
Step 19: In the data of the function, map the []data of empADP and click on save.
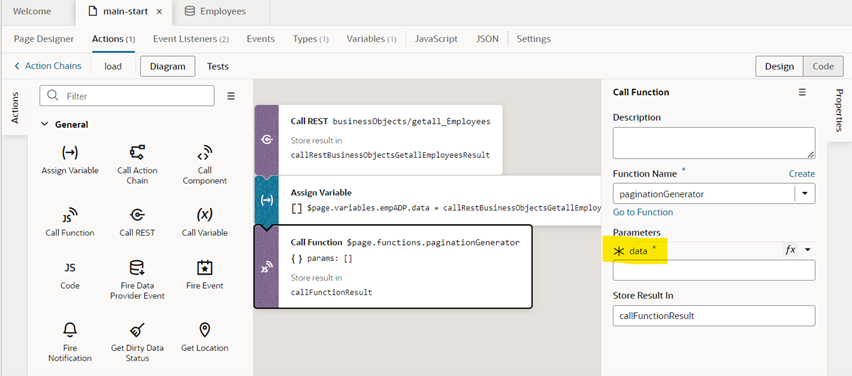
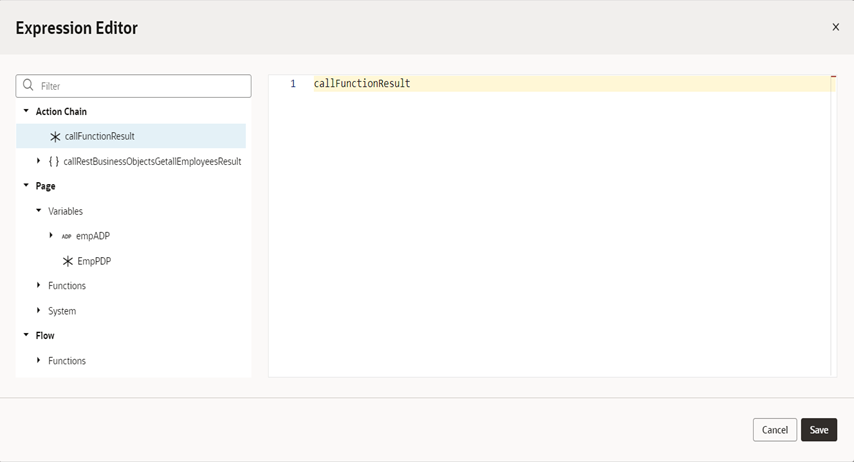
Step 20: Now drag and drop assign variable action in the load action chain after the call JS action. Select the variable EmpPDP created above and in value, map the callfunctionResult and click on save.
Step 21: From main-start, go to page designer tab, Toggle to code tab and add the below code before the table ends </table>.
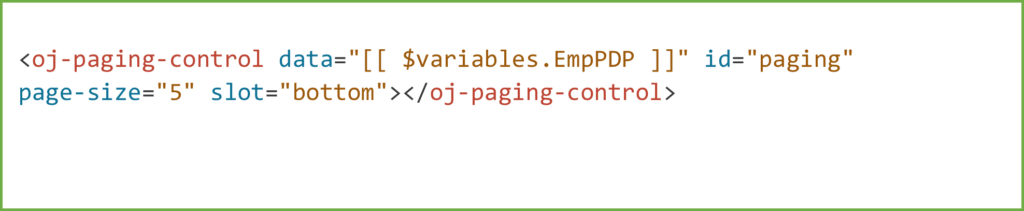
Step 22: Toggle back to design mode and select the table, go the Properties tab on the right side and replace the data of the table with EmpPDP.
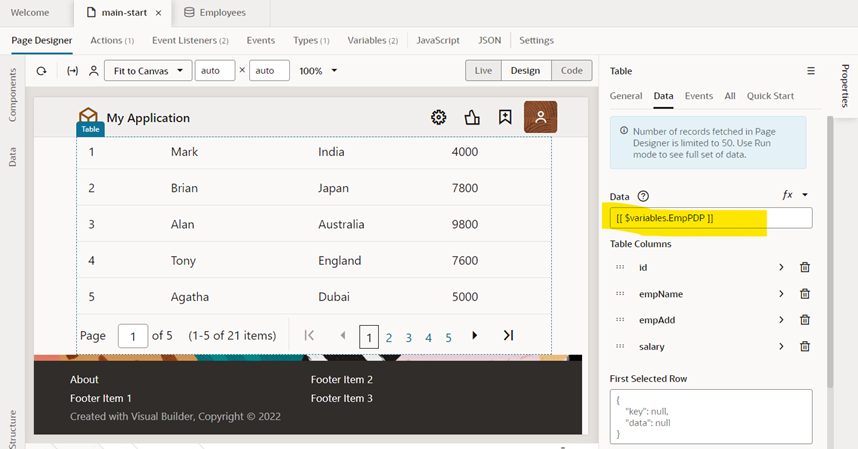
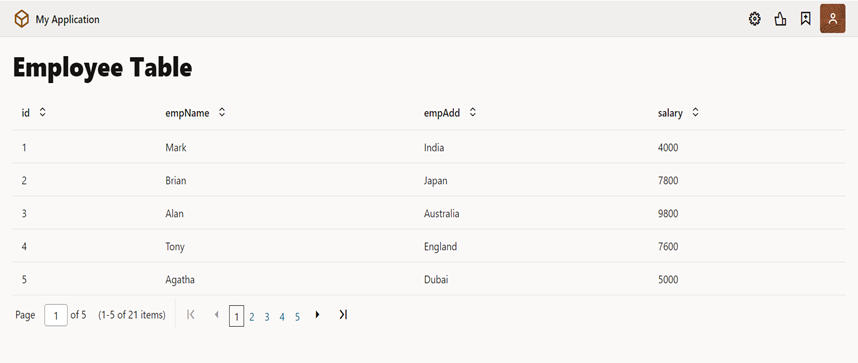
With this we are done with adding pagination control in the table. The screen will look like below.
If you have any questions or concerns, please get in touch with us on [email protected].
Kuamr
Thanks aa lot lot for your blog. I have been strugling for 2 days to done this and your post saved my time and reslove the issue. I really apriciate the efforts you put on this post. Once again thank you thank you very much sir.
Karan Tulsani
Hi Kuamr,
Thanks for the appreciation and we are glad that our resource/blog helped you save time and get the desired solution.
Check out our blog and Linkedin for more such updates.
Thanks
Satyajeet Koule
Hi, Thank you for your blog. I found your solution helpful. However, while retrieving data from the REST API, we’re getting all the records at once, which takes a significant amount of time to load. Do you have a solution where we can fetch only 100 records at a time, and upon clicking “Next,” the REST API is called again to retrieve the next 100 records? Please let me know if you have any suggestions.
Thank you!
Karan Tulsani
Hi Satyajeet,
Below are the two suggestions that you can use:-
1. Use ‘SDP’ in place of ‘ADP’, this will automatically have pagination functionality and will load 25 records at once. Next 25 records will be fetched when user scrolls.
2. If Use of ADP is necessary, then try to use Offset and Limit as query parameter to Rest Api.
Hope this helps.