End-to-End process from Creation to Payment
About Expense Report: An Expense Report is a form which is filled in by the employees to submit the reimbursement request for the expenses they have incurred for the business. It also helps to record all the most important information about an employee’s business expenses. In this blog we will be going to create an ER and process its Approval, Auditing, Invoicing and Payment.
Prerequisites:
- 1. Employee Role in ERP cloud instance for ER Creation.
- 2. Manager’s/Approver’s Login Credentials in ERP cloud instance for ER Approval.
- 3. Expense Auditor Role in ERP cloud instance for ER Auditing.
- 4. General Accountant, Expense Audit Manager and Accounts Payable Supervisor Role in ERP cloud instance for processing ER to Invoice Workbench and for ER Payment.
Solution: Solution is divided into five parts:
- 1. ER Creation
- 2. ER Approval
- 3. ER Auditing
- 4. ER Invoicing
- 5. ER Payment
Part 1: ER Creation
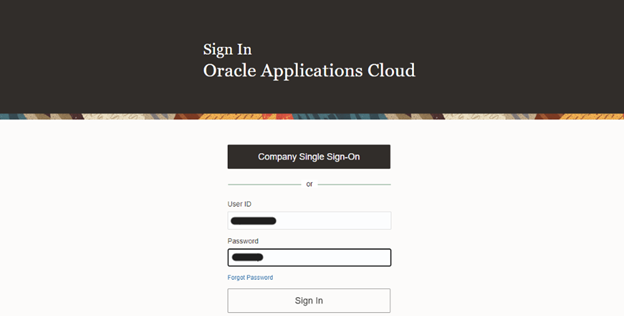
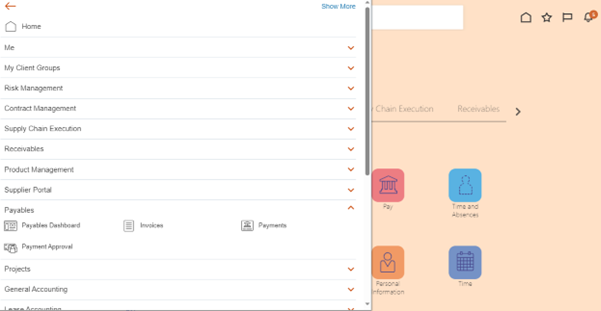
Step 1: Login to Oracle ERP cloud instance and navigate to Expenses work area via Me tab.
Login -> Navigator -> Me -> Expenses.


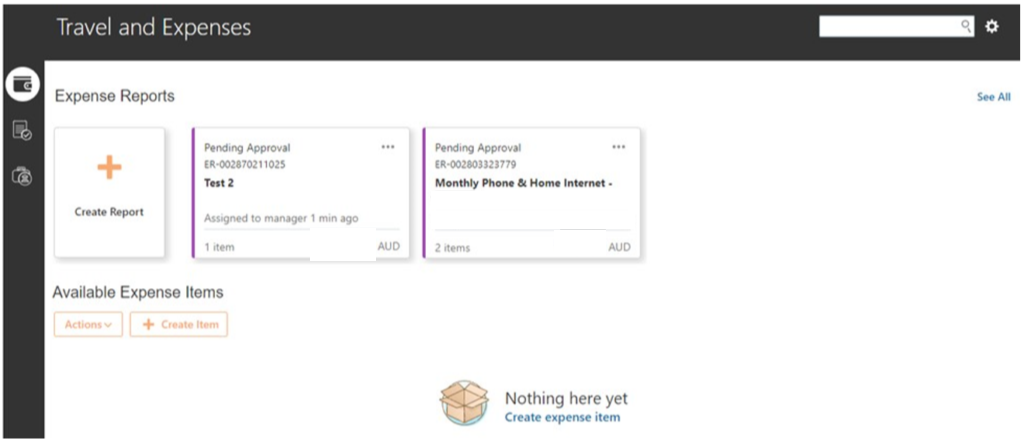
Step 2: Click on Create Report.
Expenses Work Area->Create Report.
Recommended Reading: How to Use Oracle BICC Approach to Consume Large Data from Oracle Fusion?
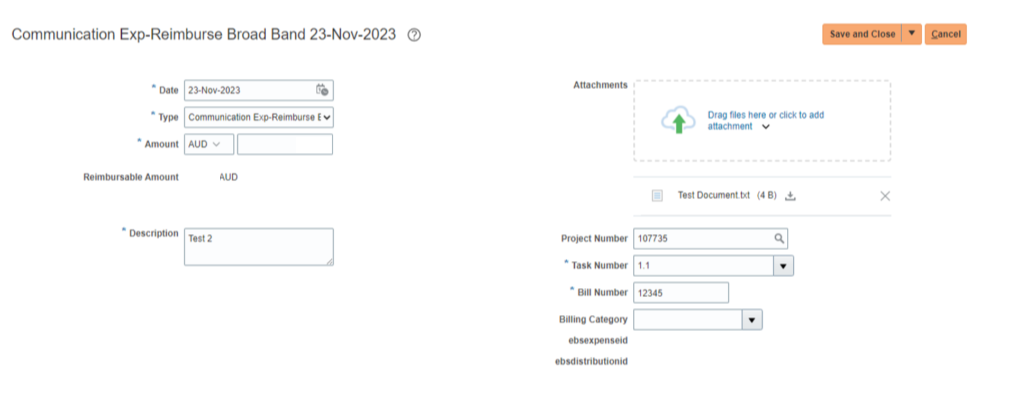
Step 3: Add required details and click on Create Item.
Required Details-> Create Item.
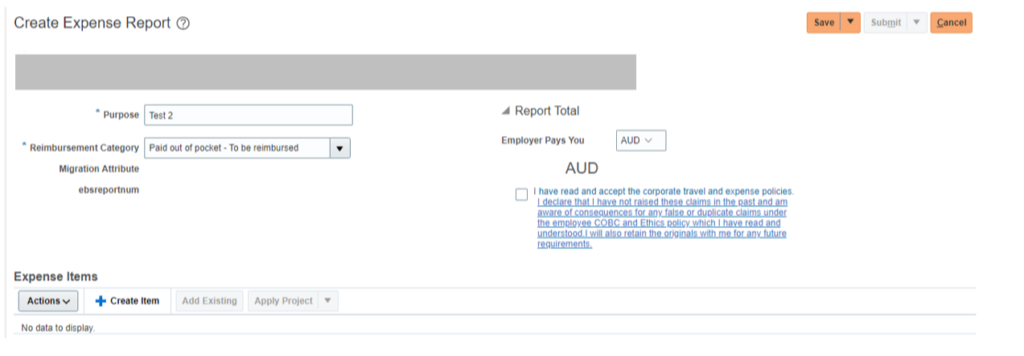
Step 4: Add required details and click on Save and Close.
Required Details-> Save and Close.
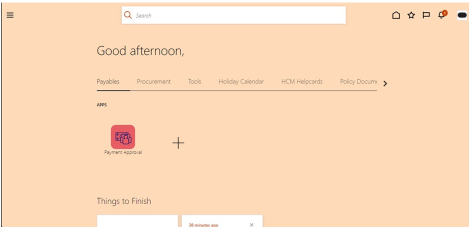
Step 5: Tick the corporate travel and expense policies checkbox to enable the Submit button and click on Submit and you will get a notification that the ER is submitted for approval.
Tick Policies Check Box -> Submit.

![]()
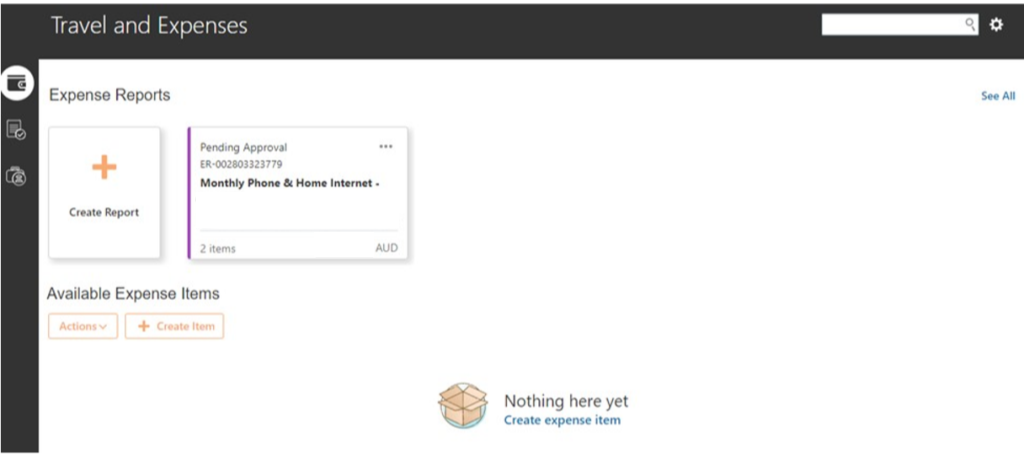
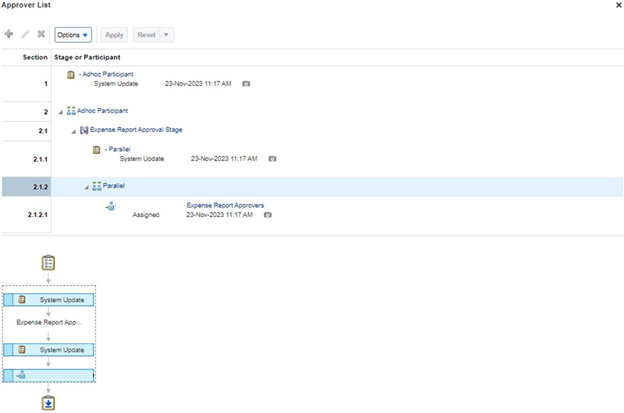
Step 6: Click on the ER created to view the ER Status and click on the Status link ‘Pending manager approval’ to view the Approver List.
ER Created-> Status Link -> Approver List.
Part 2: ER Approval
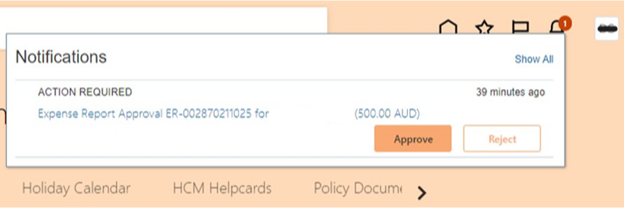
Step 1: Login to Oracle ERP cloud instance with Manager’s/Approver’s Login Credentials and click on the Notification Bell Icon.
Login -> Notification Bell Icon.
Step 2: Click on Approve to approve the ER.
Notifications -> Approve.
Part 3: ER Auditing
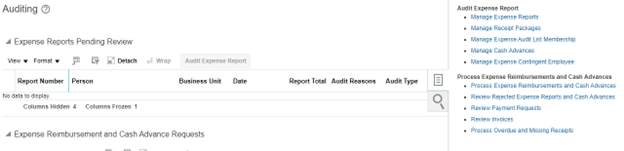
Step 1: Login to Oracle ERP cloud instance and navigate to Auditing work area via Expenses tab and from Tasks go to Manage Expense Reports and Search by Report Number.
Login -> Navigator -> Expenses -> Auditing -> Tasks -> Manage Expense Reports -> Report Number -> Search.

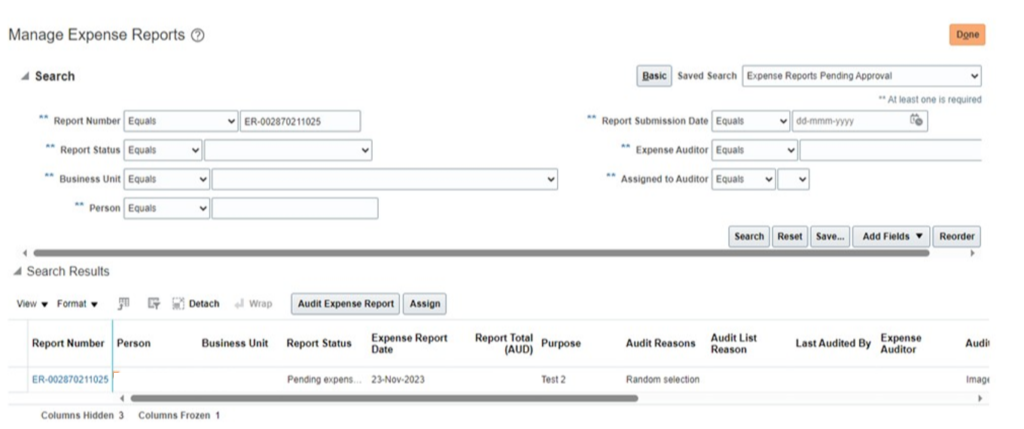
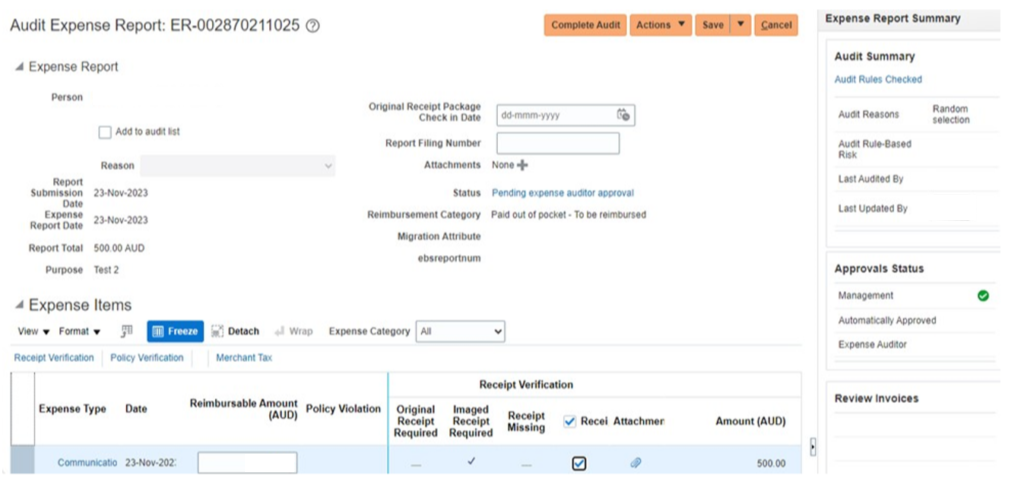
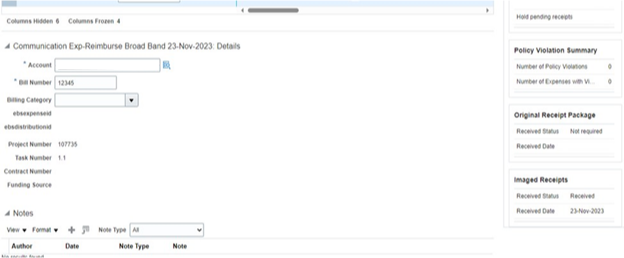
Step 2: Open the Expense Report by clicking on the hyperlink below the Report Number column and review all the details of the Expense Report. Tick the checkbox below the Receipt Verification tab and click on Complete Audit.
Report Number Column -> Hyperlink ->Review Expense Report -> Tick Receipt Verification Checkbox -> Complete Audit.

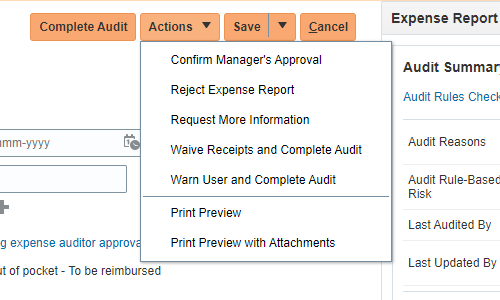
Note: Auditor can also take other Actions such as mentioned in the below screenshot while Auditing the Expense Report by clicking on Actions.
Part 4: ER Invoicing
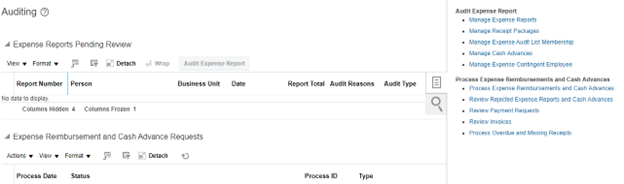
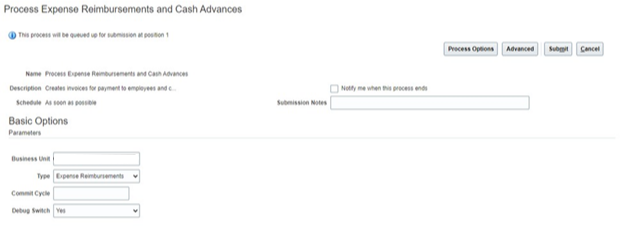
Step 1: In Auditing work area click on Tasks and go to Process Expense Reimbursements and Cash Advances.
Auditing -> Tasks -> Process Expense Reimbursements and Cash Advances.
Step 2: Add required details and click on Submit.
Required Details -> Submit.
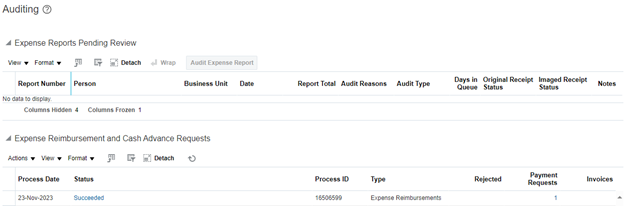
Step 3: In Auditing work area click on the refresh icon below the heading Expense Reimbursement and Cash Advance Requests until the Status changes to Succeeded of the Process submitted.
Auditing->Expense Reimbursement and Cash Advance Requests ->Refresh Icon ->Status -> Succeeded.
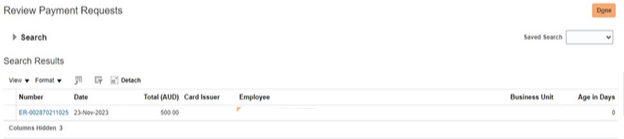
Step 4: Review Payment Requests by clicking on the hyperlink below the Status column and click on Done.
Status Column ->Hyperlink -> Review Payment Requests ->Done.
Part 5: ER Payment
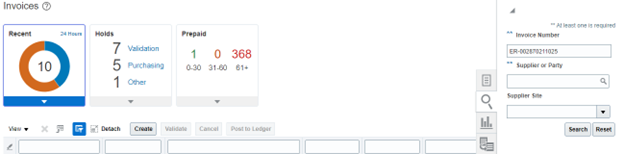
Step 1: Navigate to Invoices work area via Payables tab and from search icon Search by ER/Invoice Number.
Navigator -> Payables ->Invoices ->Search Icon ->ER/Invoice Number -> Search.
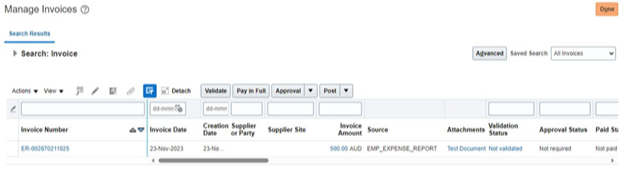
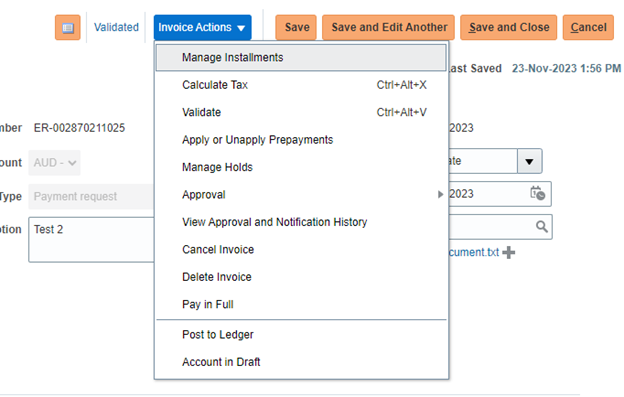
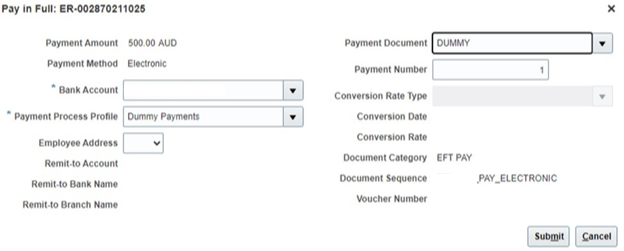
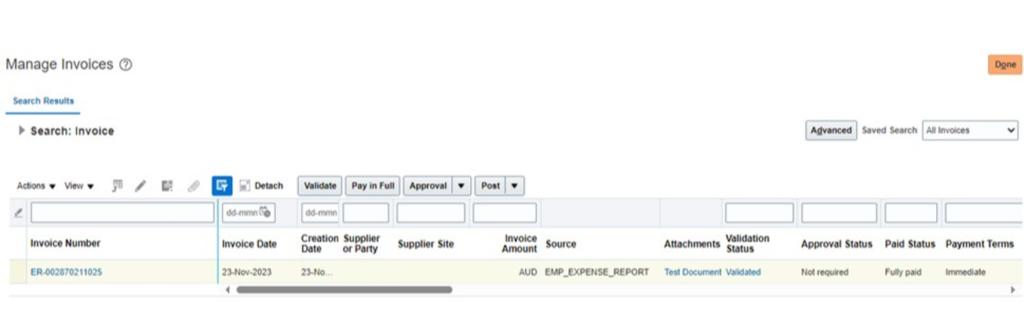
Step 2: Edit the Invoice and from Invoice Actions tab click on Validate and after Invoice gets Validated from Invoice Actions tab click on Pay in Full. Add required details and click on Submit and then click on Save and Close and from Paid Status column check the status of the Invoice as Fully paid.
Edit Icon ->Invoice Actions ->Validate ->Invoice Actions ->Pay in Full ->Payment Details ->Submit ->Save and Close ->Paid Status Column ->Fully Paid.