Oracle Cloud’s Generative AI Agents include a built-in RAG Tool (Retrieval-Augmented Generation), a powerful AI pattern that enhances large language models (LLMs) by integrating enterprise-specific data at runtime, without retraining the model.
RAG enables the AI agent to retrieve current, relevant data from corporate sources, including internal systems, documents, and portals. As a result, answers can be more precise, pertinent, and in line with the organization’s existing procedures or policies.
The best part is that complex AI pipelines are not necessary because Oracle Cloud Infrastructure (OCI) manages the entire RAG process, from document ingestion to vector generation, storage, and retrieval. All you have to do is connect your data, and the system will handle the rest.
How to Use the RAG Tool in Oracle Cloud
Part 1: Create a Bucket using Object Storage and create a Knowledge Base

Step 1: Login to the Oracle Cloud Console.
Step 2: From the main menu, go to Storage → Buckets.
Step 3: Click on the Create Bucket button.

Step 4: Provide a name for the bucket and keep the default options unless specific changes are required.

Step 5: After the bucket is created, click Close.
Step 6: Now, click on the bucket you just created.

Step 7: Inside the bucket, click Upload Object.

Step 8: Enter a name for the object and upload your multiple documents (PDF, DOCX, or text file).

Step 9: In the OCI Console, go to the menu.
Step 10: Navigate to Analytics & AI → select Generative AI Agents.
Step 11: Under the Knowledge Base Agents tab, click Create Knowledge Base.

Step 12: Enter a name for your knowledge base.

Step 13: Select the Object Storage bucket you created earlier.
Step 14: You will now see a list of available data sources from that bucket.
Step 15: Select the required data sources you want to use.
Step 16: Click Create to build the knowledge base.
Part 2: Creating RAG Chatbot
Step 1: Go to the Agents tab.
Step 2: Click Create Agent.

Step 3: Enter an Agent name.

Step 4: Click on the Tools tab inside the agent setup.

Step 5: Click Create Tool, then select RAG as the tool type.

Step 6: Enter a name and description for the tool, select your knowledge base, then click Create Tool.

Step 7: Go to the Setup agent endpoint tab.
Step 8: Enable automatic create an endpoint for this agent toggle.

Step 9: Leave the default options selected (no changes needed).

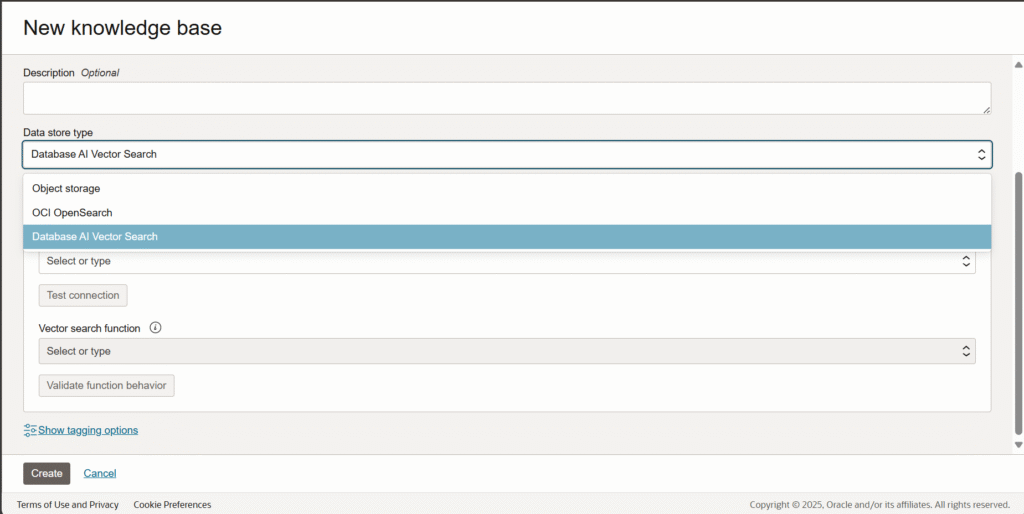
Step 10: There are three ways to add a knowledge base: Object Storage, Vector Search, or OpenSearch.
Step 11: Keep the Disable toggle selected if you do not want to expose the endpoint yet.

Step 12: Click Review and Create.
Step 13: Check all your configurations carefully.

Step 14: Accept the language model acknowledgment.
Step 15: Finally, click Create.
Part 3: Endpoints and Testing the RAG

Step 1: Click on the title of your RAG chatbot.
Step 2: Go to the Tools tab and click on the chatbot title.


Step 3: Add custom instructions (tone, style, or rules).

Step 4: Navigate back to the Endpoint tab.
 Step 5: In the agent details, go to the Endpoint tab.
Step 6: You can:
- a. Click Launch Chat to test it directly in the OCI Console.
- b. Or copy the Endpoint URL to integrate with external apps.

Step 7: Interact with your RAG chatbot directly.
 Step 8: Ask any question, and the bot will respond using linked documents.

Step 9: Click on the Traces tab.
Step 10: Here, you can view the full request and response flow, including:
- a. Retrieved documents
- b. LLM input/output
- c. Time taken for each step
Conclusion
In this blog, we covered how to set up a RAG-enabled chatbot in Oracle Cloud using Object Storage. Oracle handles the full process, making it easy to build accurate, data-driven AI agents.
In upcoming blogs, we’ll show how to connect this with Oracle Digital Assistant (ODA) and also how to use Vector Search with 23AI DB as another way to build knowledge bases. If you have any questions, please reach out to [email protected].


