Robotic Process Automation (RPA) is now integrated into Oracle Integration, allowing businesses to start building robots right away. These robots are software programs that mimic human interactions by performing tasks within an application’s user interface, ensuring streamlined operations and greater efficiency.
RPA can be utilized when APIs are unavailable for specific tasks. Robots can bridge this gap, working alongside API-based integrations to create a comprehensive automation strategy:
- UI-Based Automation: Automate tasks directly via the application’s interface when APIs are unavailable.
- API-Based Automation: Utilize APIs to design seamless integrations for tasks supported by modern applications.
Together, RPA and integrations enable end-to-end automation across both legacy systems without APIs and modern software, revolutionizing your workflows.
If your organization is already using Oracle Integration, simply submit a Service Request (SR) to enable robotic process automation (RPA). In your request, mention that you would like to enable RPA for your instance. You’ll be asked for your OCID, and once provided, Oracle will enable RPA as soon as possible.
If your organization doesn’t yet use Oracle Integration, reach out to Oracle to schedule a demo. You can also sign up for a free trial of Oracle Integration to get started. So, let’s begin by setting up a new project in OIC.
Pre-Requisite
Navigate to Oracle Integration Cloud (OIC) and open the Projects section to create a new Project.

If you can see the Robot icon in the project, it means RPA is enabled for your instance.

Installing the Robot Agent for Oracle Integration
a) Install Robot Agent within a Project
Step 1: On the target computer, log in to the Oracle Integration instance that the robot agent will connect to.
Step 2: Navigate to the appropriate section and download the ZIP file for the robot agent. This file contains all the required components for installation.
b) Download the Robot Agent Outside a Project
If you are not tied to a specific project, follow the below steps:
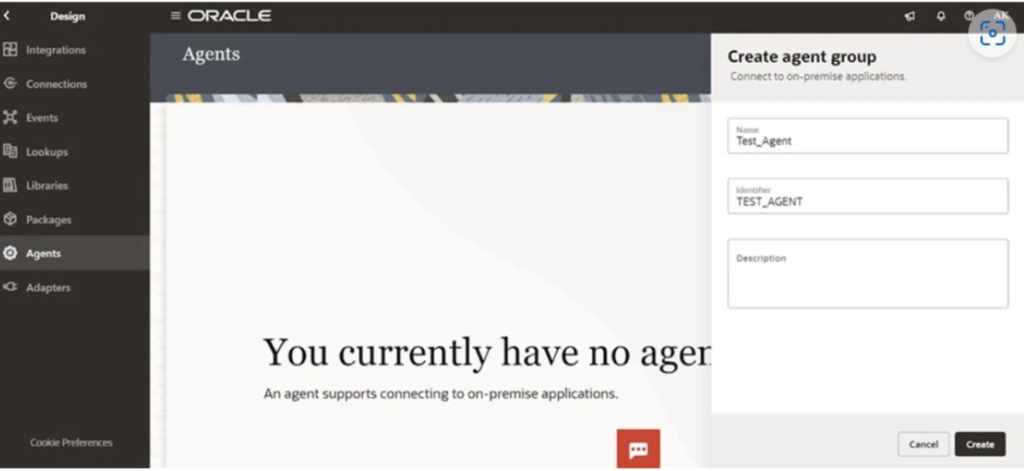
Step 1: Open the Oracle Integration interface and, in the navigation pane, click Design, then select Agents.
Step 2: Click Download and choose the Robot Agent option to get the required files.
This approach can be used by anyone with access to Oracle Integration, allowing flexibility to download and deploy the robot agent.

Starting the Robot Agent
To start the robot agent, you must run it on the computer where it is installed. If the agent isn’t running, no robots will operate on that computer.
First-Time Setup:
The computer needs internet access when starting the robot agent for the first time to download required dependencies.
Step 1: Navigate to the location where you extracted the ZIP file for the robot agent.
Step 2: Note the version in the orpa-agent JAR file (e.g., orpa-agent-0.1.80.jar).
Step 3: Build and Run the following command in the terminal:
java -jar [path_to_folder]\[orpa-agent-JAR_file]
Replace [path_to_folder] with the path where the files are located (avoid spaces in folder names).
Replace [orpa-agent-JAR_file] with the full name of the JAR file, including the version number (e.g., orpa-agent-0.1.80.jar).
Java -jar C:\robot_agent\orpa-agent-0.1.80.jar
Note: If the directory path contains spaces (e.g., C:\Users\John Smith), create a new folder without spaces (e.g., C:\Users\JohnSmith) and update the command:
java -Duser.home=C:\Users\JohnSmith -jar C:\robot_agent\orpa-agent-0.1.80.jar
If you see the message “INFO – Requesting messages from ControlRoom” in the terminal, that means everything is working correctly, and you’re good to go! The robot agent is successfully connected and ready to start executing tasks. You can now begin running your robots without any issues.
Recommended for you – How to design a Call Back Integration in Oracle Integration Cloud?

Installing the Recorder
Step 1: Open Google Chrome Extension and search for the Oracle Robot Flow Designer Extension.
Step 2: Download the browser extension. The ZIP file will typically be downloaded to your Downloads folder.
Step 3: Install the recorder by:
- Go to the location where the ZIP file was downloaded (e.g., Downloads).
- Extract the ZIP file to a location of your choice.
Step 4: Install the extension in Google Chrome:
- In Chrome, go to the Extensions menu and click Manage Extension
- In the upper-right corner, enable Developer mode (if it’s not already enabled).
- Click Load unpacked, navigate to the folder where you unzipped the file, and choose Select Folder.
- Close and reopen Chrome.
- If you are using Incognito mode, make sure the extension is allowed in Incognito windows.
Step 5: Go to Manage Extensions, click Details under the Oracle Robot Designer Extension, and enable “Allow in Incognito”.
Now the Oracle Robot Flow Designer extension is ready to use!
Creating a Project and Setting Up a Connection
Step 1: Create a Project.
- In Oracle Integration Cloud (OIC), navigate to the Projects
- Click on Create Project and assign a meaningful name to start building your automation.
Step 2: Create a Connection.
- Inside the project, you need to create a Connection to your Fusion application.
- Select Connections from the project menu, then click Create Connection.
- Enter the required details:
- Fusion URL: Provide the URL of your Oracle Fusion instance.
- Username: Enter your Oracle Fusion username.
- Password: Enter the password associated with the username.

Now Create your First Robot
After creating your robot, you should see a confirmation screen with an image similar to this one:

In the URL field, enter the URL from the connection you created earlier, and then click OK to save your settings.

Step 1: We are going to develop a robot for generating sales orders, for which we need to define the inputs and outputs.

Step 2: The two inputs for the robot will be Customer and Item.

Step 3: Open your Fusion instance in a new tab. Next, click on Recording and select the tab you want to record.


Step 4: Next, click on Begin Recording.

Step 5: Pass the Username from the Connection and give the username in the Test Value to test it Live.
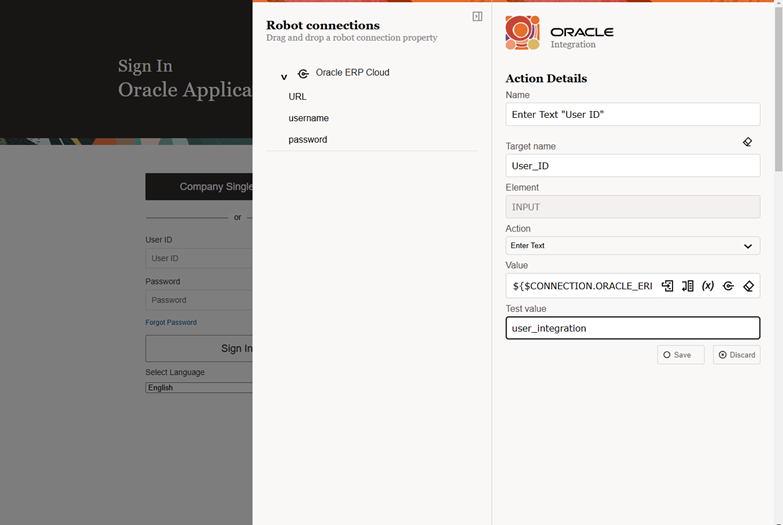
Step 6: Click on Sign-In and Save it.

Step 7: Next, you will need to log in to your Fusion instance. Click on Order Management and save. Then, click on Order Management again and save once more.

Step 8: Next, click on “Create Order” and save.

Step 9: Then, click on “Business Unit” and change the action to “Select from List by Index“. Provide the index from the LOV (List of Values) that you want to use.

Step 10: In the customer field, enter the name of the Customer by passing it from the customer input.
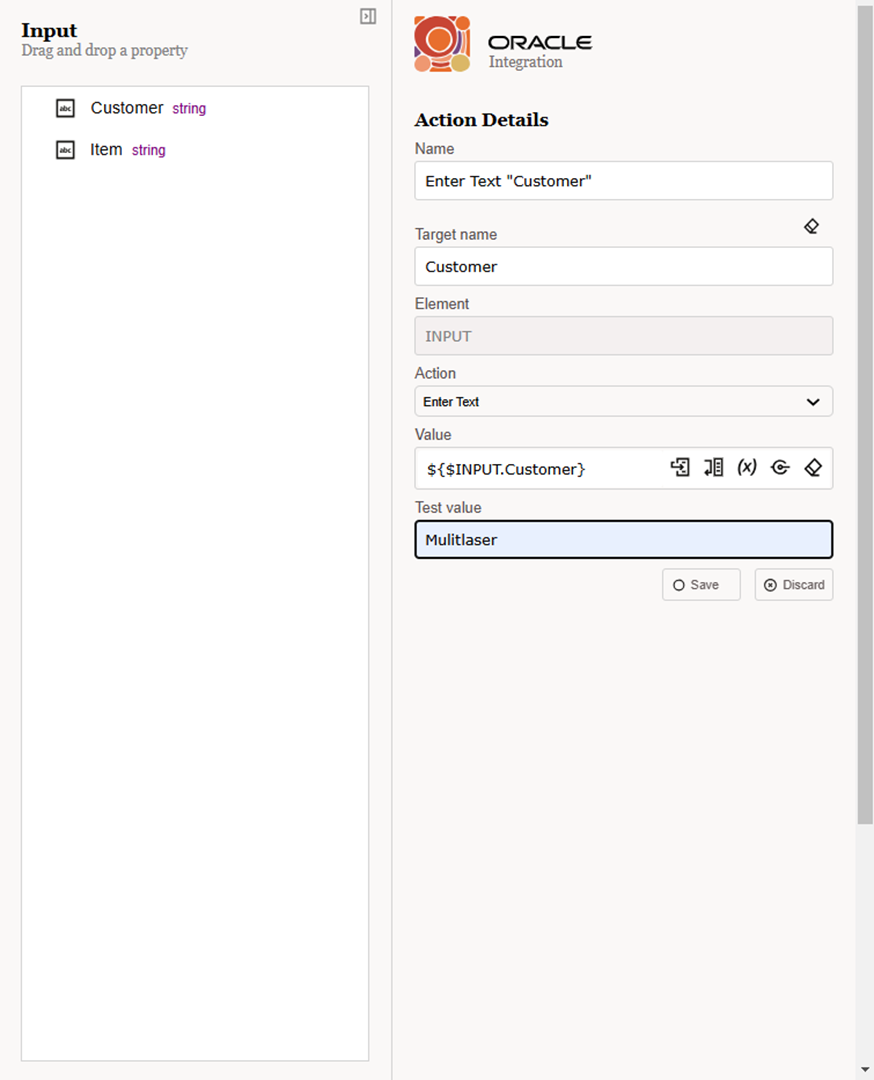
Step 11: Next, search for the item.

Step 12: Pass the item input and save it.
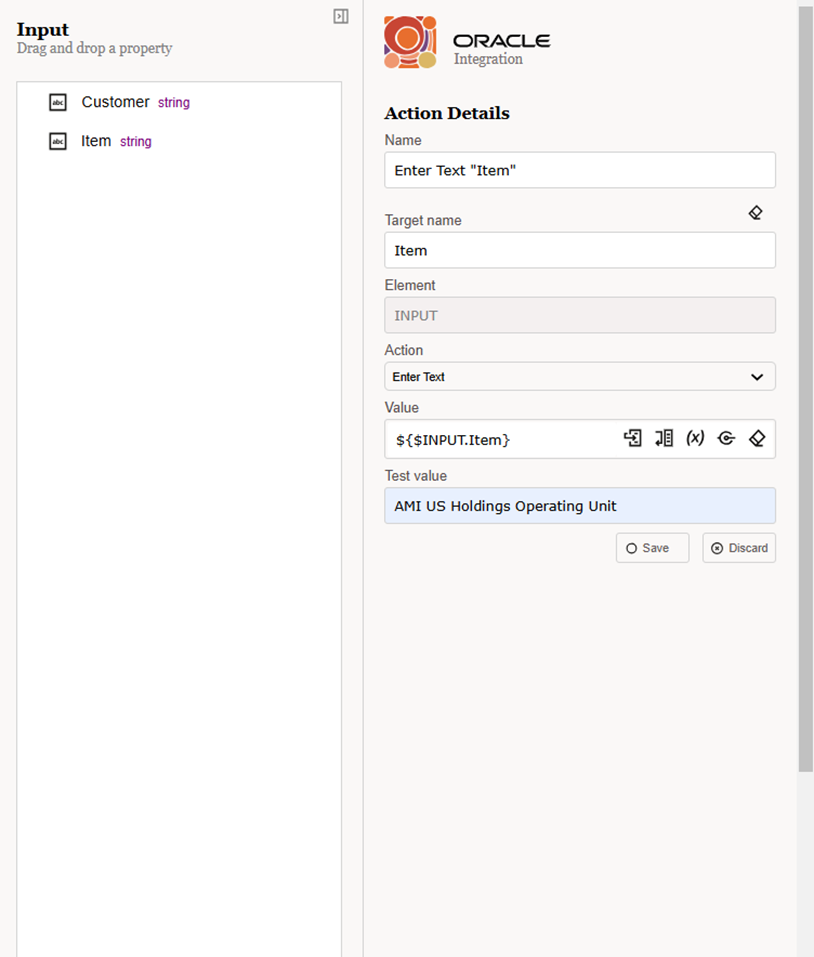
Step 13: In this step, add the line to the order. Then, click the “Submit” button to submit the order.

Step 14: You will receive a confirmation pop-up; from that, select the text.
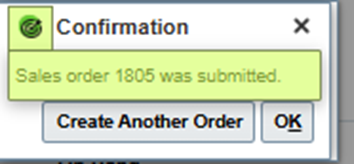
Step 15: Change the action to “Get Text” and save the retrieved text to the output variable and click on Save.
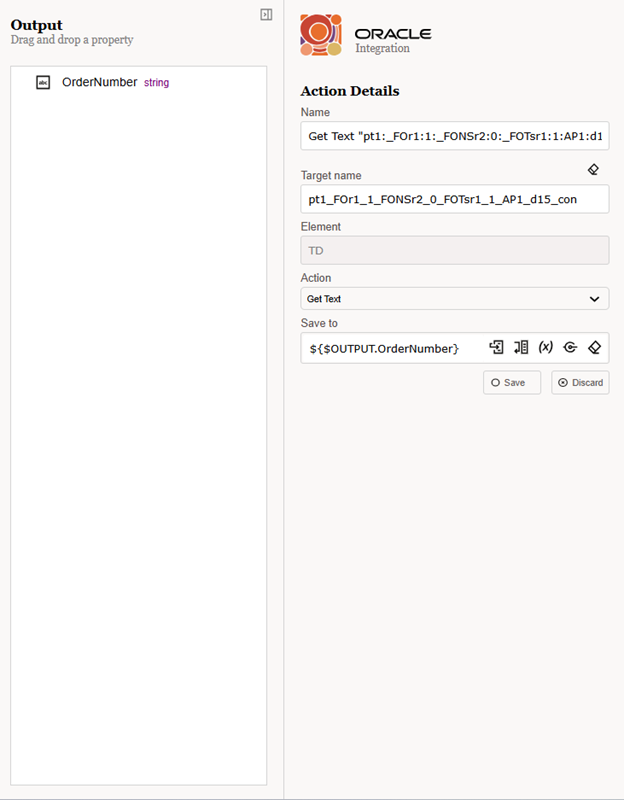
Now, you can stop the recording and save the robot. The robot is now successfully created.
Creating an Environment Pool to Assign & Activate the Robot
Step 1: Now, we will create an integration that will call the robot Select Robot Flow
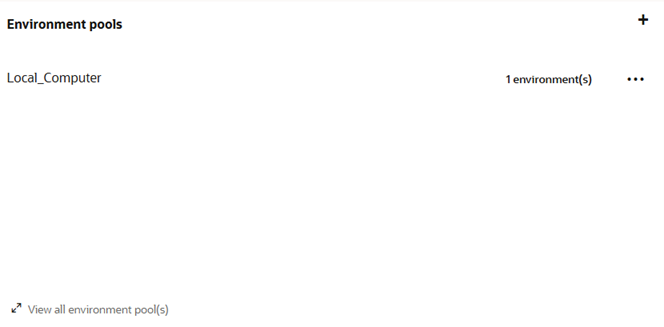
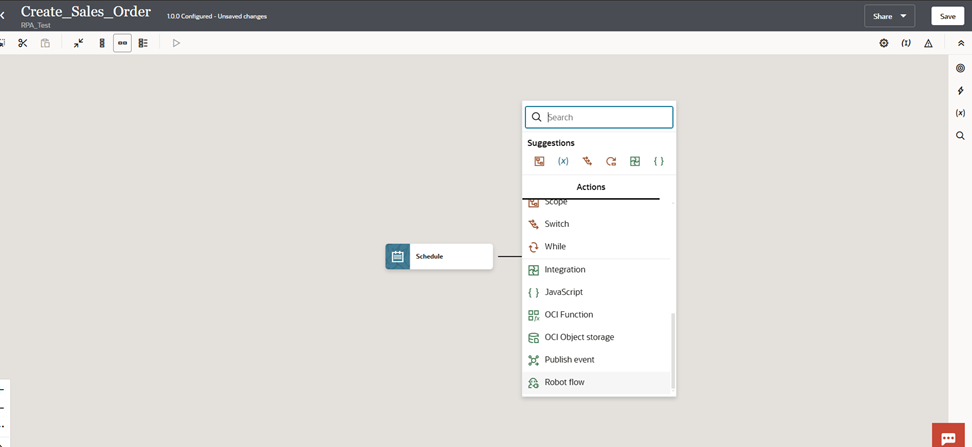
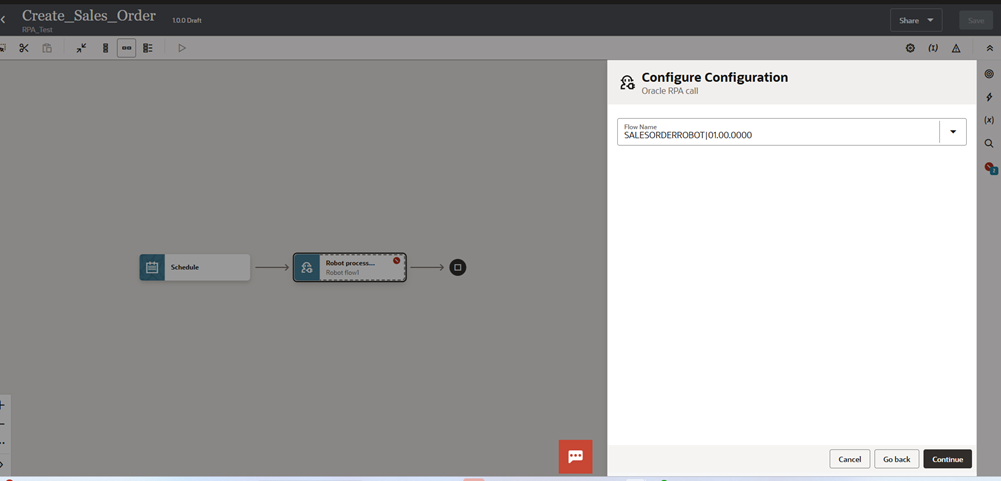
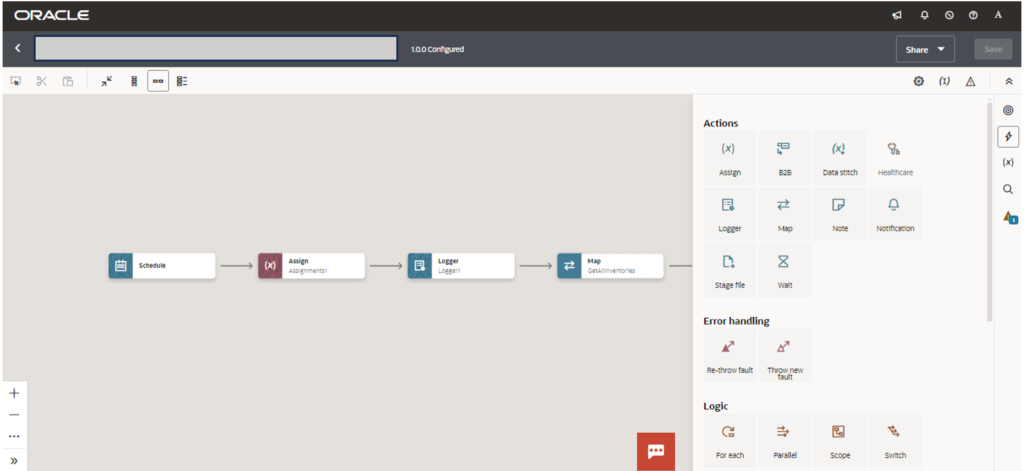
Step 2: Map the Customer and Item, or hard code them for testing purposes. Add a logger to log the Sales Order number in the output.
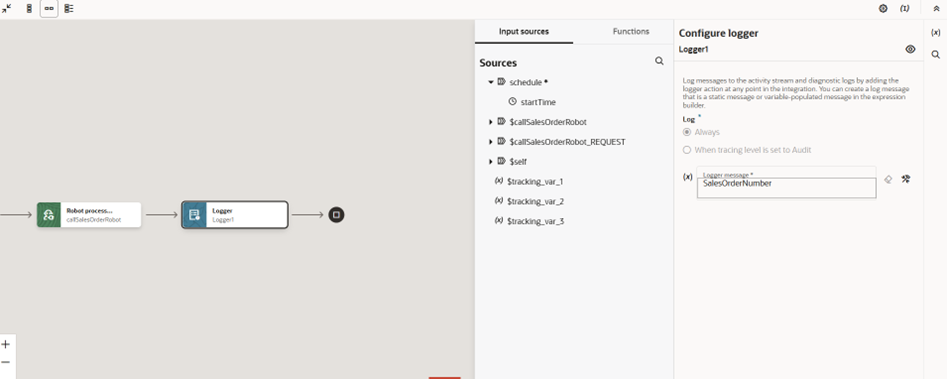
Step 3: Now, save the integration, and you are ready to run the integration that will execute the robot.
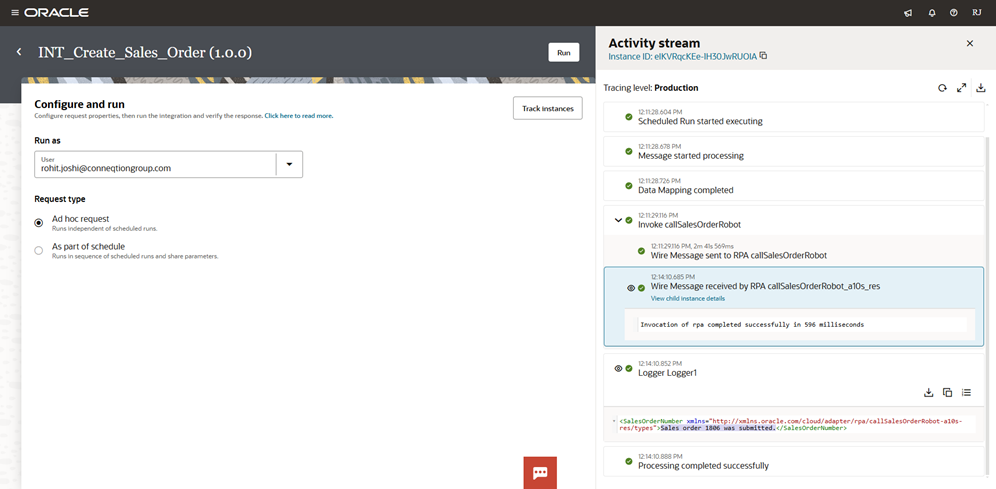
After you run the integration, a new Chrome window will open. You can see what the robot is doing live without touching your system.
Step 4: After the integration runs, you can see the Sales Order number in the logger.
With that we come to the end of this blog. Integrating Robotic Process Automation (RPA) into Oracle Integration 3 is a game-changer for automating repetitive tasks and enhancing operational efficiency. If you have any questions or would like to share some suggestions, please write to us at [email protected].


