Brief about ERP callback integration: – An ERP Cloud callback integration service provides a platform for the users to register their callback service that is invoked from Oracle fusion Cloud when import job is completed. The ERP callback integration returns the status of the bulk Jobs/processes by including all the child Jobs in it. Call back integration can be performed in two ways:
- Event based processing
- File based processing
In this blog we will see how to get a call back from ERP by Using File based Data transfer Approach (FBDI).
We have used GL_DAILY_RATES FBDI file automate the Import and Calculate Daily Rates FBDI process using OIC.
PROBLEM:- How to design a Call back integration in OIC.
Prerequisites :-
1) ERP Cloud instance access to submit standard jobs.
2) OIC instance access with User having Service Developer role, Service Monitor, Service invoker role.
3) User should have following ERP Cloud roles to be able to trigger any call back integration as a result of business events occurs in OIC
a) Integration Specialist b) Attachment User c) Manage Webservices Catalog
Solution:- Solution for this approach is divided in four parts.
Part 1) Manually process FBDI file in Fusion ERP by submitting schedule processes and check the expected output after the job completion.
Part 2) Create an OIC integration to get FBDI File from SFTP and import to ERP cloud.
Part 3) Create Call back integration in OIC which will be triggered by ERP cloud whenever an event is ocurred.
Part 4) Activate integrations, test, and validate the output.
Part 1 –
Step 1: Log in to fusion ERP instance navigate as below.
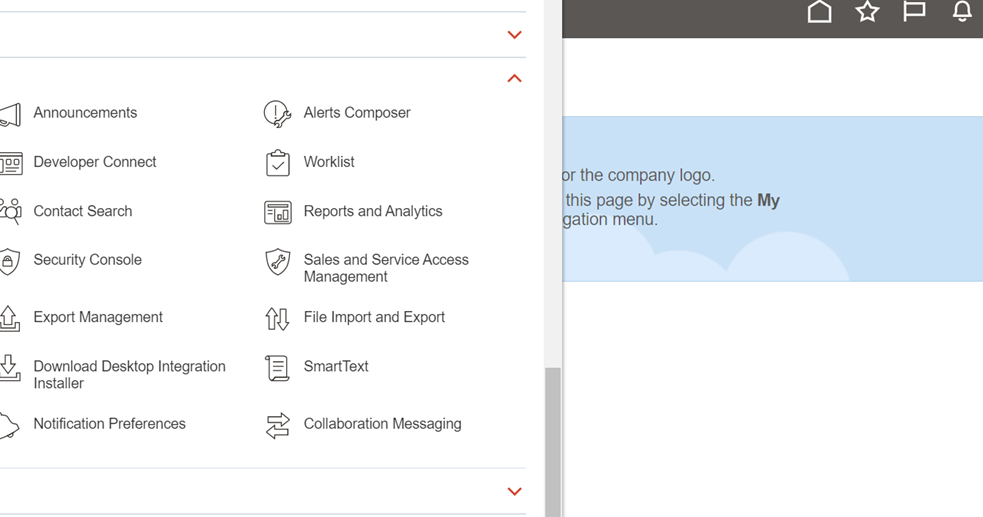
Navigator->TOOLS->FILE IMPORT AND EXPORT
Step 2: Upload zipped FBDI File.
Account will be selected based on file type.
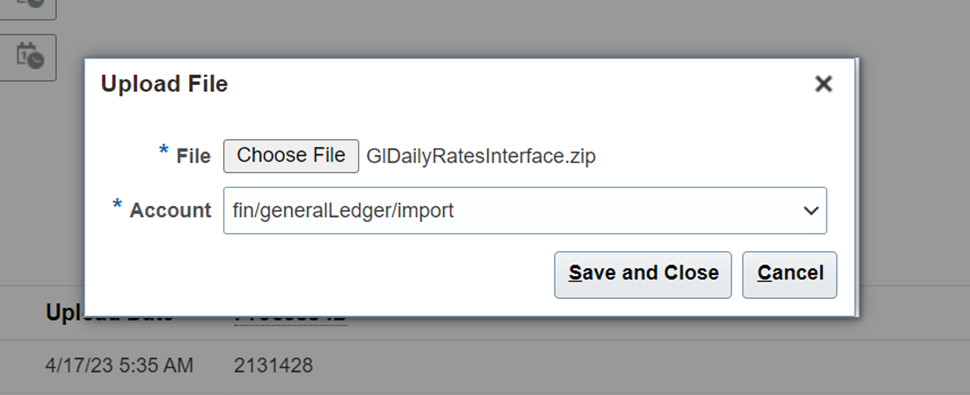
FBDI file has been uploaded.
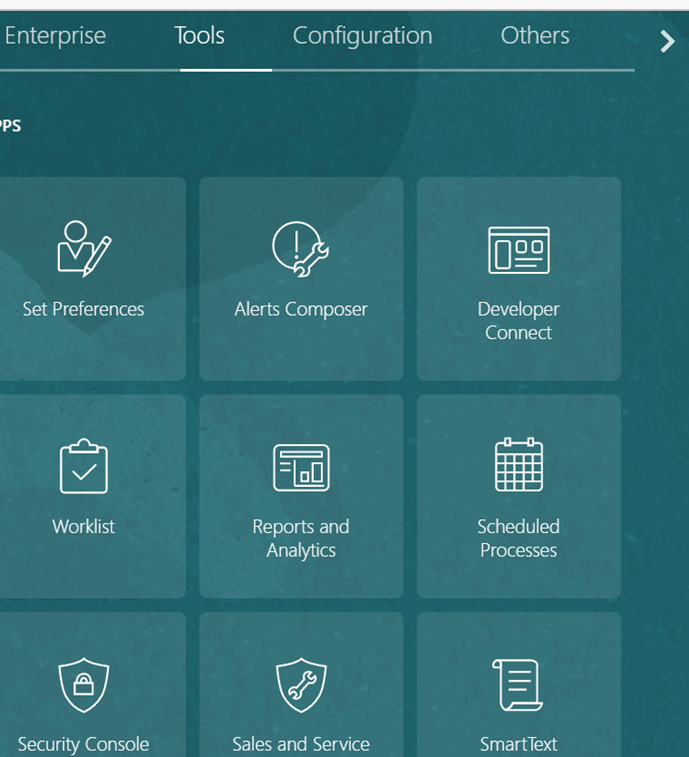
Step 3: Navigator ->TOOLS -> Scheduled Processes
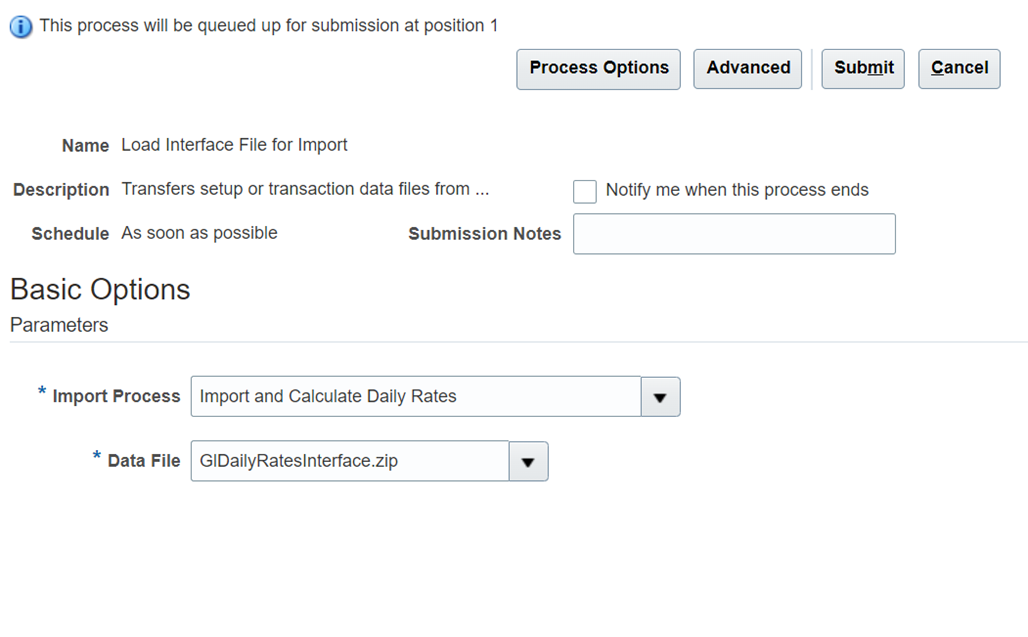
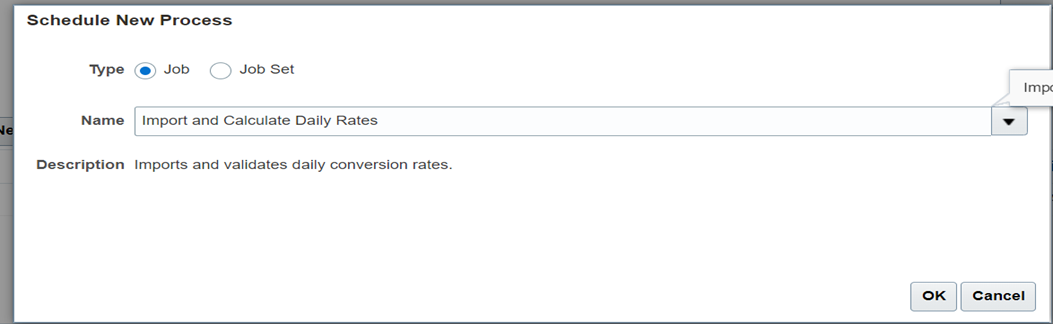
Click on Schedule New Process ->add Job Name (Load Interface File for Import)
Load Interface File for Import is a custom Parent Job Which is require to import any FBDI file, it will then call its Child Jobs implicitly depends on User Privileges.
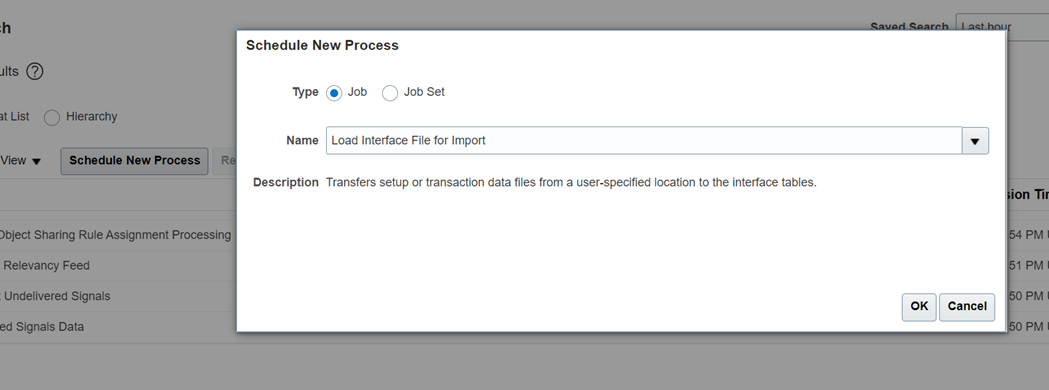 Search and add import process name of the FBDI file that has to be imported(Import and Calculate Daily Rates).
Also Read: How to Schedule OIC Integrations using iCal Expression?
Select the Data file which have been uploaded at first step and then submit the job.
 Step 4: After successful submission of Load Interface File for Import Job, run child job “Import and Calculate Daily Rates”


Part 2 – Create an OIC integration to get FBDI File from SFTP and import to ERP cloud.
STEP 1: Create SFTP connection and keep the FBDI file in your remote sftp server.
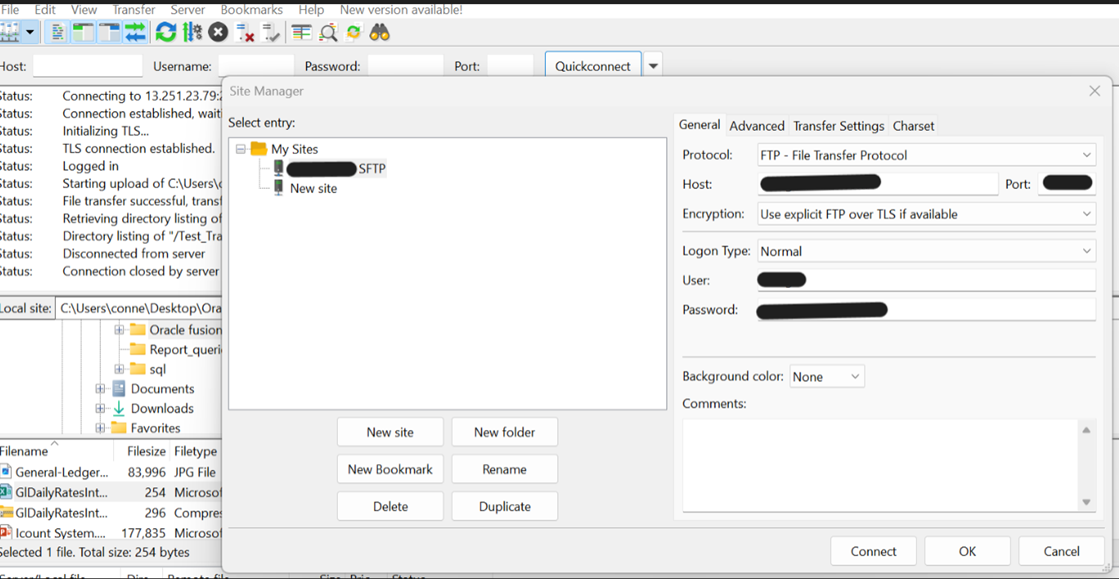
File format should be in CSV.
Create three Connections :-a) Rest Connection as Trigger b) ERP Connection as Rest and Invoke c) FTP connection as Rest and Invoke.
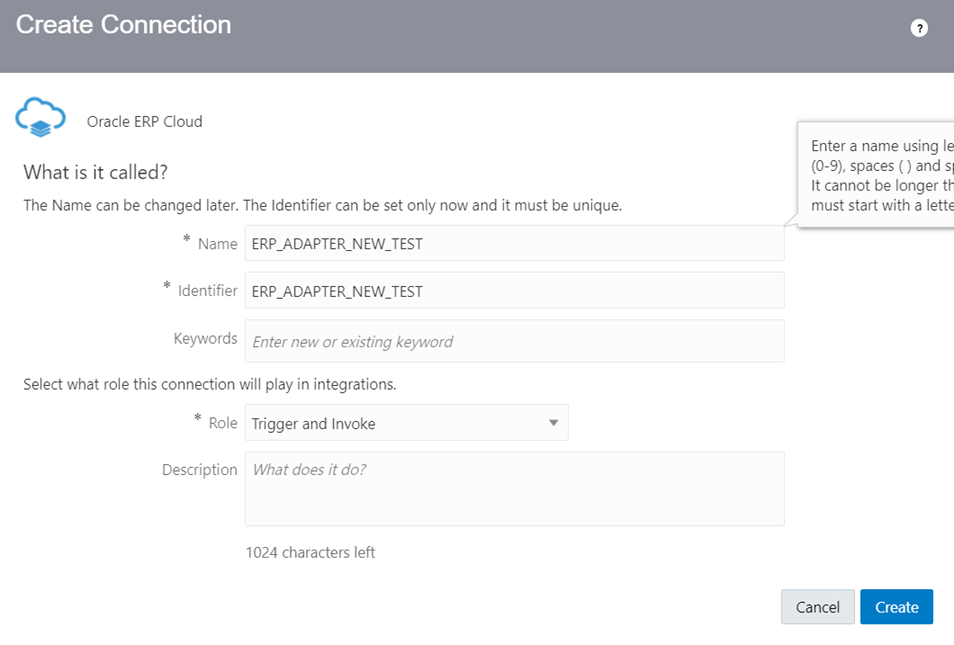
a) Crate a Rest connection.
Log in to OIC/ICS instance. Navigator->integration->Connections
Select Rest adapter.
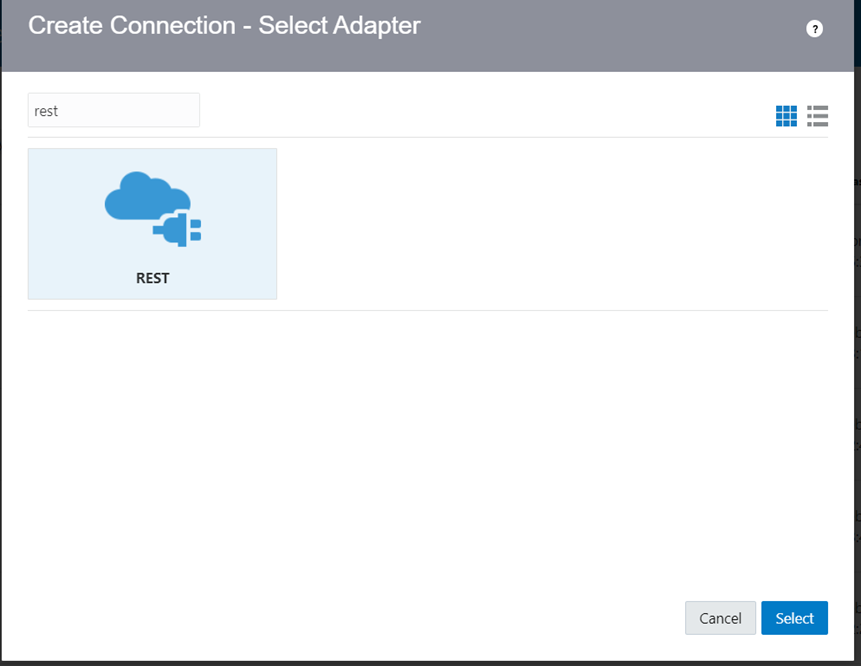
Create the connection by adding required details: -NAME will be the trigger name, Identifier will be taken automatically, Select Role as Trigger.
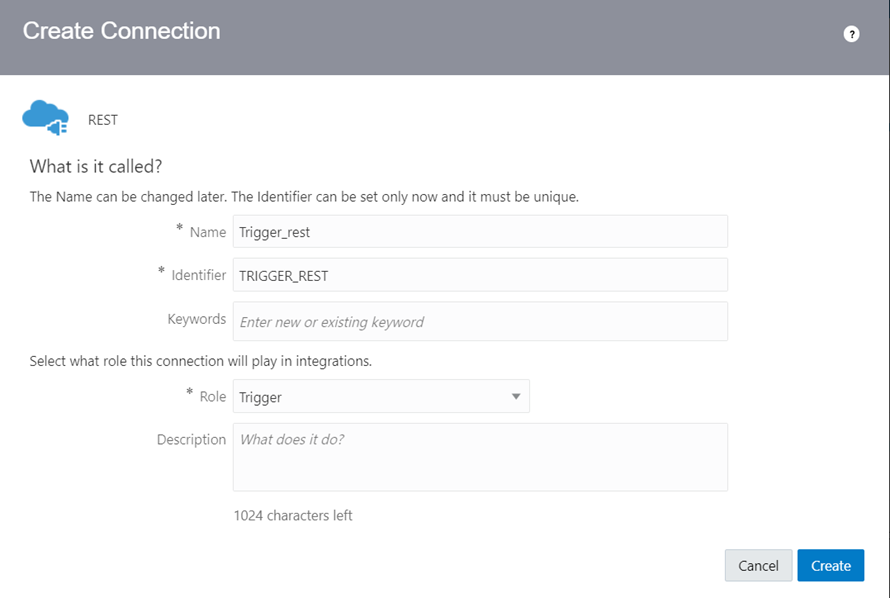
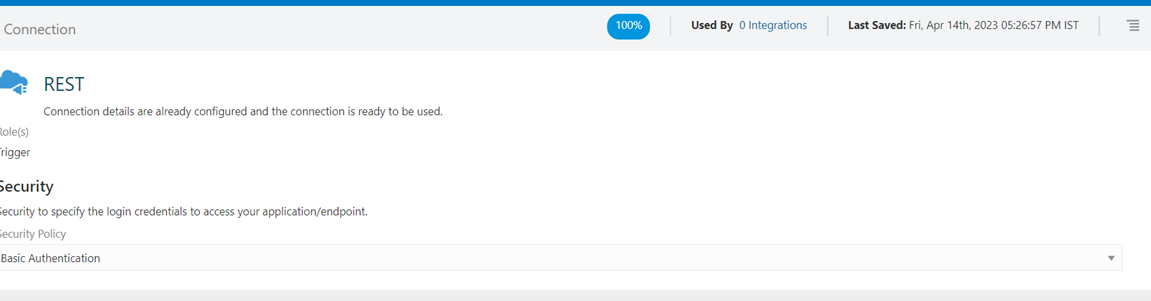
Test the connection by adding Authentication and Save. (For Rest as Trigger Username password is not required)
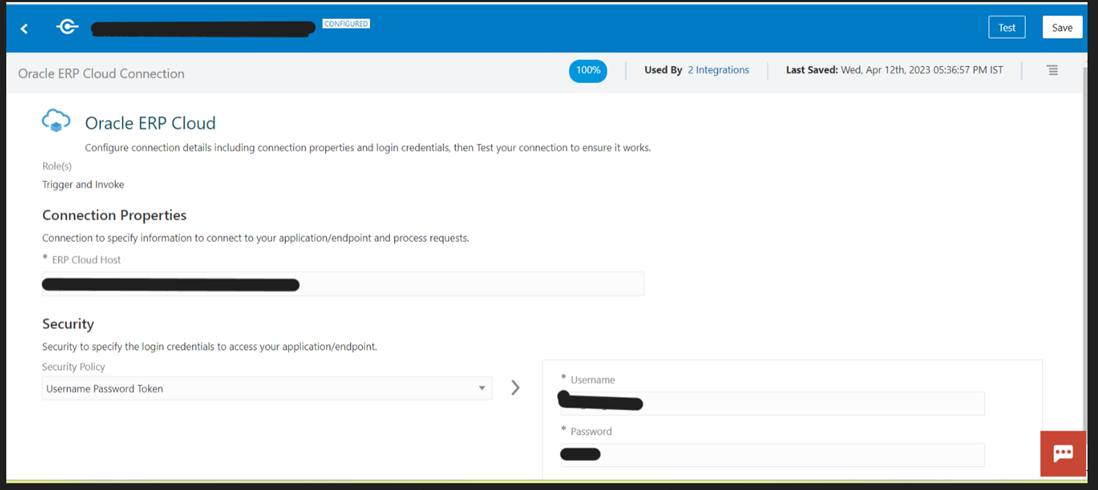
b) Create an ERP connection.
Log in to OIC/ICS instance. Navigator->integration->Connections
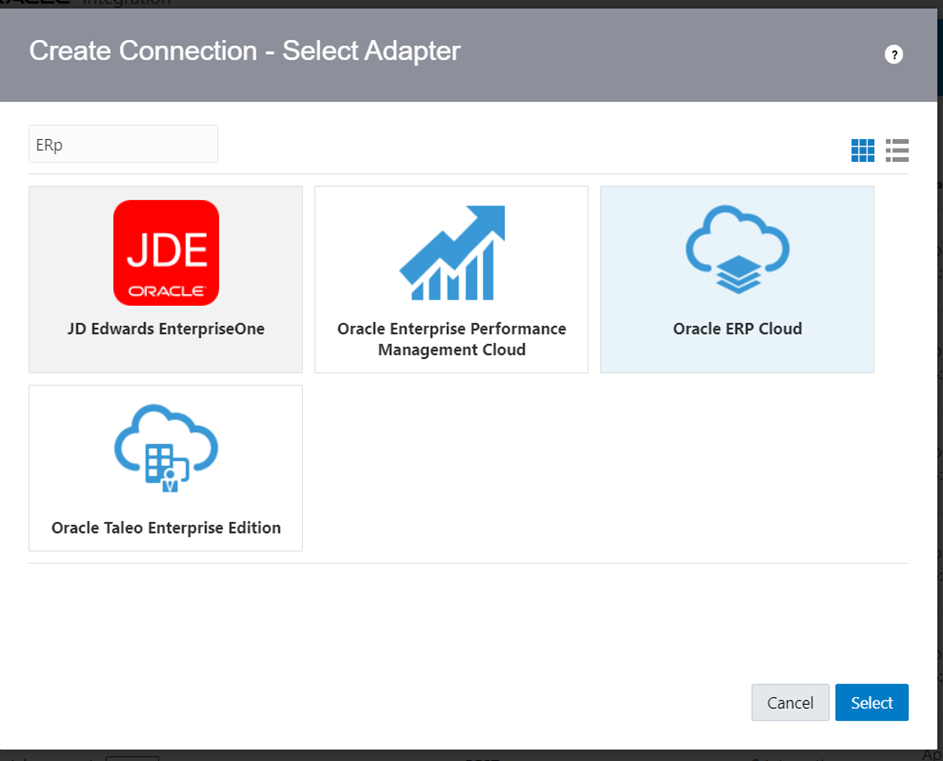
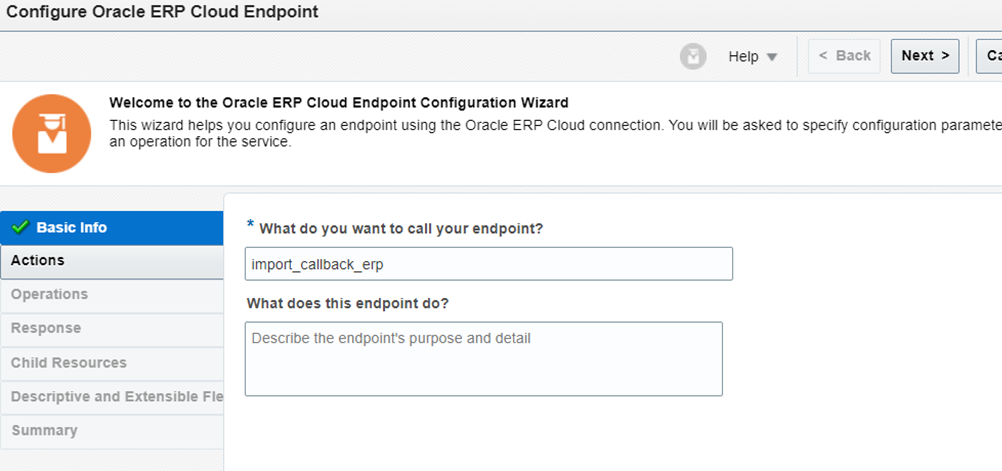
Select an Oracle ERP Cloud Adapter to Create Connection make it as Trigger and invoke.
 In connection properties ERP Cloud Host will be the URL containing the hostname of the ERP instance which will be used to import FBDI file and running custom JOBS. Ex: https://<hostname>.oraclecloud.com
In Security, select Authentication as Username Password Token and provide credentials of ERP instance.
Test the connection and Save.
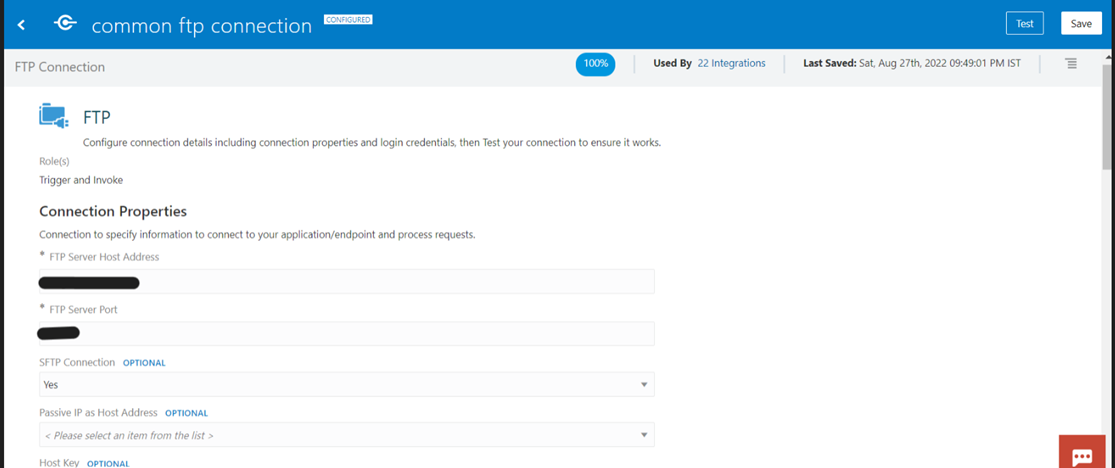
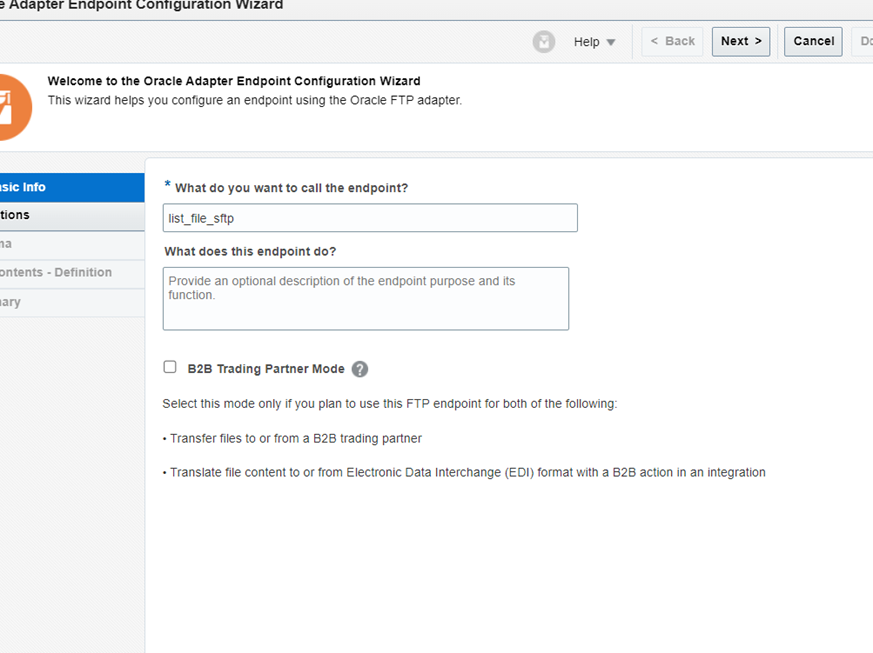
c) Create SFTP connection, provide FTP server Host address and port number, Put SFTP connection as ‘YES’.
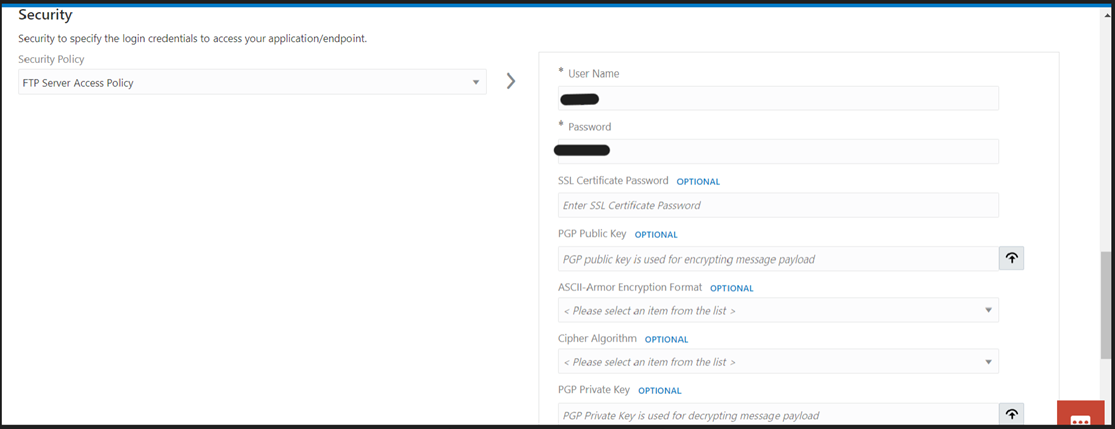
Give security policy as ‘FTP Server access Policy’ and provide username and password, then test the connection and save.
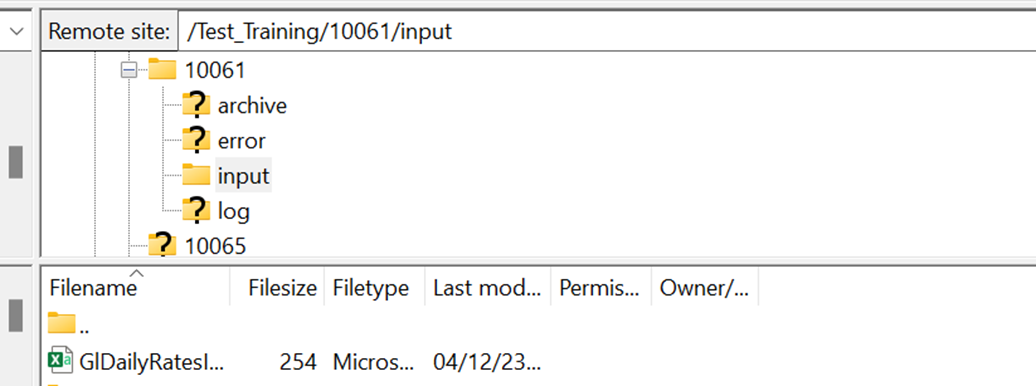
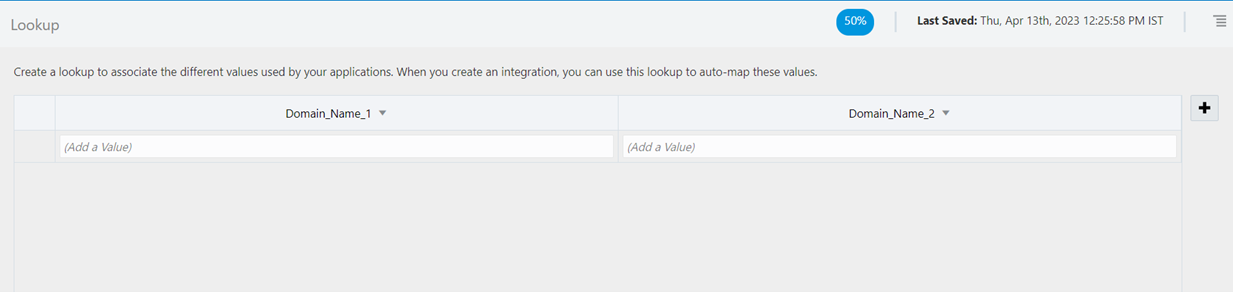
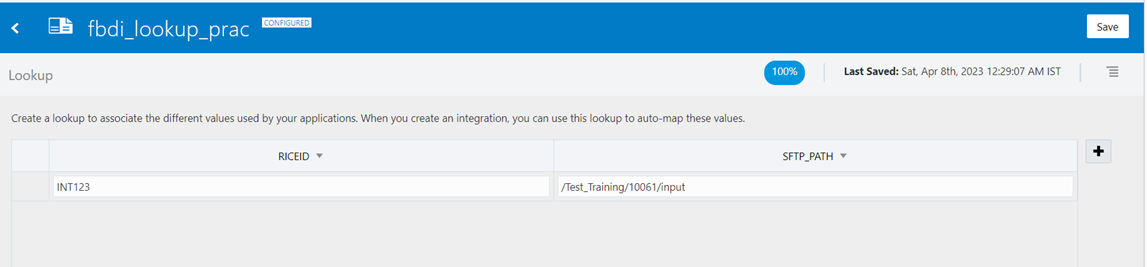
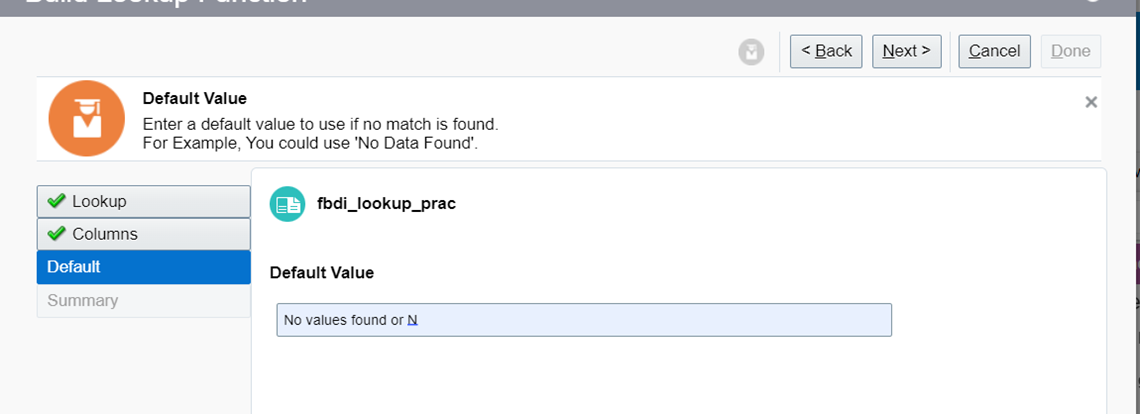
STEP 2: Create a lookup and put the SFTP Path of the file which must be imported (remote directory path where file has been place).
Navigator->Integration->Lookups->Create
After creation add keys and values in it and save. In our integration we will take the SFTP server Path from LOOKUP. (we have changed the name of Domain_name_1 as RICEID and Domain_name_2 as SFTP_PATH.
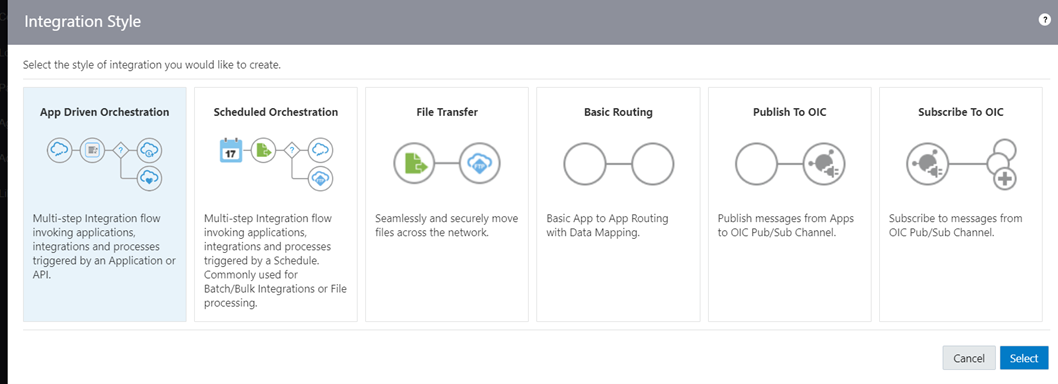
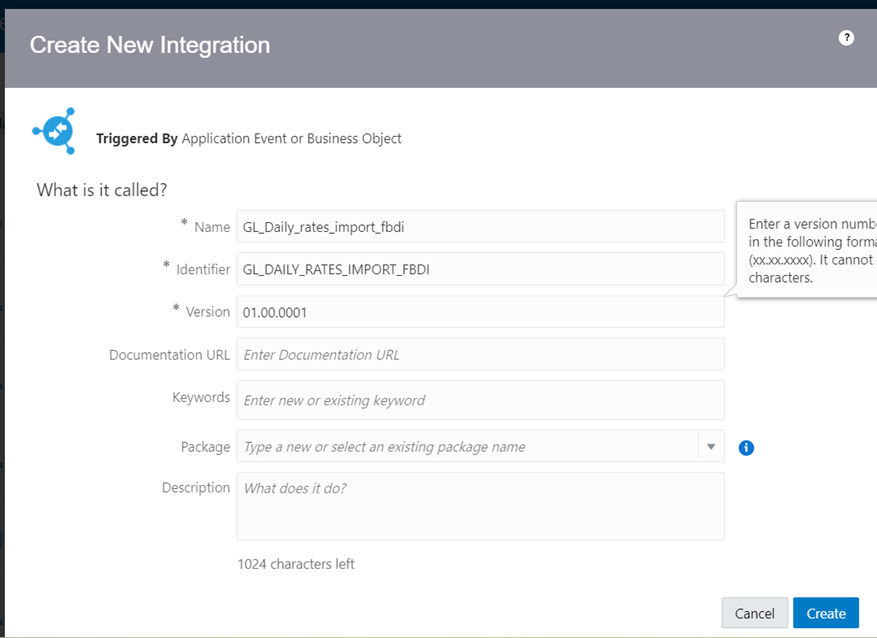
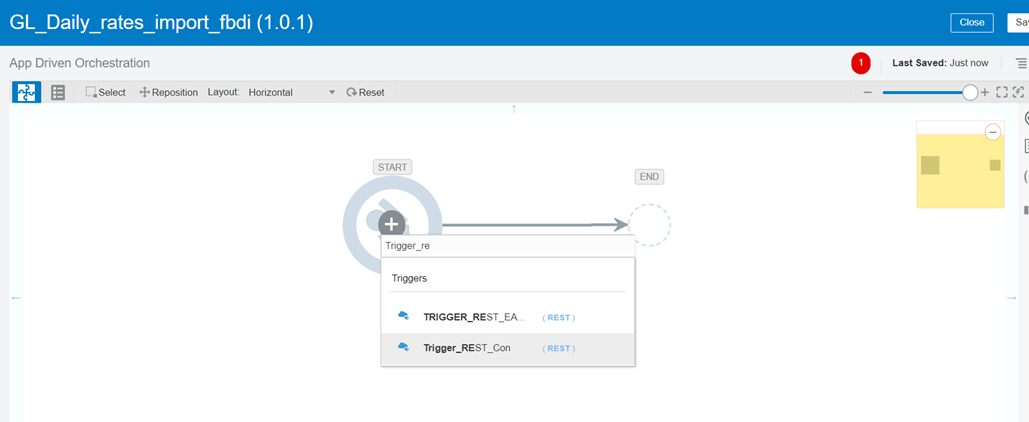
STEP 3: Create an App-Driven OIC integration Navigator->Integration
Click on create After adding NAME.
Create Rest trigger integration to Trigger Input by taking Rest connection.
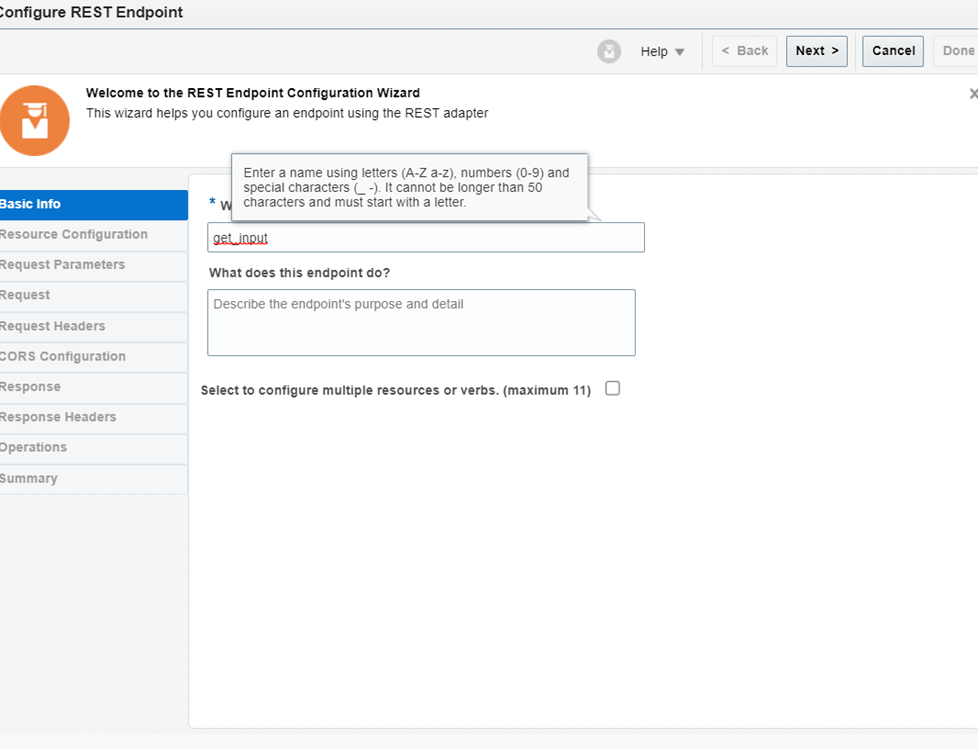
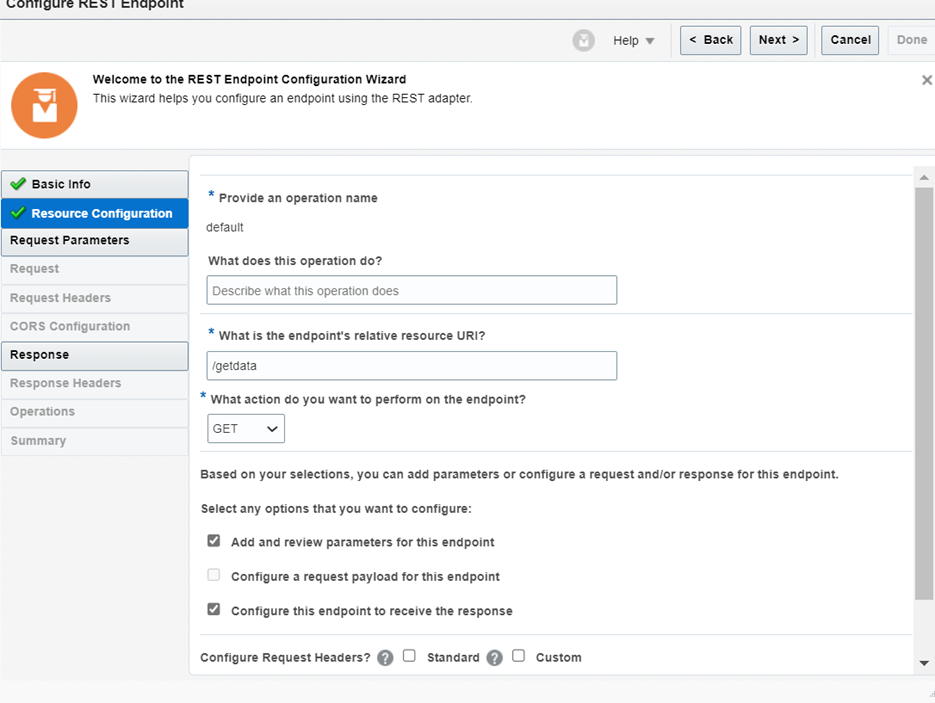
Provide a name to your endpoint Select the action as “GET”. Check the box to add parameters and to configure endpoint to receive response.
Add query parameter value as shown below which has been provided in lookup.

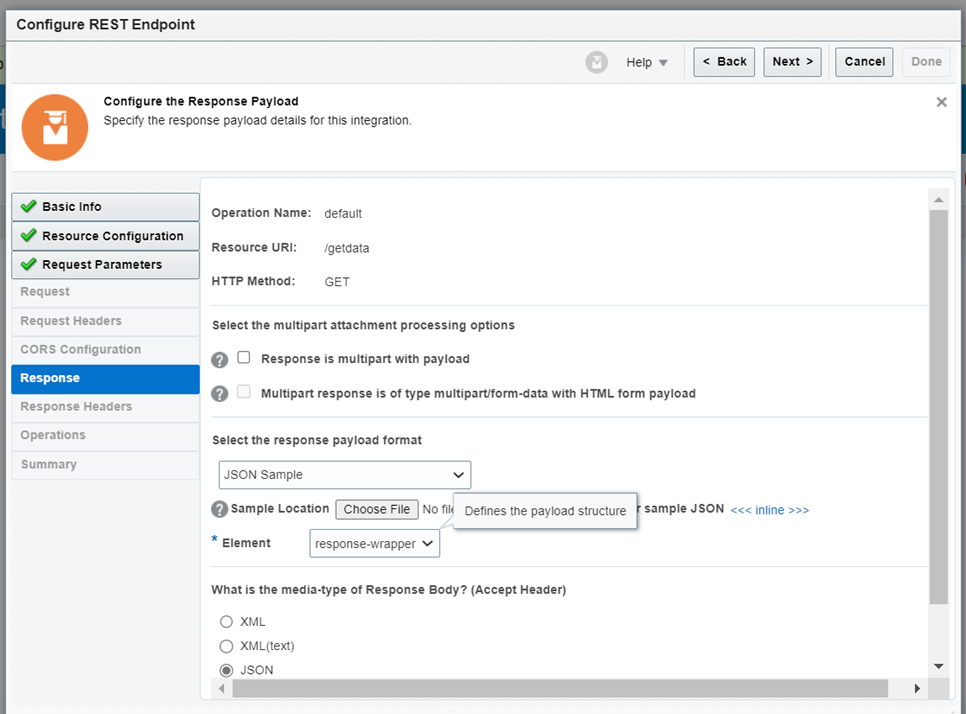
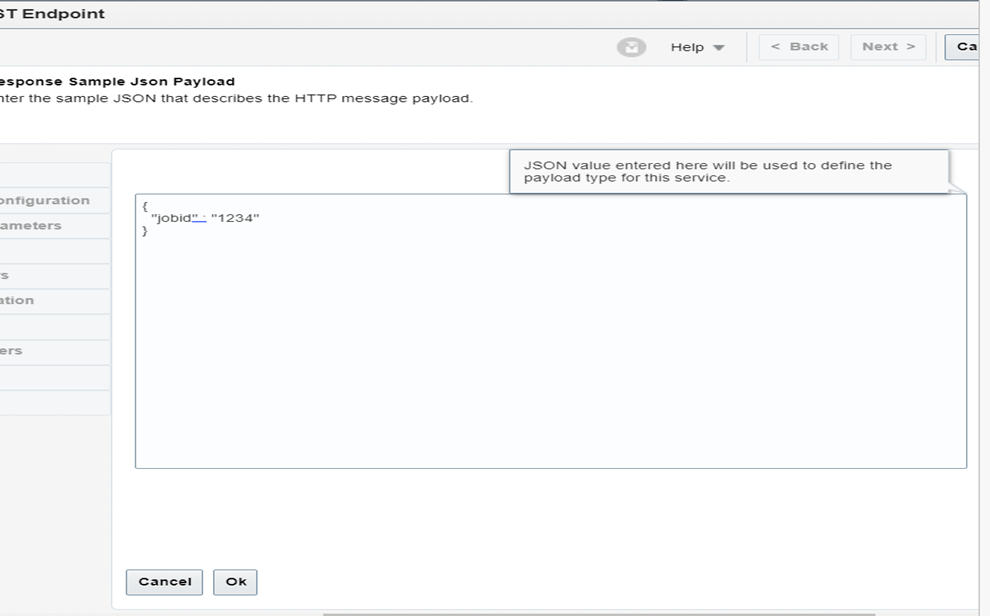
In Response, Select the format as JSON Payload and add response payload as shown below.
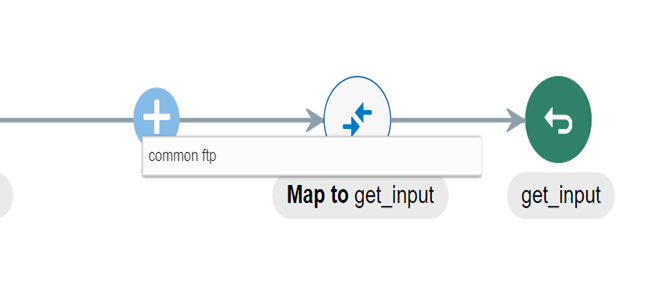
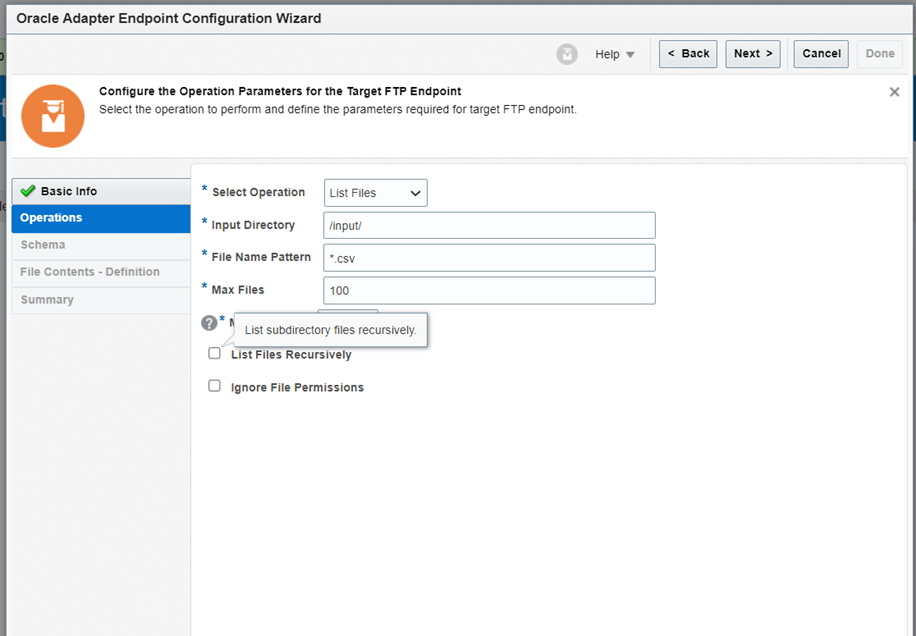
Step 4: Take SFTP adapter to list the file from SFTP, provide the name to your End point, select operations as list files, specify any temporary name to input directory, actual name will be taken from the lookup in mapper, give file name pattern as *.csv.
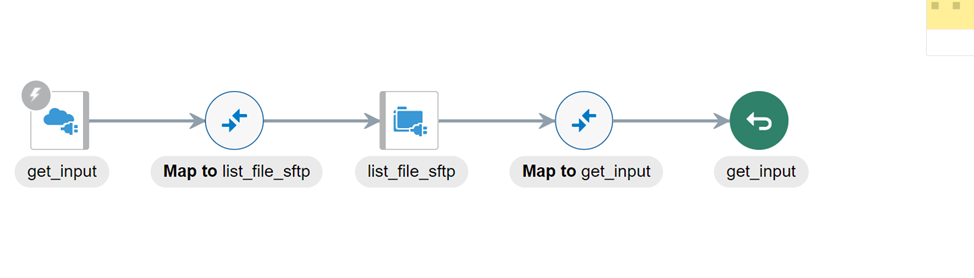
STEP 5: Add Mappings, Map the query parameters to the Directory of SFTP by using lookup and hardcode the value of filename pattern.
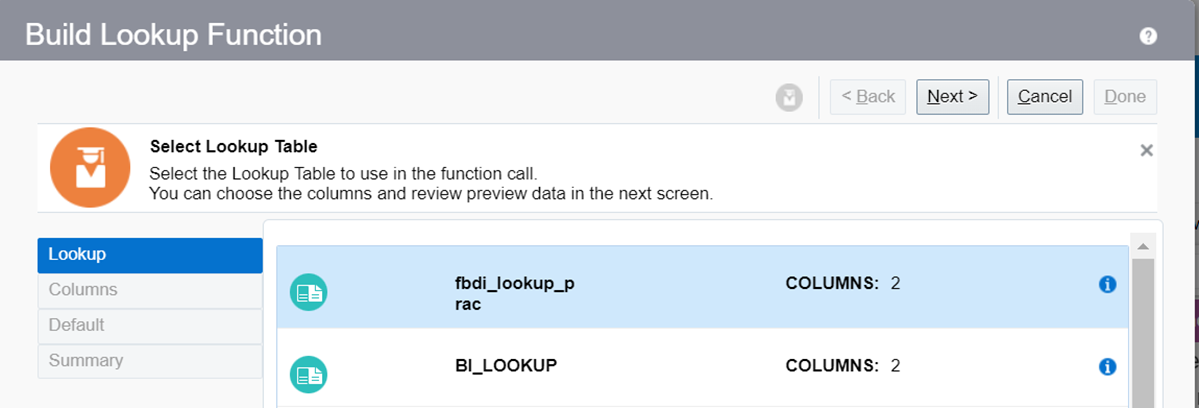
From function tabs select Lookup values, drag and drop it to expression builder and follow the below procedure.
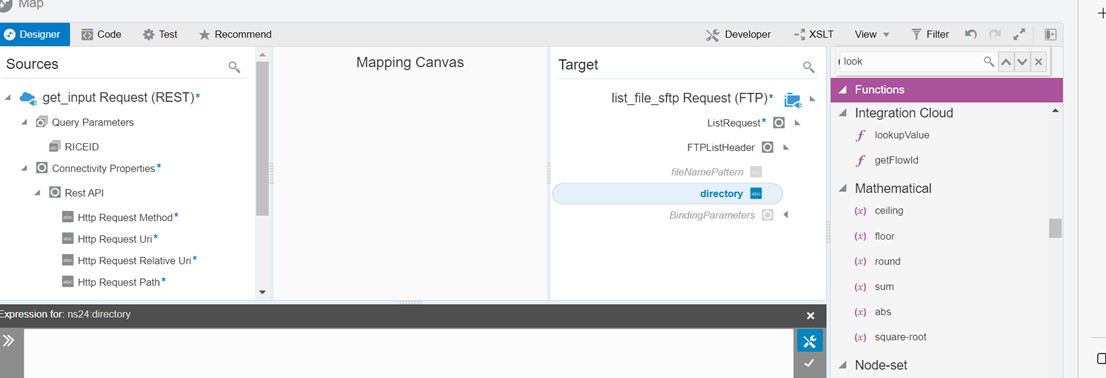
 In Expression directory change the name of ‘srcValue’to RICEID.
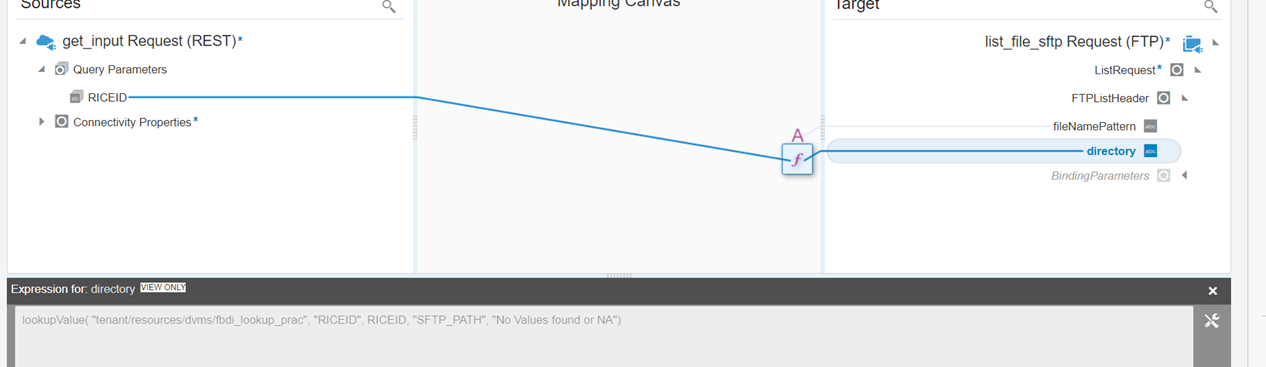
Validate and save.
Now we have successfully listed the file.
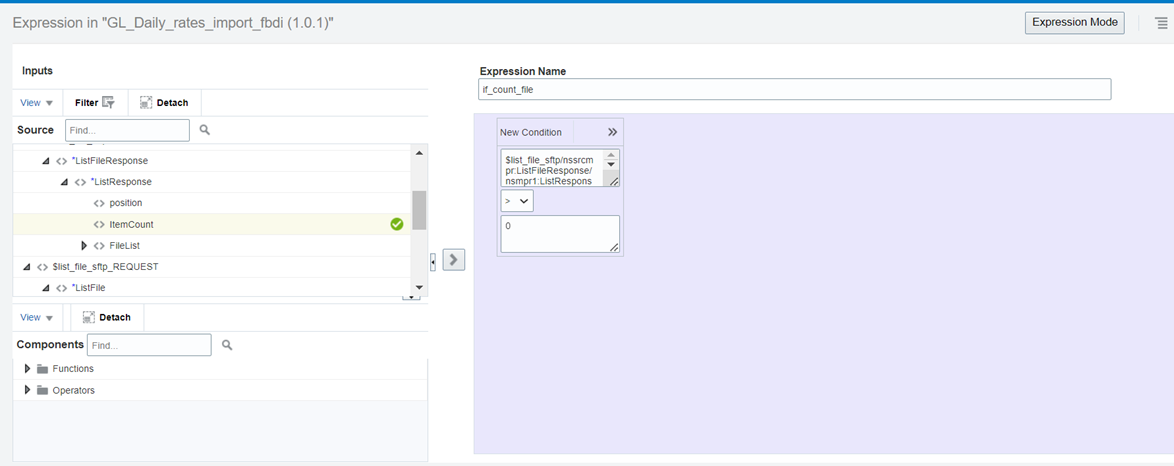
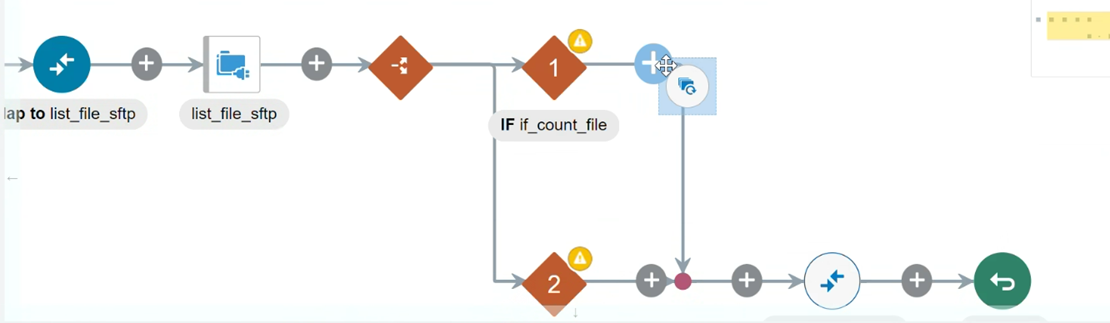
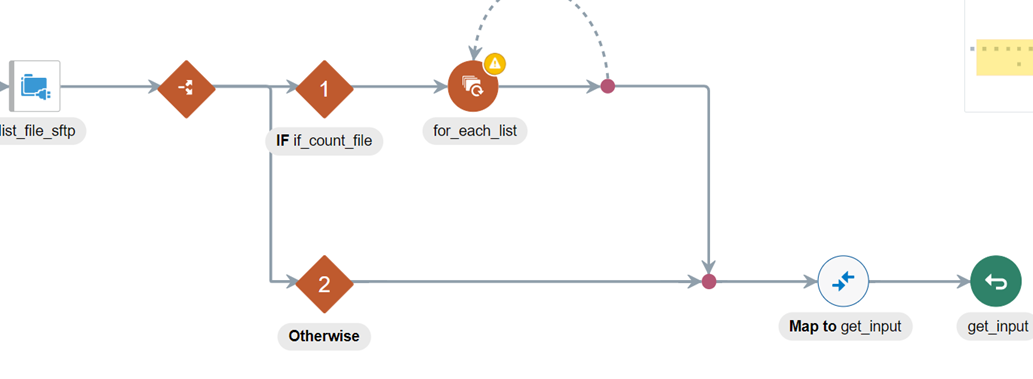
 STEP 6: After file listing, we will check the count of the file, if the count is greater than zero, perform iteration on each repeating element of list file.
Take switch case from Collections and add the condition, take the item_count from the list_file_response if the item_count>0 then perform iteration.
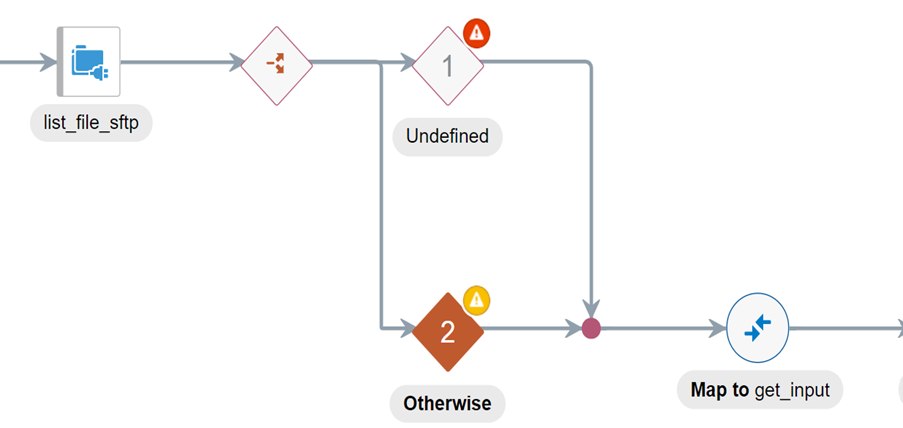
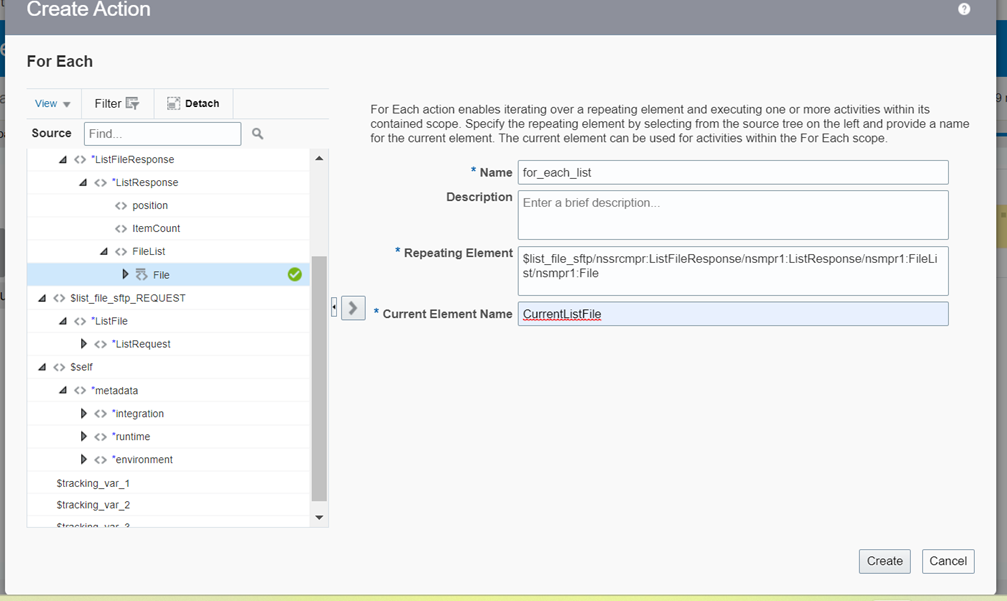
 Insert for each loop from collection , select repeating element from List_file_response , provide the name of current element name and create the loop.
STEP 7: After iterating each file downloaded from SFTP server with the help of SFTP connection, provide a unique name to your endpoint.
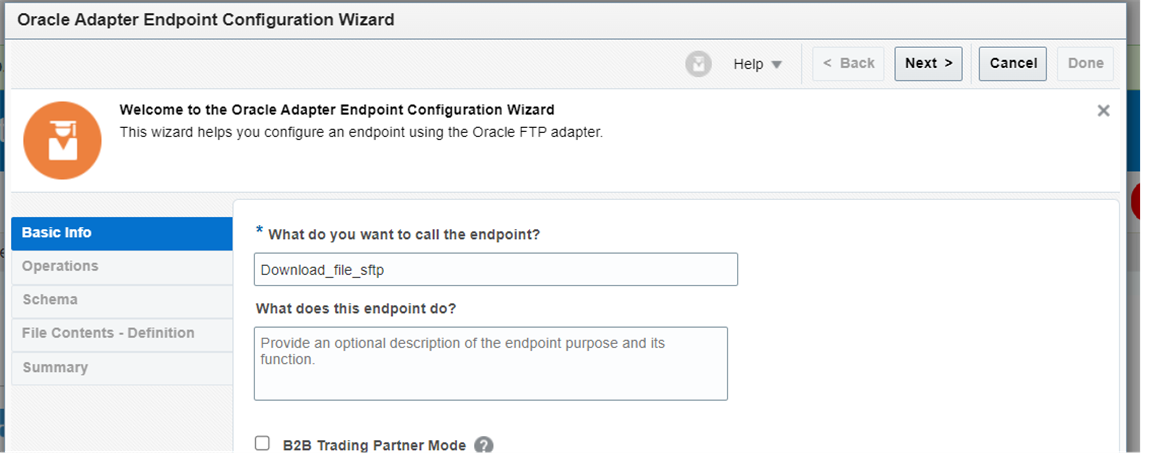 Select operation as download file and keep the download directory name as/OIC/ (this will be the temporary file location) input directory and file name will be taken from current file request in mapper.
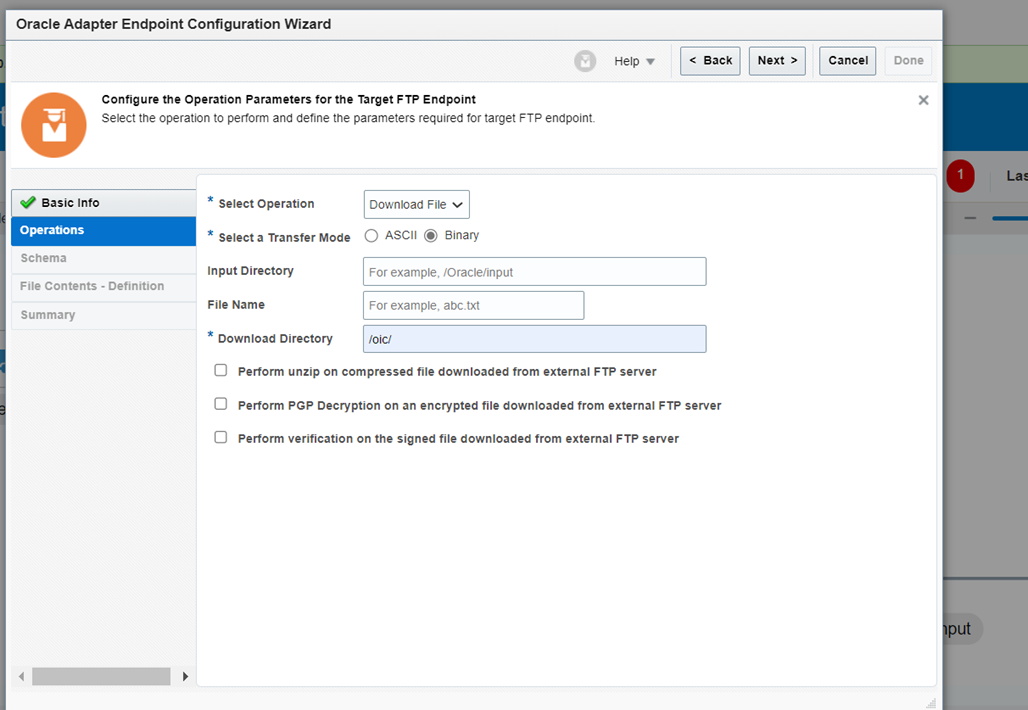
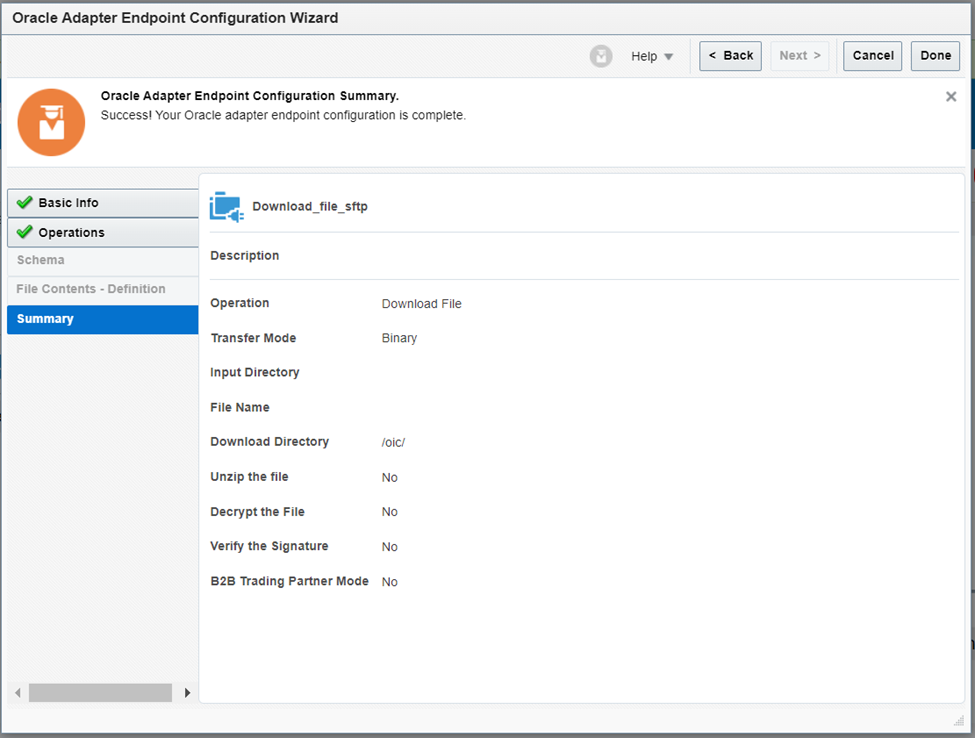
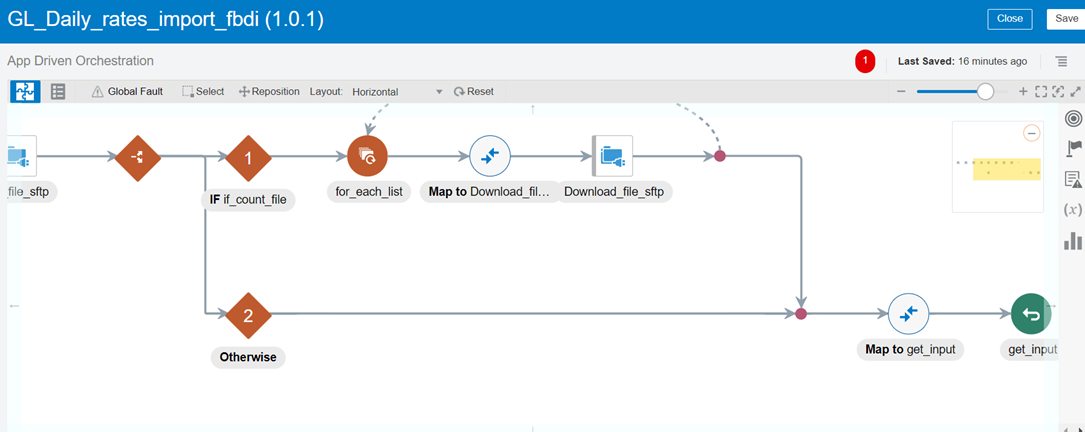
Map file name and directory of current file to the file name and directory of Download file, validate and close.

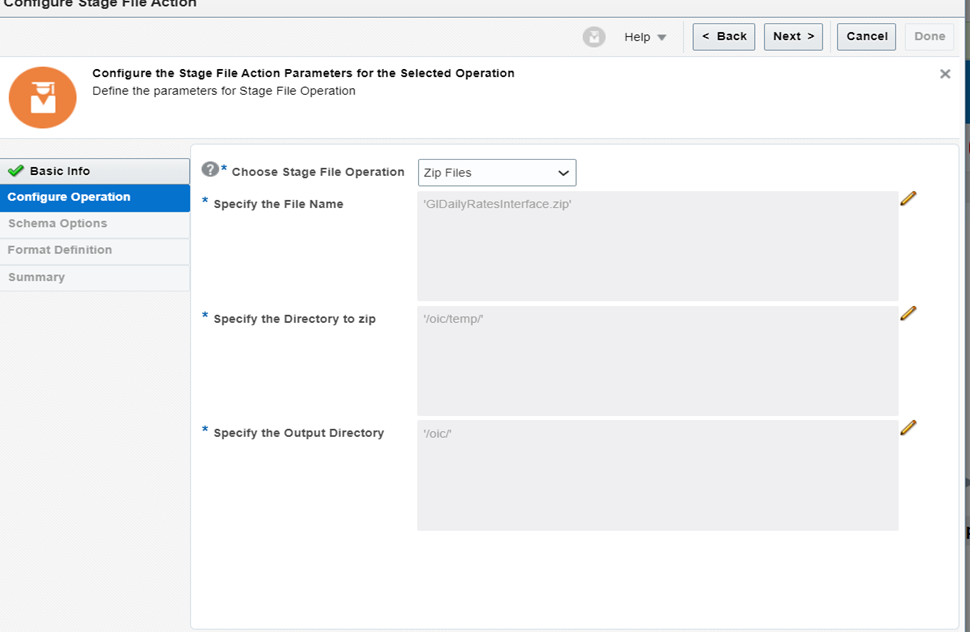
STEP 8: After downloading the file from SFTP , zip the file with the help of stage file .
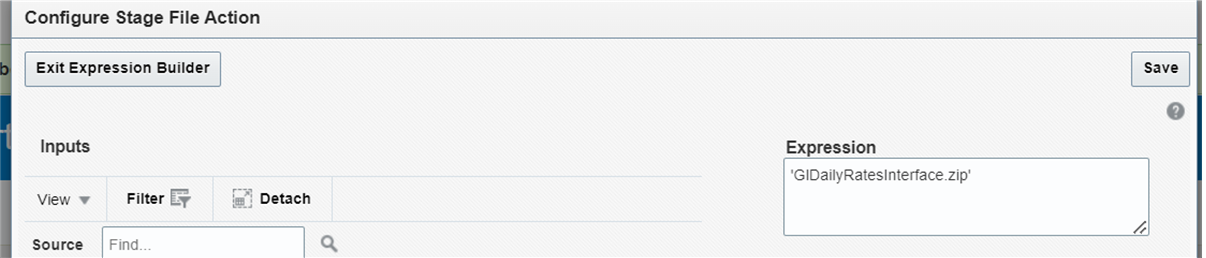
Provide the exact file name with .zip file extension, which has been downloaded from SFTP.
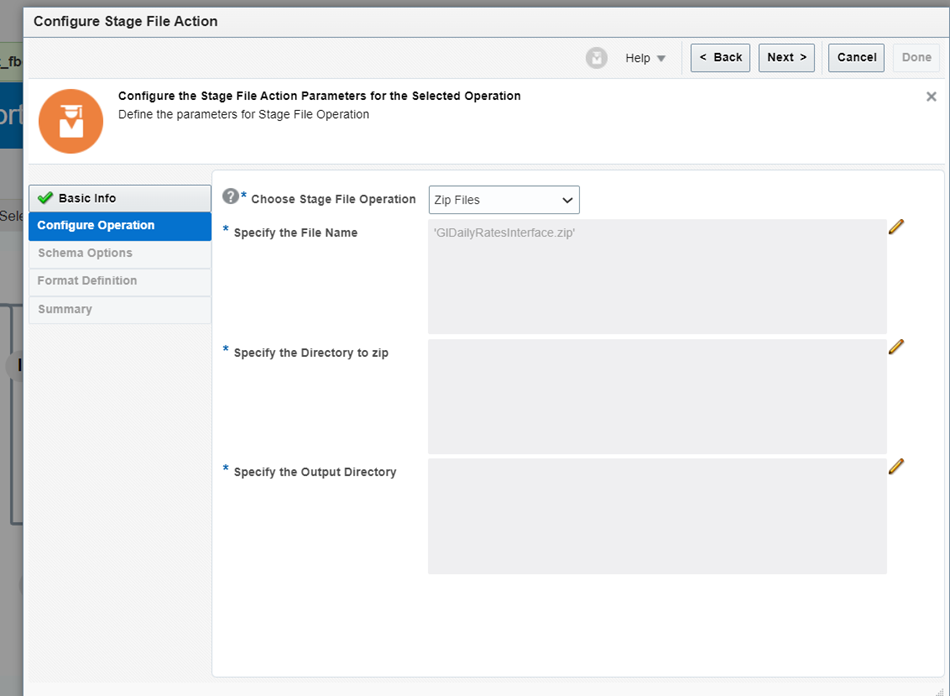
Specify Directory to zip will be ‘/oic/temp/’(temporary directory) and output directory will also be the temporary directory. ‘/oic/’
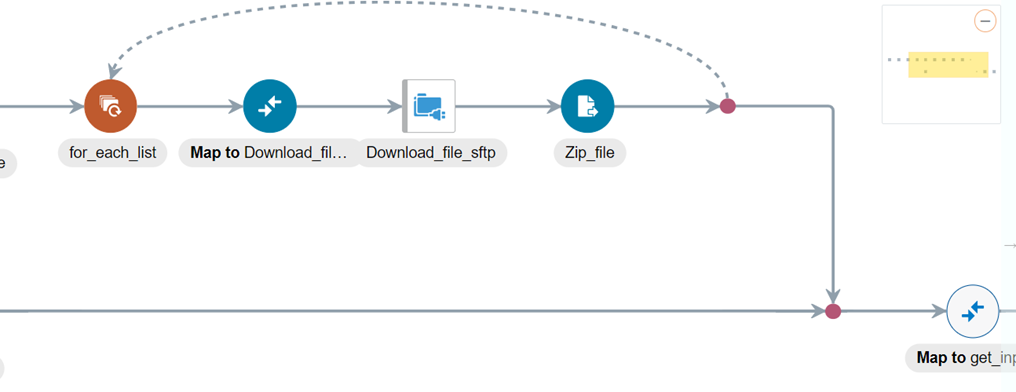
STEP 9: After Zipping the FBDI file, use ERP Cloud Adapter to call the FBDI IMPORT file, give the unique name to call your endpoint.
Select the option “Import Bulk Data into Oracle ERP Cloud”. And select the Bulk data import process as “Import and calculate Daily Rates”.
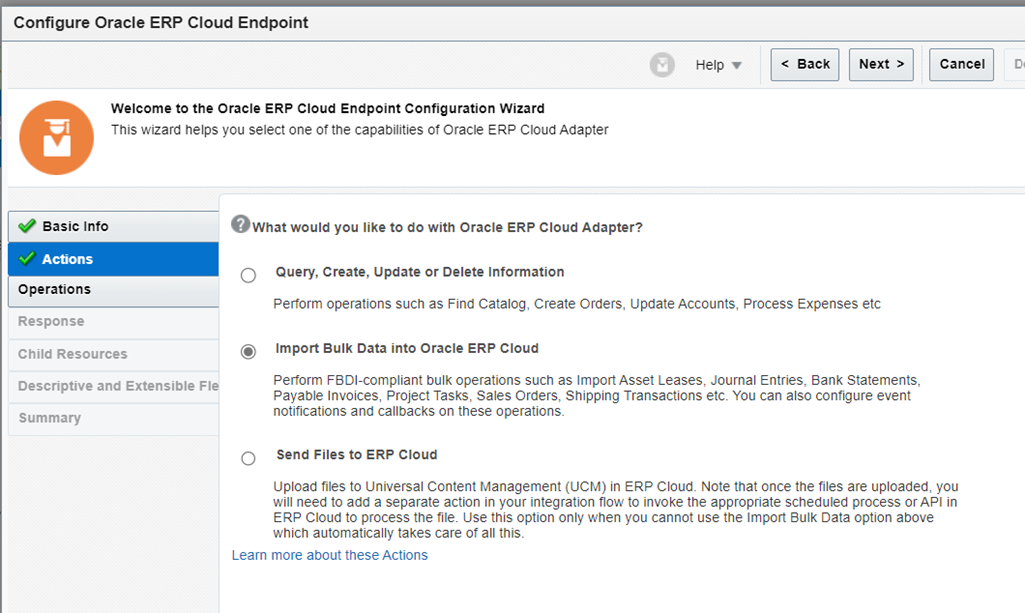
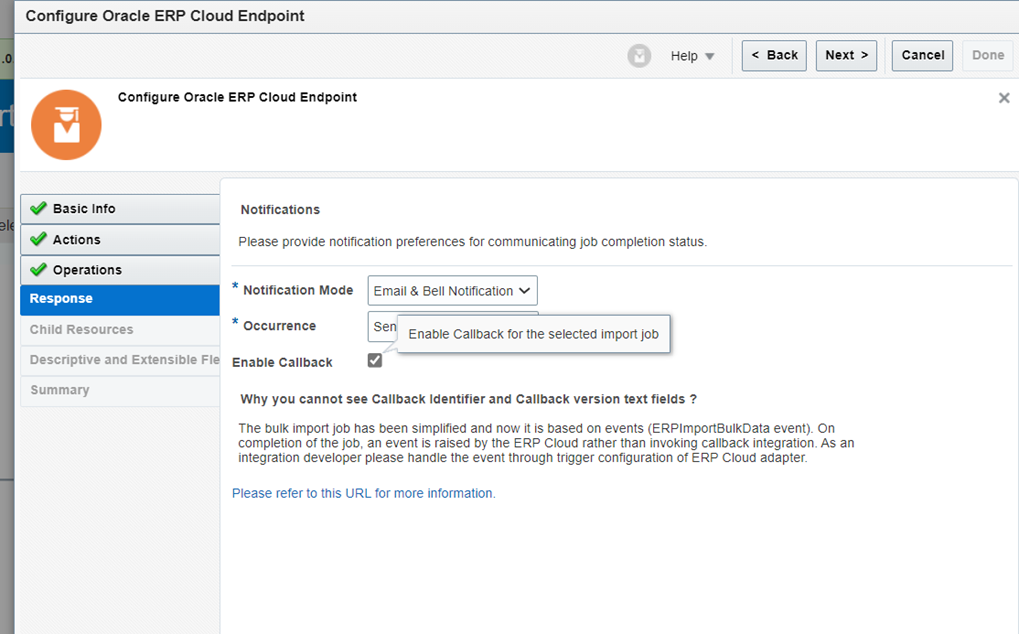
Make sure to enable callback for the selected import Job.
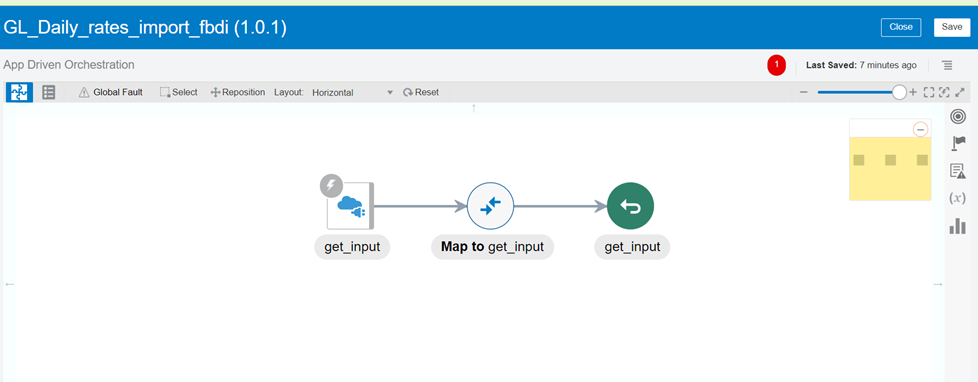
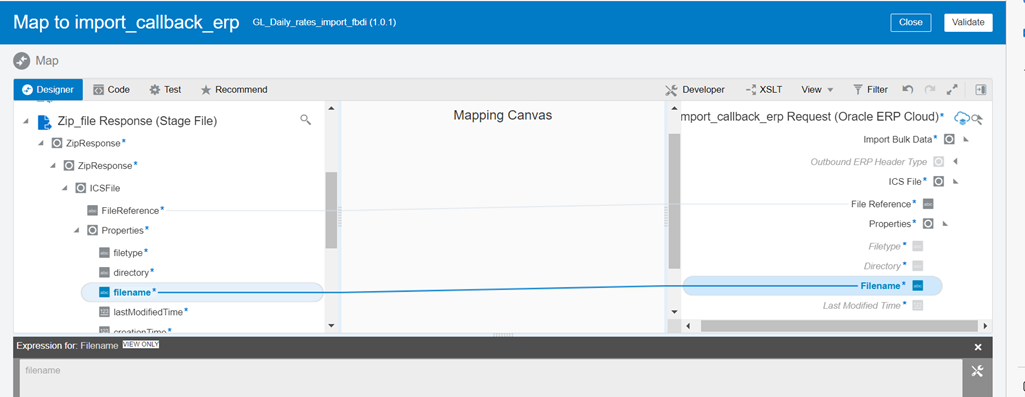
Once the config is done, we will map the filename and file reference in the adapter mapping as shown below.
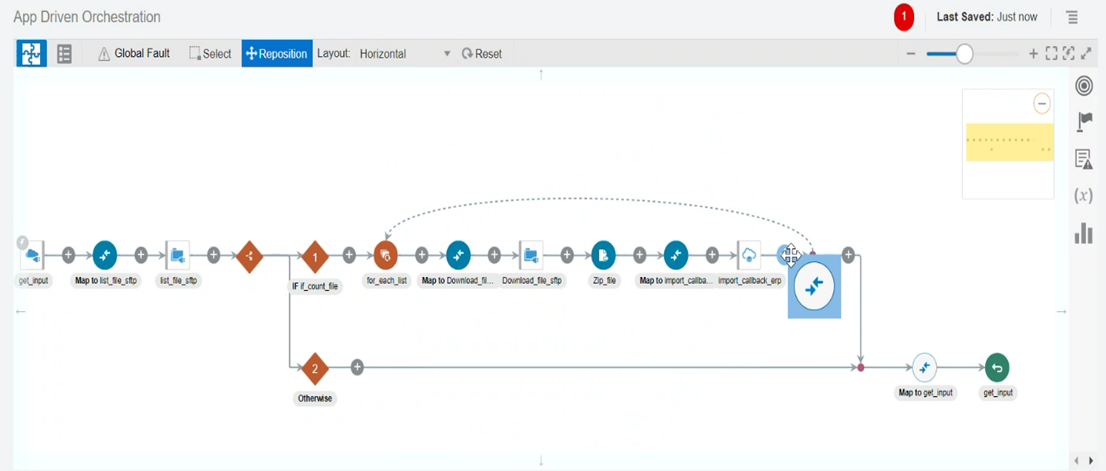
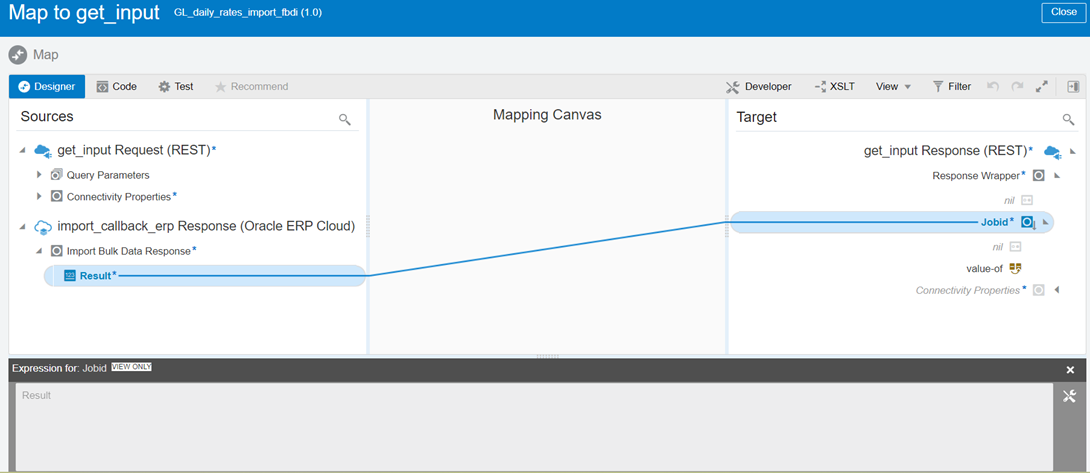
STEP 10: Reposition the mapper inside foreach loop and map the result of ERP response to the response given to the input REST.
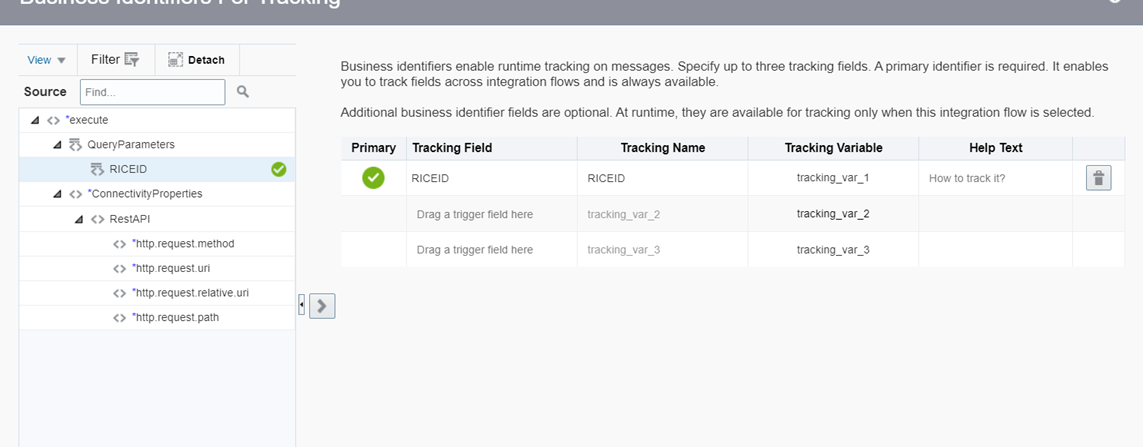
STEP 11: Add a tracking variable and save the integration.
 GL_Daily_rates_import_fbdi integration has been completed.

Part 3 – Create Call back integration in OIC which will be triggered by ERP cloud whenever an event is occurred.
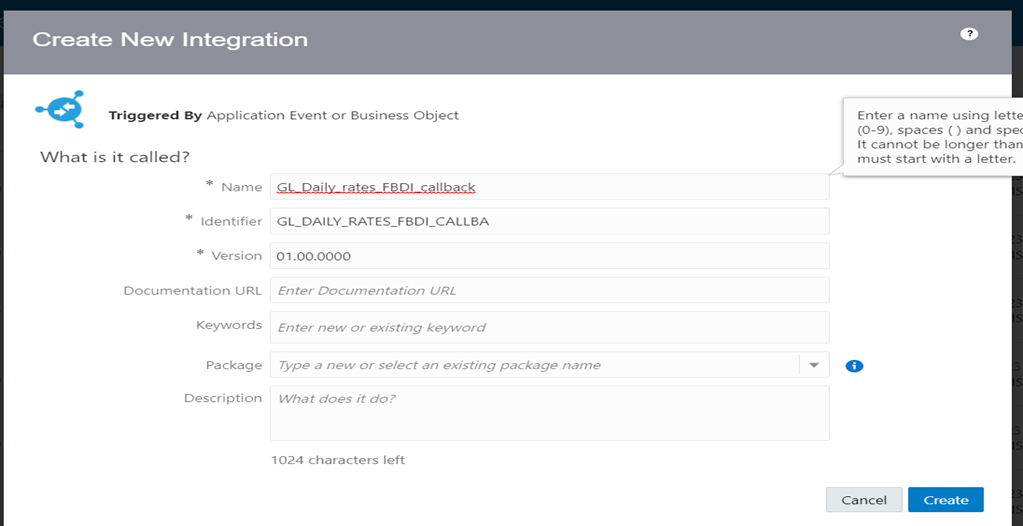
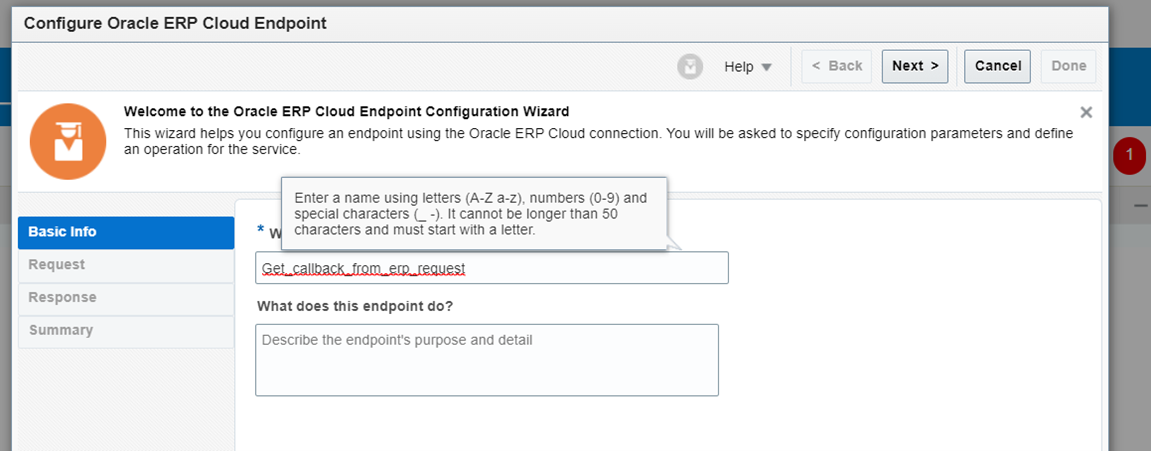
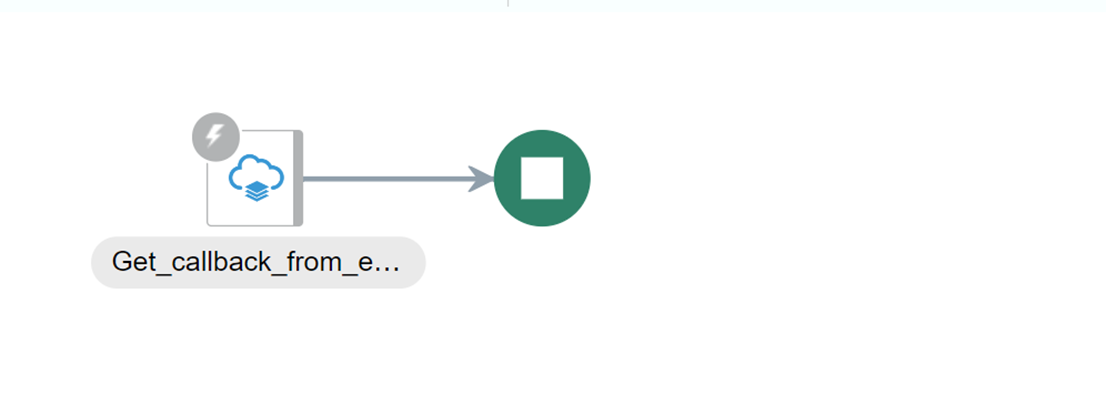
Step 1: Create an App driven Integration, name it as GL_Daily_rates_FBDI_callback.
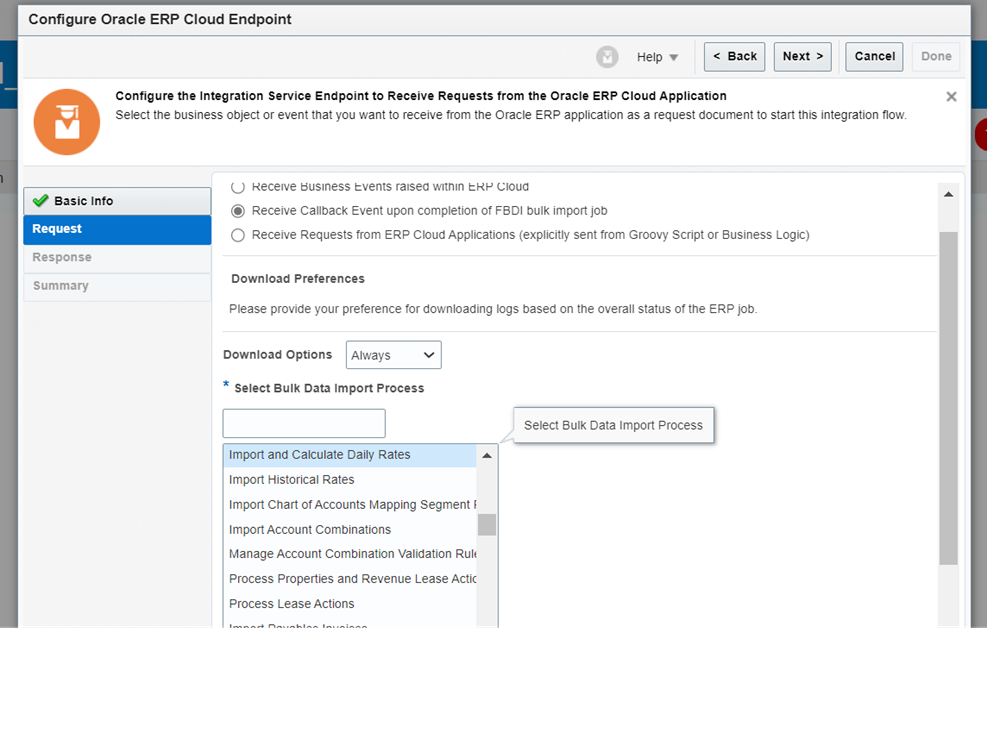
Step 2: Take the same ERP connection which has been created earlier and used in the first OIC integration as well.
Check Receive Callback event upon completion of FBDI bulk import job button Select bulk data import process same as “Import and Calculate Daily Rates”.
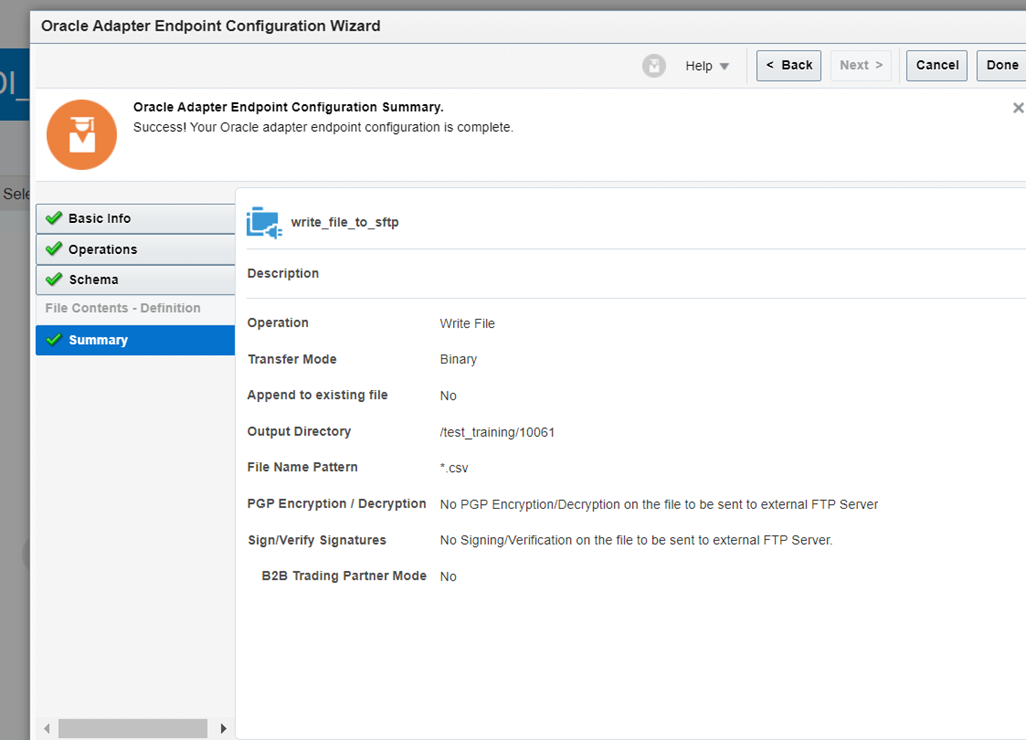
Step 3: Take SFTP connection to Write the file into our input directory after successful Import of Data to ERP. Select the operation as Write File, Specify output directory name and file name pattern.
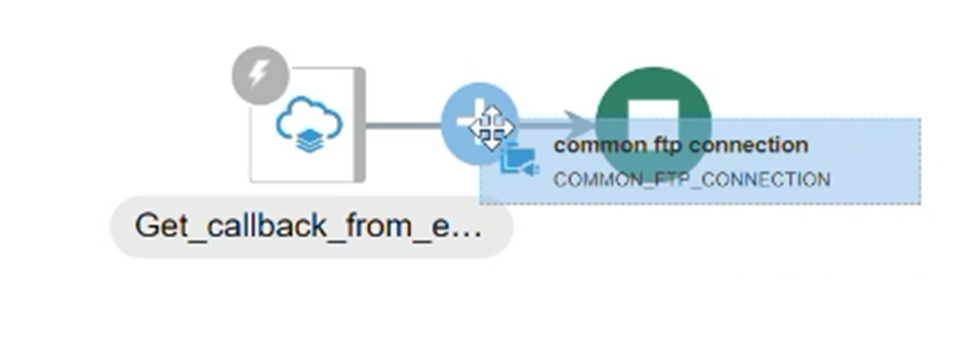
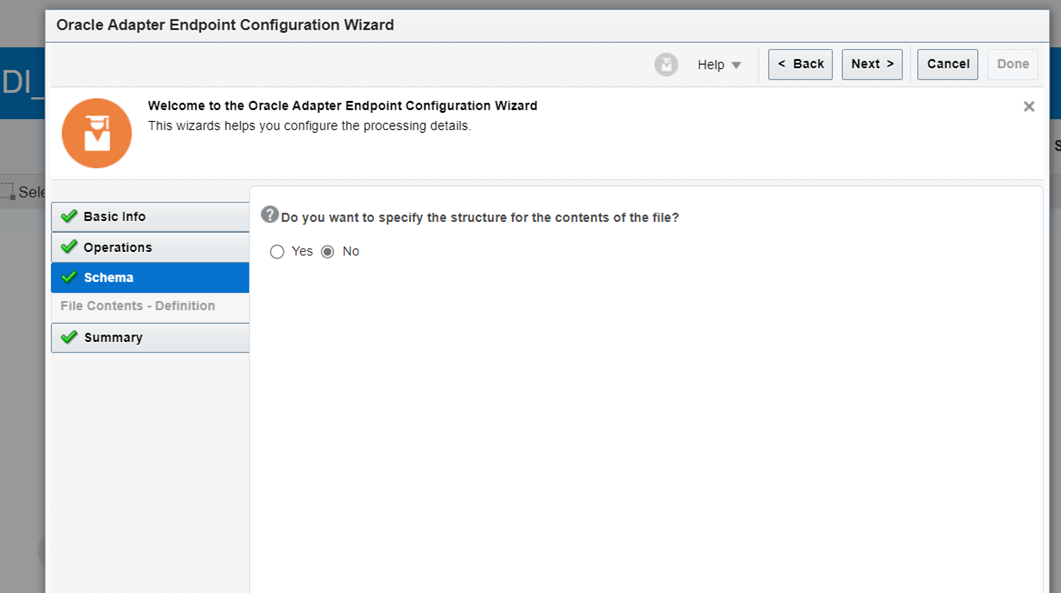
Select NO to specify structure for contents of file as we are bringing it from callback event.
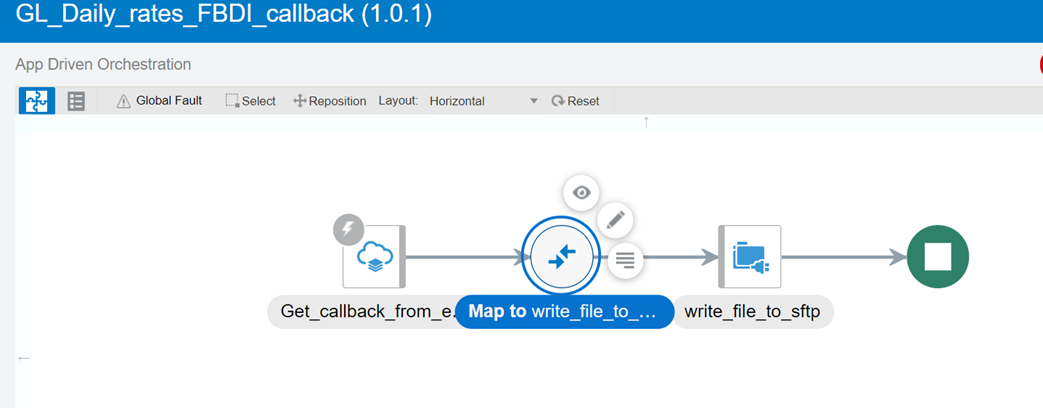
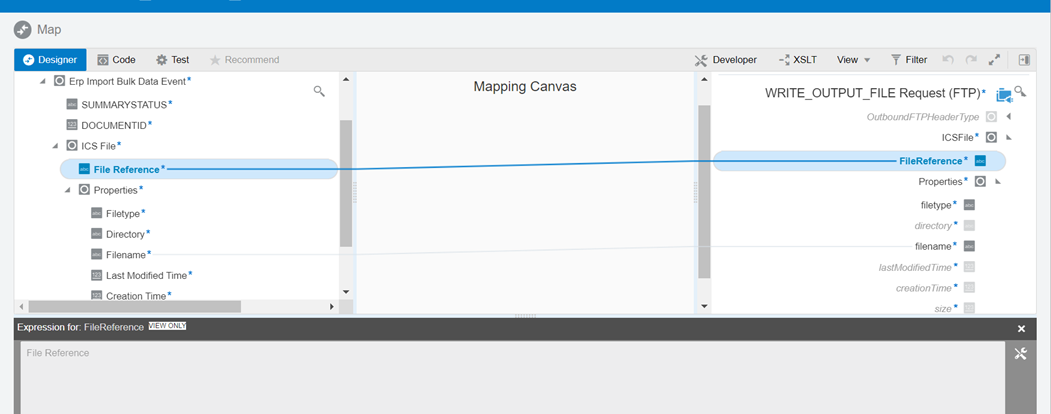
Step 4: Map file reference and file name from request of Get_callback_erp to the request of WRITE_OUTPUT_FILE.
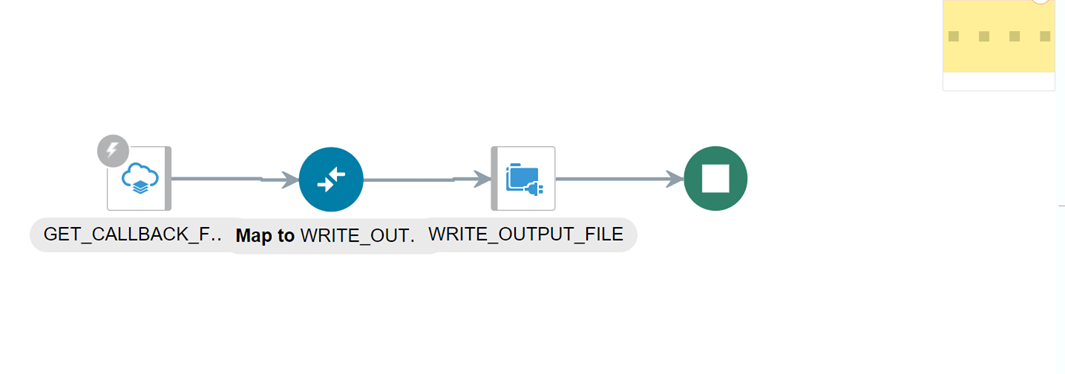
GET_Daily_rates_FBDI_callback integration has been completed.
Part 4 – Activate integrations ,Run and validate output.
Step 1: Activate both the integrations.
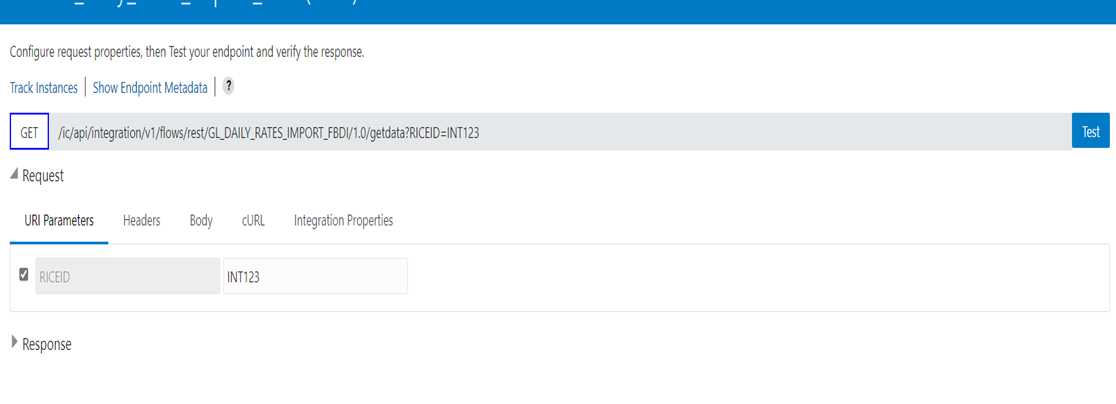
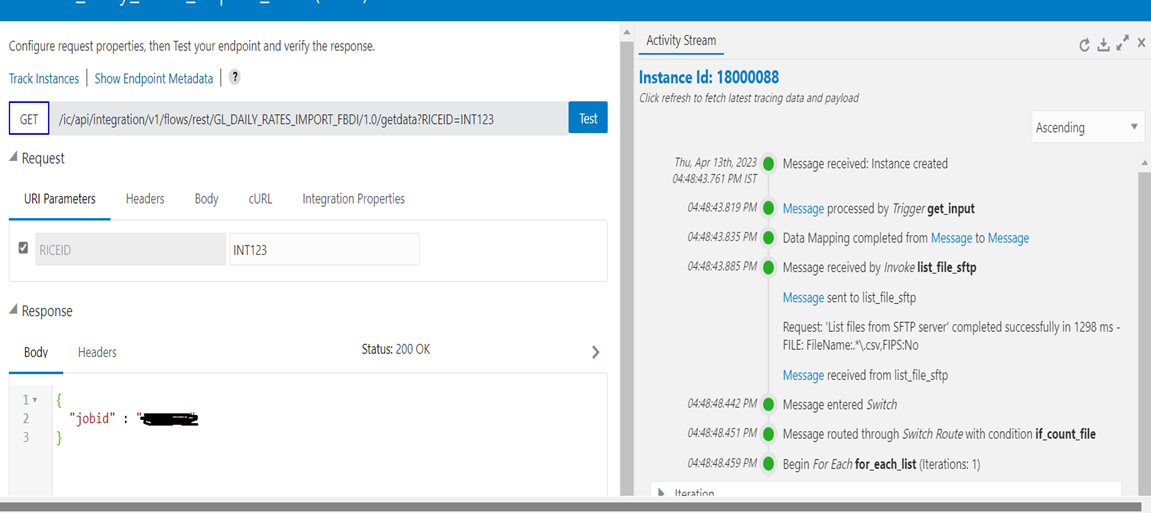
Step 2: Test by running main OIC Integration GL_Daily_rates_import_fbdi, provide value of RICEID and Test.
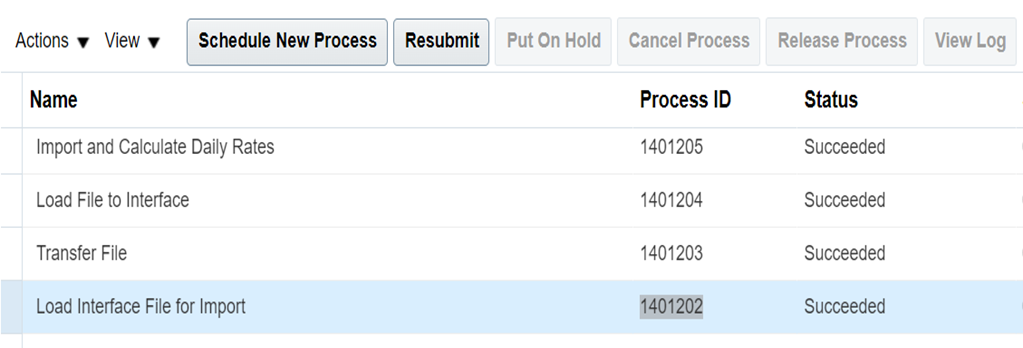
Step 3: Sign into fusion ERP instance and navigate through Navigator->Tools->Scheduled Processes->Click on Search.
And validate if all the below processes have been succeeded.
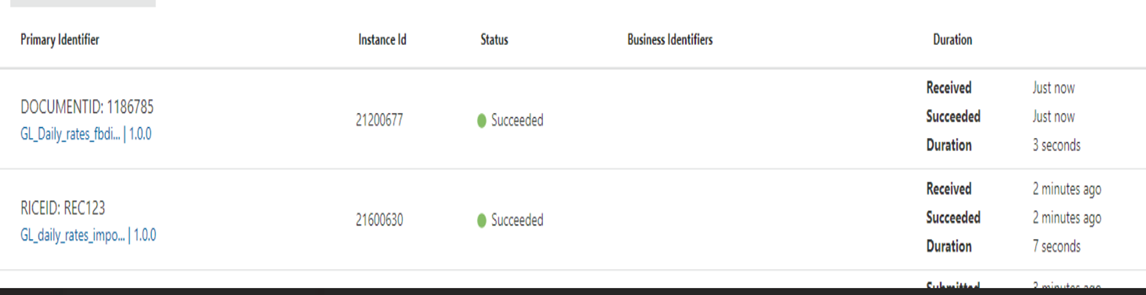
 STEP 4: In OIC instance check if both the integrations Completed Successfully.
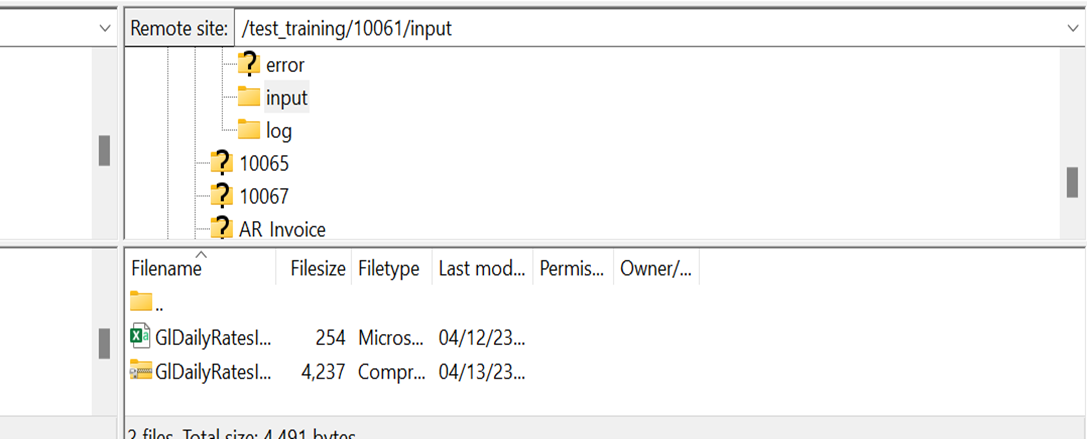
Step 5: Callback has been triggered and we can see the file in directory.
We hope that you like this blog. If you have any questions related to the Callback Integration process in OIC, please share it in the comments or write to us on [email protected].
Read more like this: Upload/Download Attachments to UCM using OIC