The Oracle Developer Cloud Service was one of the first service on Oracle Cloud. Since then, it has been renamed as Visual Builder Studio. The service offers support for agile project management, source code control, artifact management, automated builds, software quality assurance, CI/CD pipelines and more.
Visual Builder Studio is Oracle’s answer to the Azure DevOps service which is widely used across the industry. In this article, we will share how you can implement CI/CD using Visual Builder Studio.
The Problem
How to implement CI/CD using Visual Builder Studio.
The Solution
Create a Project
You can use a project to host source code files, track issues, collaborate on code, and build and deploy your applications. A project can host multiple Git repositories, and each Git repository can have multiple branches and hundreds of code files.
Within the project, you can require team members to create a merge request for each branch of the Git repository and ask reviewers to review and approve the code. You can create and configure multiple build jobs to generate different project artifacts that you can deploy to Oracle Cloud or your on-premise web server.
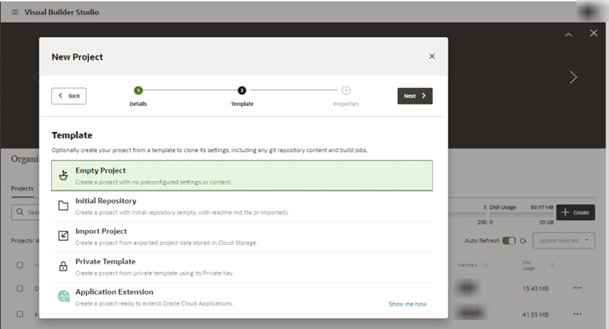
If you haven’t decided which applications you want to upload, or want to start from scratch, create an empty project that has no pre-configured Git repository or any other artifact:
Empty Project
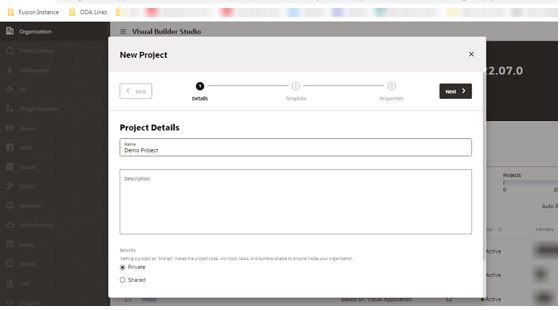
Step 1: On the Organization page, click + Create.
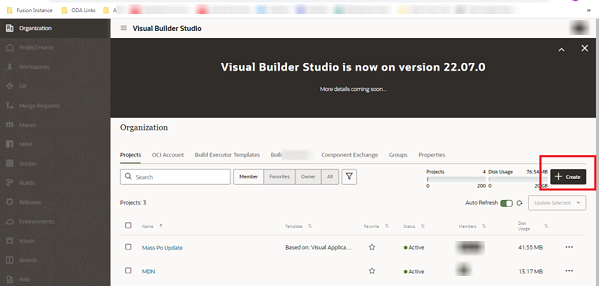
Step 2: On the Project Details page of the New Project wizard, in Name and Description, enter a unique project name and a project description.
Step 3: In Security, select the project’s privacy.
Step 4: Click Next. On the Template page, select Empty Project, and click Next.
Step 5: Project team members use the markup language to format wiki pages and comments. Click Finish.
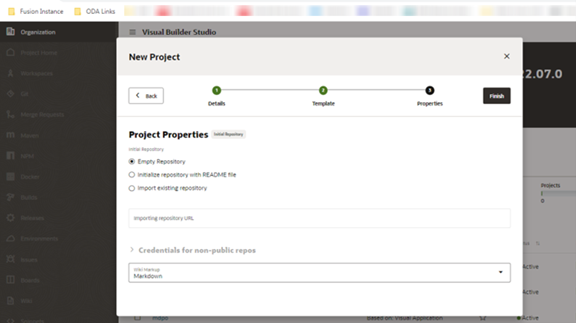
Initial GIT Repository
If you plan to upload application files soon after you create a project, you should create a project with an initial Git repository. You can choose the Git repository to be empty, populated with a readme file, or populated with data imported from another Git repository.
Add Users To Project
Step 1: In the left navigator, click Project Home.
Step 2: On the right side of the page, click the Team tab.
Step 3: Click +Add Member button.
Step 4: Add the user’s name. If you can’t find a particular user, enter the user’s name or username in the search box. As you begin typing, users matching the search term are displayed.
Step 5: Select “What membership will these members have for the project?”
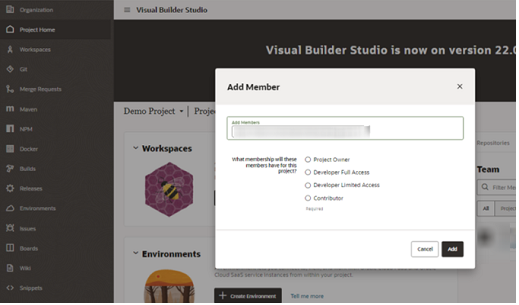
Step 6: click Add.
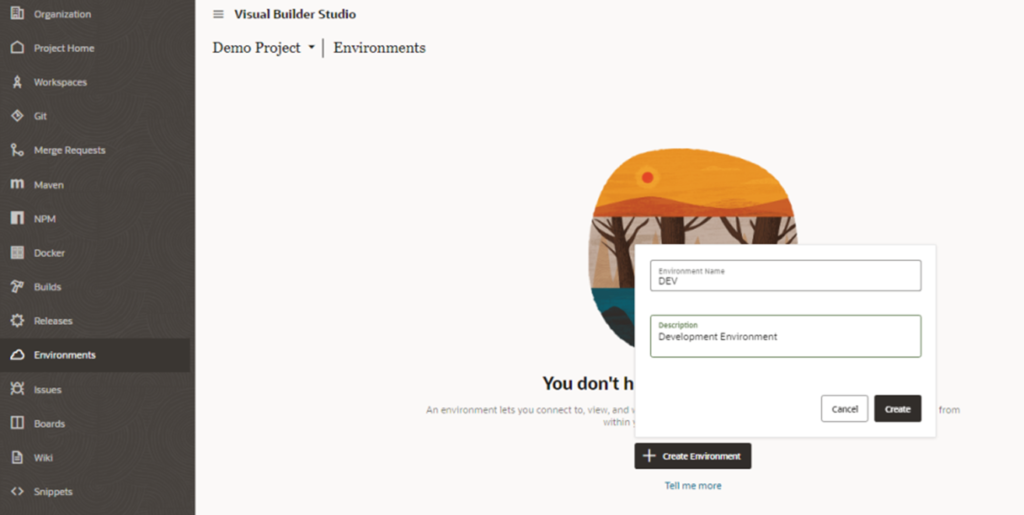
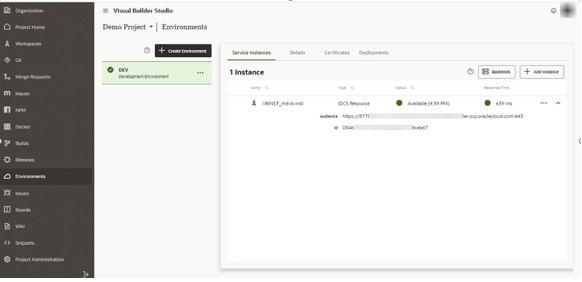
Create Environments
An environment defines the target Oracle Cloud Applications, Visual Builder, Oracle Cloud SaaS, or Oracle Cloud Infrastructure service instance as a single entity. You’ll define an environment to deploy an application to a service instance or to get information from a service instance.
Set Up an Environment
Step 1: In the left navigator, click Environments.
Step 2: Click Create (or Create Environment if the page is empty).
Step 3: In Environment Name, enter a unique name. In Description, enter a description. Click Create.
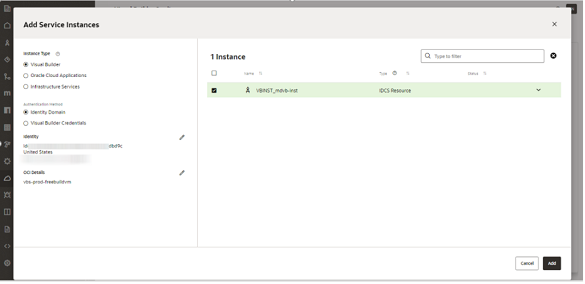
Step 4: In the Service Instances tab, click Add.
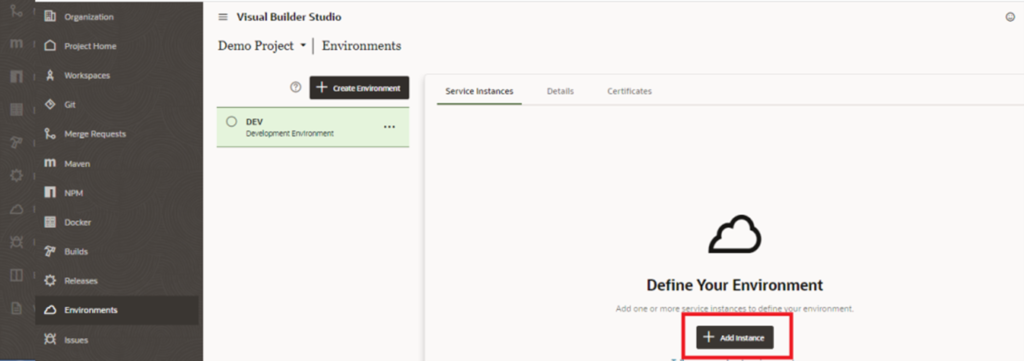
Step 5: In the Add Service Instances dialog box, select the type of service instance (Visual Builder, Oracle Cloud Applications, or Infrastructure Services), then select the check boxes of service instances and click Add.
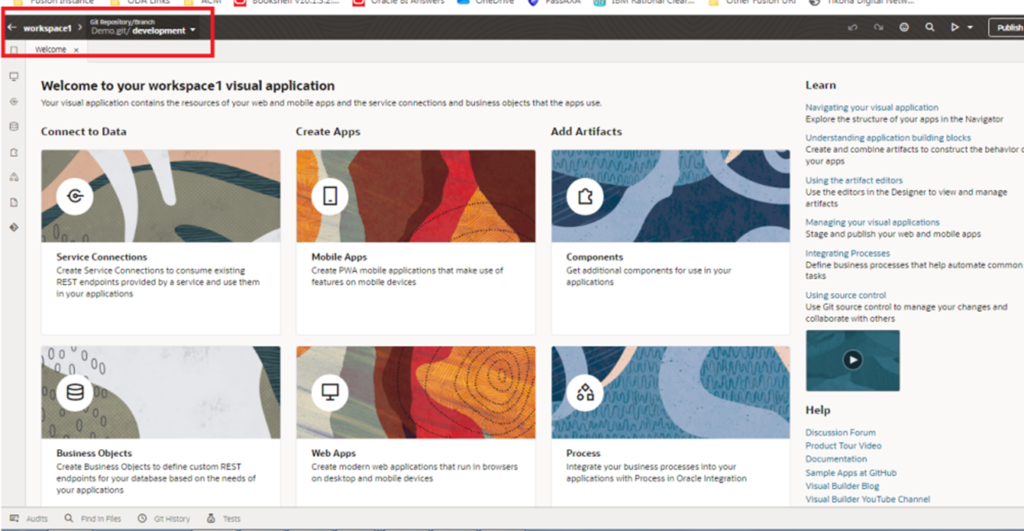
Workspace
A workspace defines the resources that are available to you when you open the Designer. These resources include the Git repository—and the branch—containing the source files you want to use, the extension’s or visual application’s development environment, and, in certain cases for extensions, a sandbox. You can think of a workspace as your private editing environment while you’re working with the Designer.
Create a Workspace
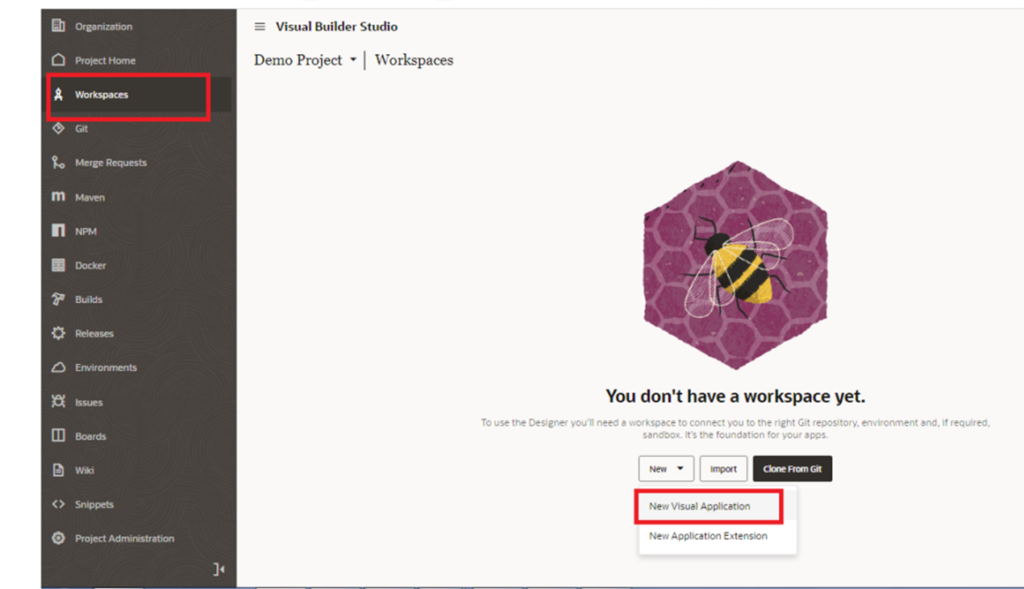
Step 1: In the left navigator, click Workspaces.
Step 2: Click New to create New Visual application.
Note: “Clone from Git” option will be used to create a workspace, once a repository with the visual application or application extension that the team works on has been created.
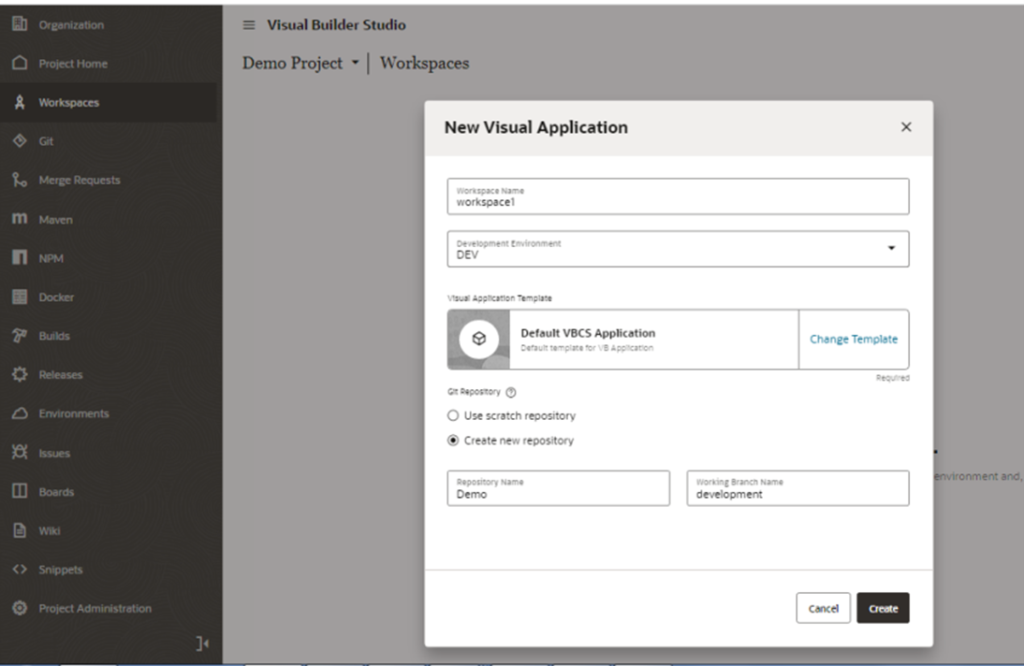
Step 3: Type a workspace name and select the environment.
Step 4: Select “Create new repository” option to create a new repository.
Step 5: And enter a working branch name to start development.
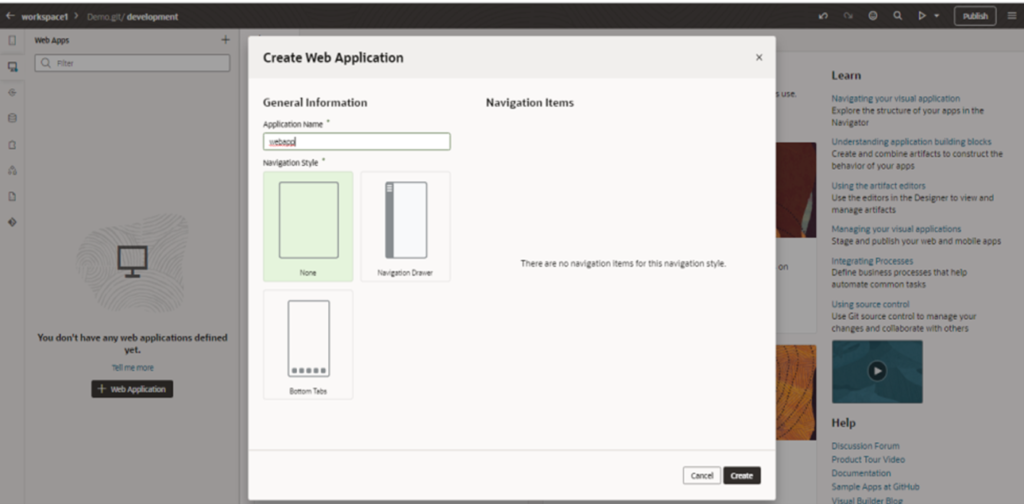
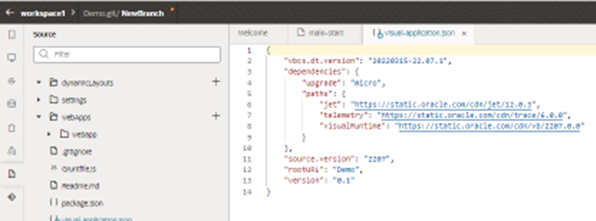
Create a Web Application
Step 1: In workspace, click on web applications option in left navigator.
Step 2: Click +Web Application.
Step 3: Enter Application name, choose navigation style and click on Create.

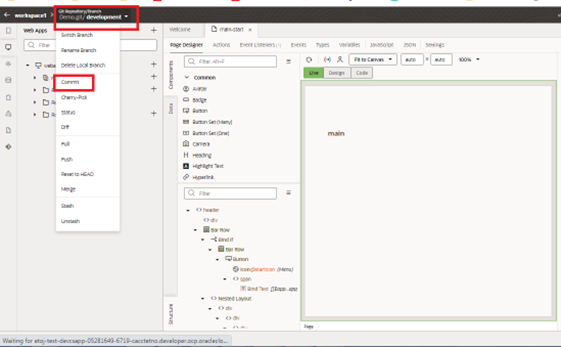
Commit a Change to GIT
Step 1: After adding changes to web application, click on arrow on header near branch name.
Step 2: Click on Commit option from dropdown to commit the changes to local branch.
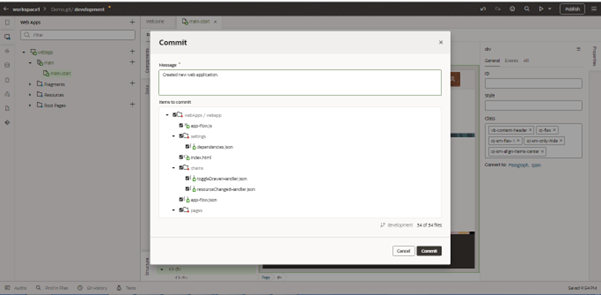
Step 3: Type a message for commit and click on Commit button.
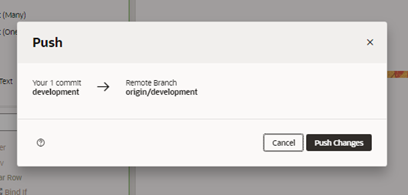
Step 4: After commit, select the Push option from dropdown.
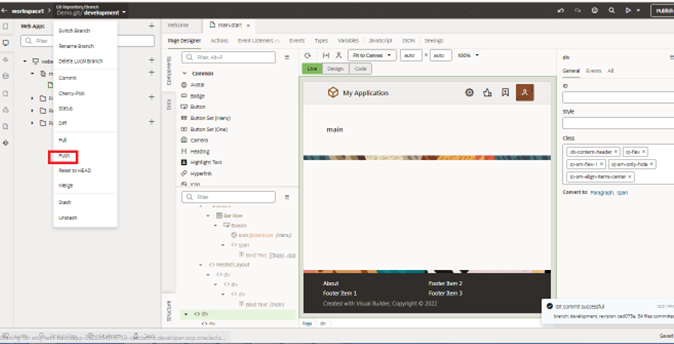
Step 5: This action will push the changes to remote branch in GIT.
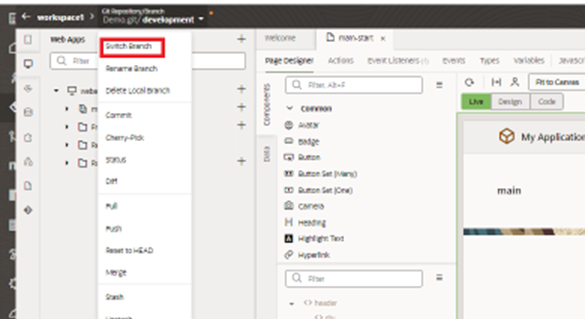
Switch Branch in Workspace
Step 1: Click on arrow on header near branch name.
Step 2: Click on Switch Branch option from dropdown to switch to a new/old branch.
Step 3: Select Branch. If you want to create a new branch using a Base branch then check New Branch from selected checkbox and enter new branch name.
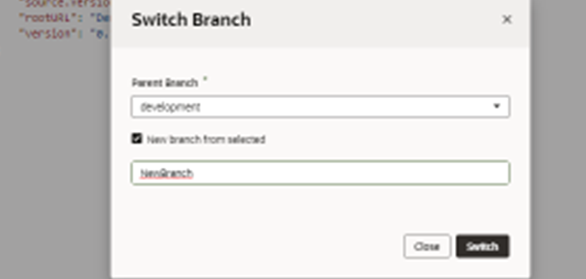
Step 4: Click Switch.
Create New Branch in Git
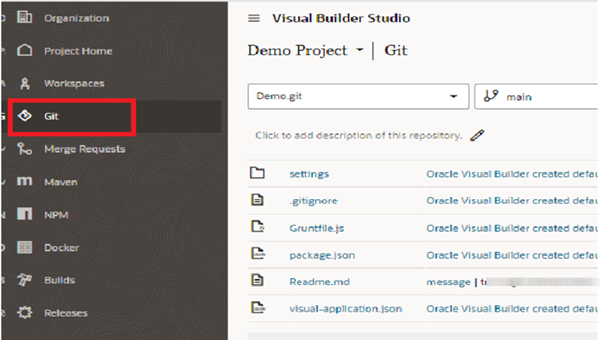
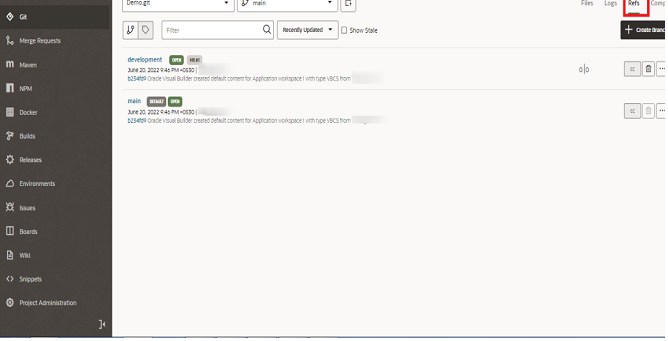
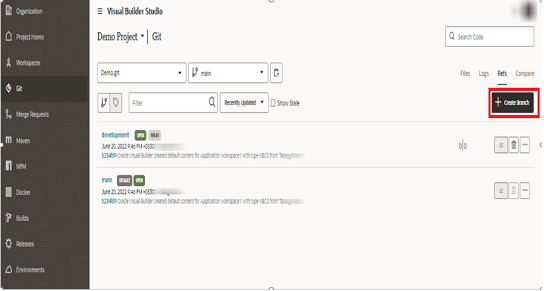
Step 1: In the left navigator, click Git.
Step 2: On the right hand side, click on Refs.
Step 3: Click +Create Branch.
Step 4: Enter Branch Name and select Base. Check the private branch checkbox.
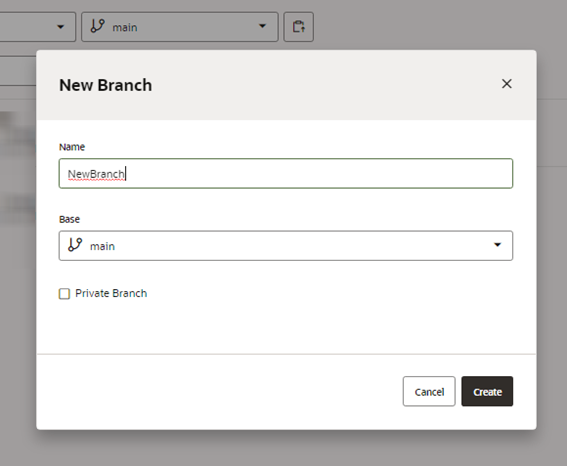
Step 5: Click Create.
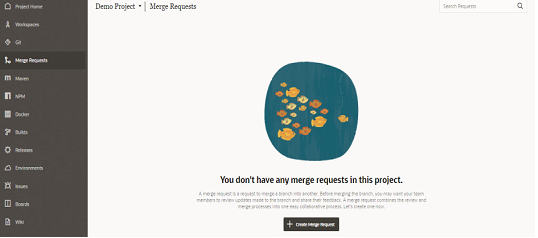
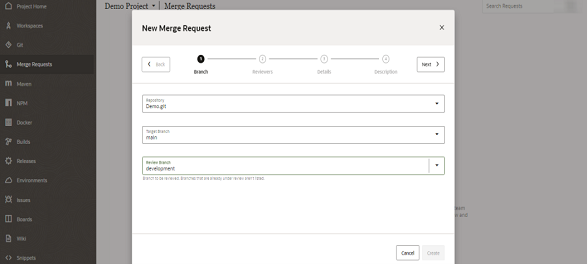
Create Merge Requests
Step 1: In the left navigator, click Merge Requests.
Step 2: Click +Create Merge Request.
Step 3: Select the Repository.
Step 4: Select Target Branch and Review Branch and click next.
Step 5: Select Reviewers to review the merge request. Click next.
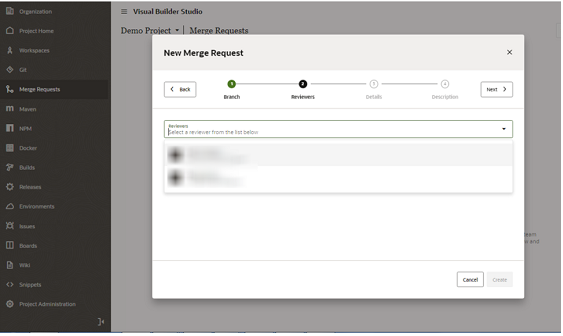
Step 6: Click Create.
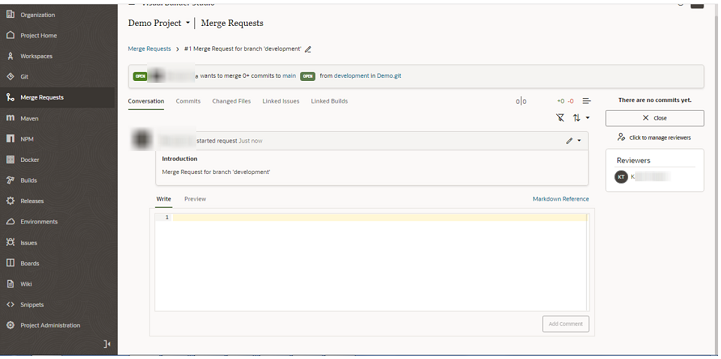
Note: On creation of a new merge Request , a system generated notification will be sent to reviewers. Reviewers can approve/reject and merge the changes.
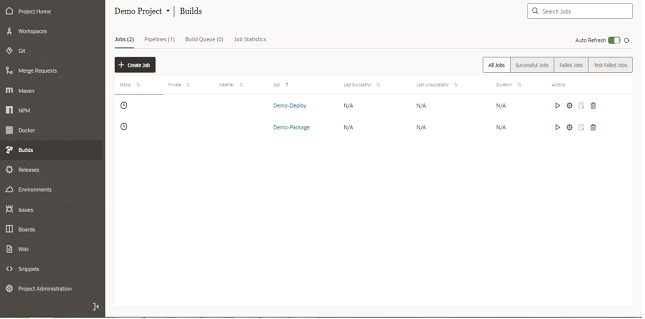
Create Build Jobs
After uploading the source code files to Git repositories, you can use the Builds page to create and configure build jobs and pipelines, run builds and generate artifacts.
What Are Jobs and Builds?
A job is a configuration that defines your application’s builds. A build is the result of a job’s run.
A job defines where to find the source code files, how and when to run builds, and the software and environment required to run builds. When a build runs, it packages application archives that can be deployed to a web server. A job can have hundreds of builds, each generating its own artifacts, logs, and reports.
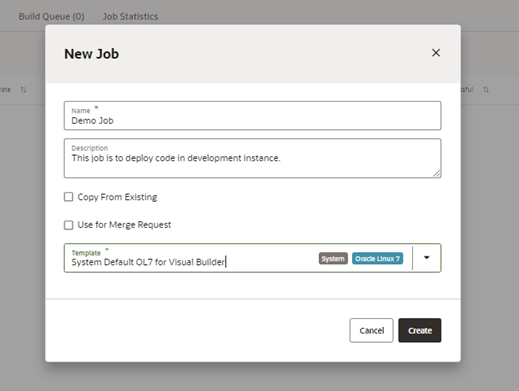
Create a blank job
- In the left navigator, click Builds.
- In the Jobs tab, click + Create Job.
- In the New Job dialog box, in Name, enter a unique name.
- In Description, enter the job’s description.
- In Template, select the build executor template.
- Click Create.
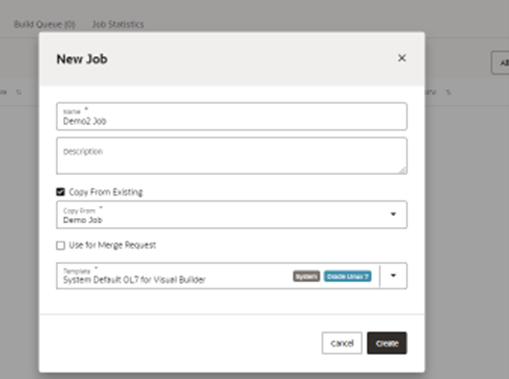
Copy an Existing Job
- In the left navigator, click Builds.
- In the Jobs tab, click + Create Job.
- In the New Job dialog box, in Name, enter a unique name.
- In Description, enter the job’s description.
- Select the Copy From Existingcheck box.
- In Copy From, select the source job.
- In Template, select the build executor template.
- Click Create.
Configure a Job
- To open a job’s configuration page, go to the Jobs tab on the Builds page and click the job’s name. In the Job Details page, click Configure.
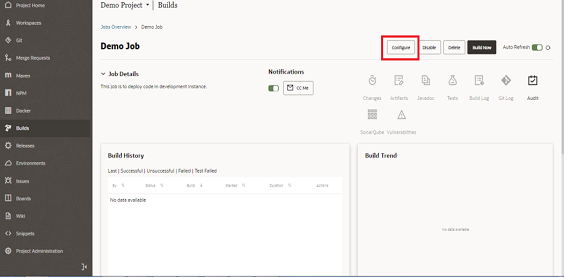
Run Build Jobs
- Open the job’s details page and click Build Now.
- You can also run a job’s build from the Jobs Overview page. In the jobs table, click Build Now Build Now.
Branch Protection
What does the branch protection do?
Git Branch Protection feature enforces that the collaborators on the Git repository cannot commit changes to a branch by bypassing the set development process.
Who has access to branch protection?
The only one allowed to configure branch protection for a Git repository is the user with the Project Owner role for the project in which the Git repository was created.
Where can we find the branch protection option?
To access this feature, select the Project Administration tab on the left navigation bar and then select the Branches tile in Developer Cloud. This feature is accessible to a Project Owner, not to a Project Member.
Branch Protection Settings – Getting Started
- In the left navigator, click Project Administration.
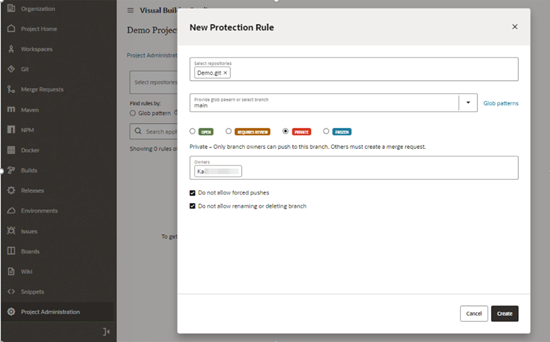
- Click +Rule.
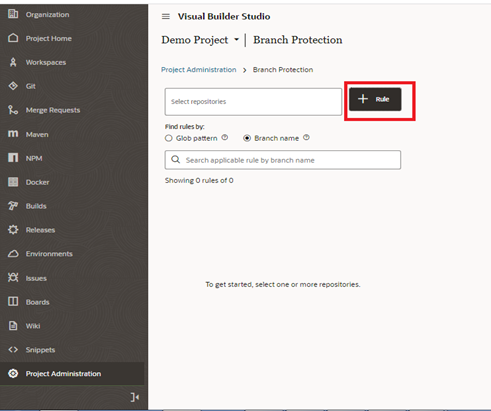
- Select repository and branch name.
- Select branch protection patterns.
- Click Create.
So, this is how you implement CI/CD using Visual Builder Studio.
If you liked the blog or would like to know more details, please write to us at [email protected] or let us know in the comments.