Enterprises running Oracle Integration Cloud (OIC) frequently need a secure, scalable place to stage files before they are processed by downstream applications — invoices for SmartAP automation, FBDI import files for Oracle Fusion ERP, EDI documents, or general archival data. Oracle Cloud Infrastructure (OCI) Object Storage is Oracle’s fully managed, internet-scale object store, and configuring it as an adapter inside OIC lets you move files between the two services without introducing any external middleware or a third-party FTP layer.
This guide walks you through the complete configuration process for connecting Oracle Integration Cloud with an OCI Object Storage bucket.
Architecture Overview
Before diving into configuration, it helps to understand how the two connection patterns differ. A Pre-Authenticated Request (PAR) URL is a time-limited, unauthenticated endpoint — ideal for simply PUT and GET operations where you don’t want to manage IAM signature headers. Role-based (IAM) authentication, by contrast, signs every request with a service user’s API key and is the pattern OIC uses for connections that need to trigger integrations or invoke other OCI resources. Most implementations use PAR for straightforward file transfer and reserve IAM-based trigger/invoke connections for scenarios that need tighter control and auditability.
Part 1 — Setting Up the OCI Object Storage Bucket
Start by provisioning the bucket that will act as the staging area for files exchanged with OIC.
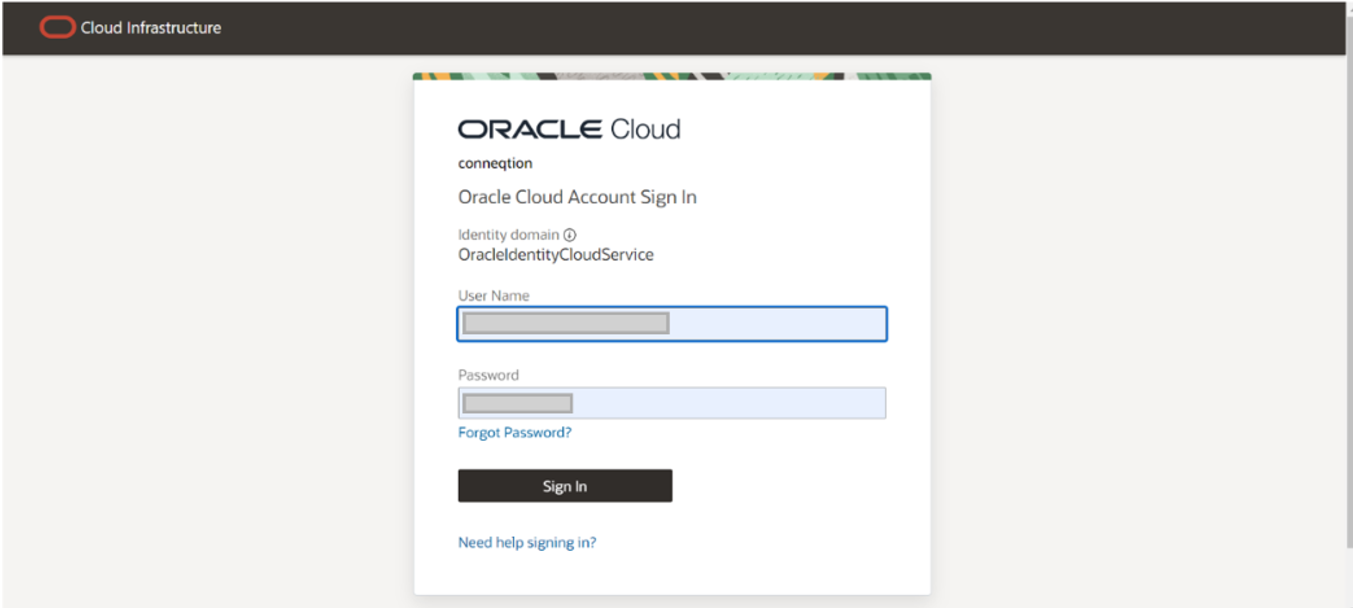
Step 1: Log In to the OCI Console your tenancy credentials.
Step 2: Navigate to Object Storage
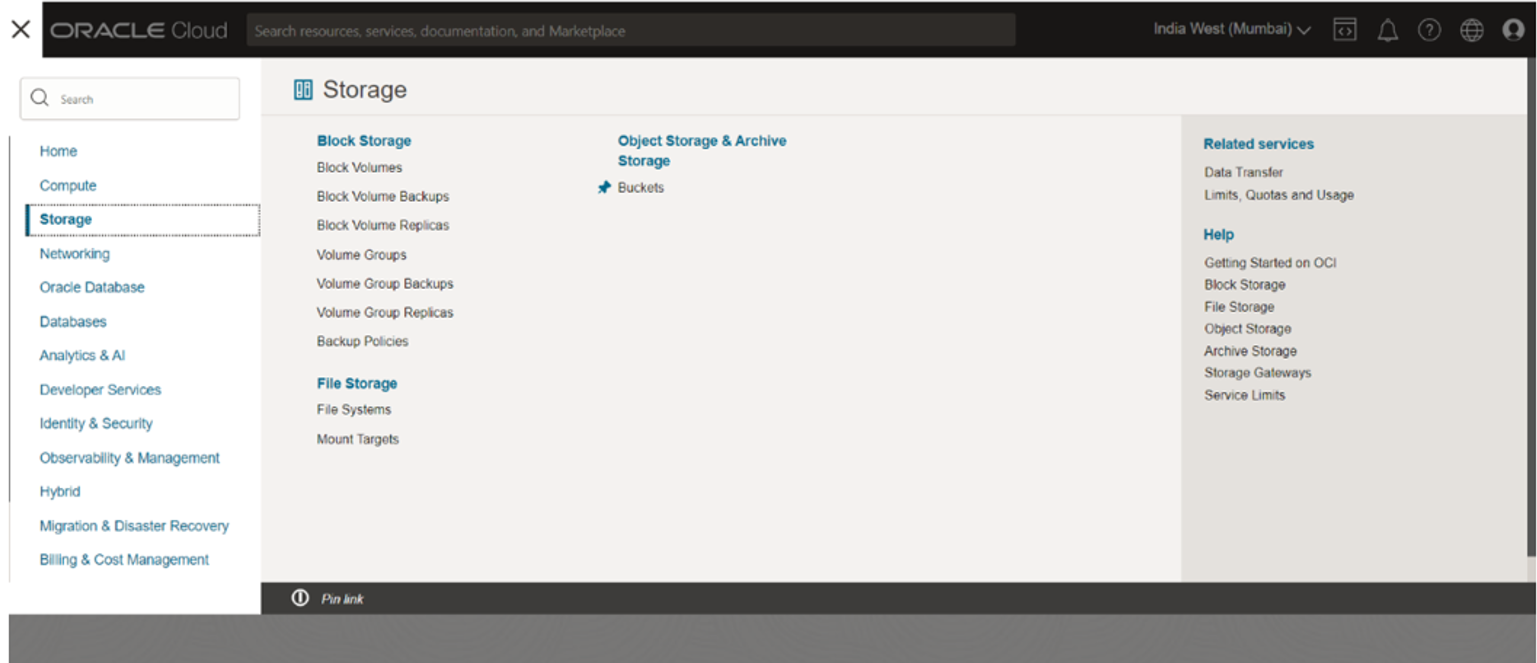
From the OCI Console navigation menu, open Storage → Object Storage. This is where all buckets for the tenancy are managed.
Step 3: Create a Bucket
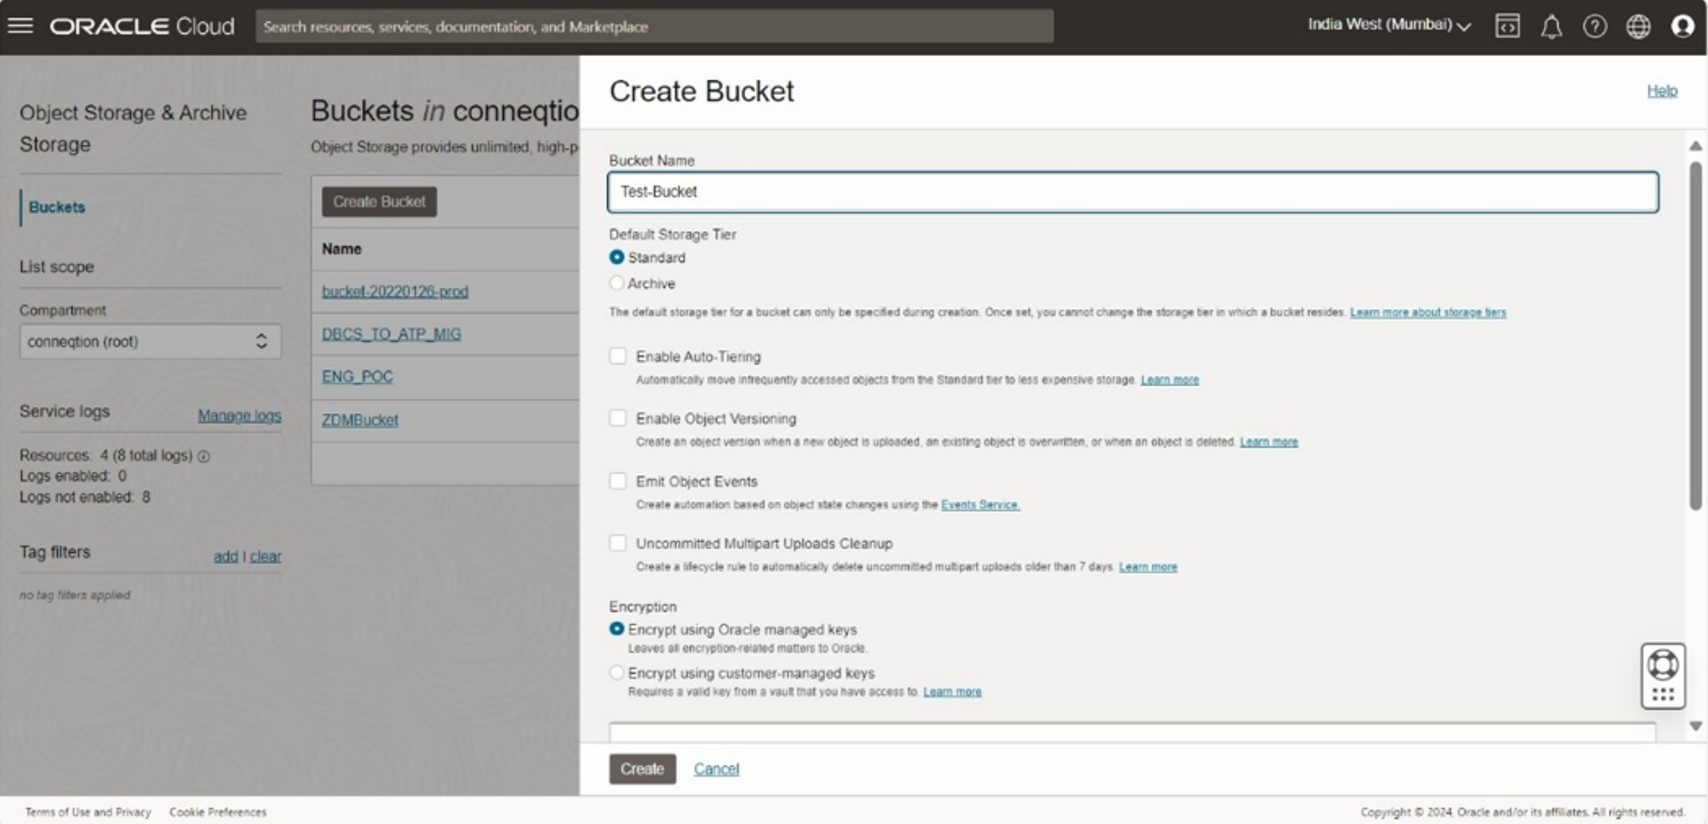
Click -> Create Bucket and give it a descriptive name. This bucket will hold the files and objects that OIC reads from and writes.
Part 2 — Creating the Object Storage Connection in OIC
With the bucket in place, the next step is to configure the connection details inside OIC so the integration can reach the bucket.
Step 1: Configure the Connection Details in OIC
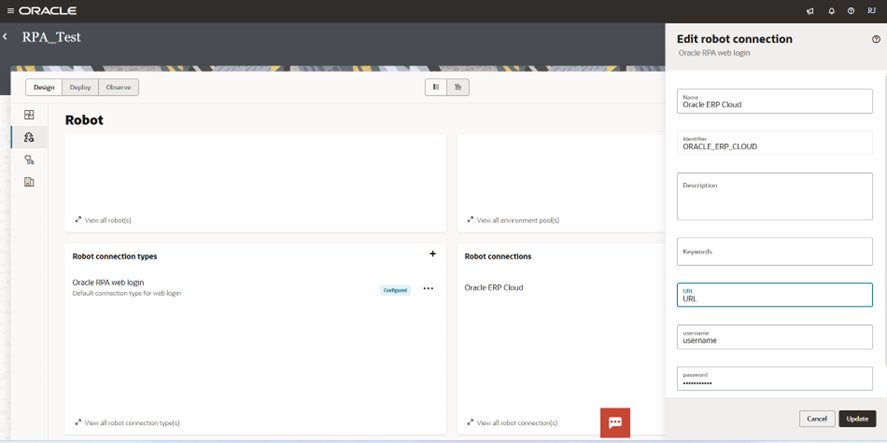
In the OIC Connections section, create a new connection and supply the Object Storage endpoint, namespace, and bucket details shown below.
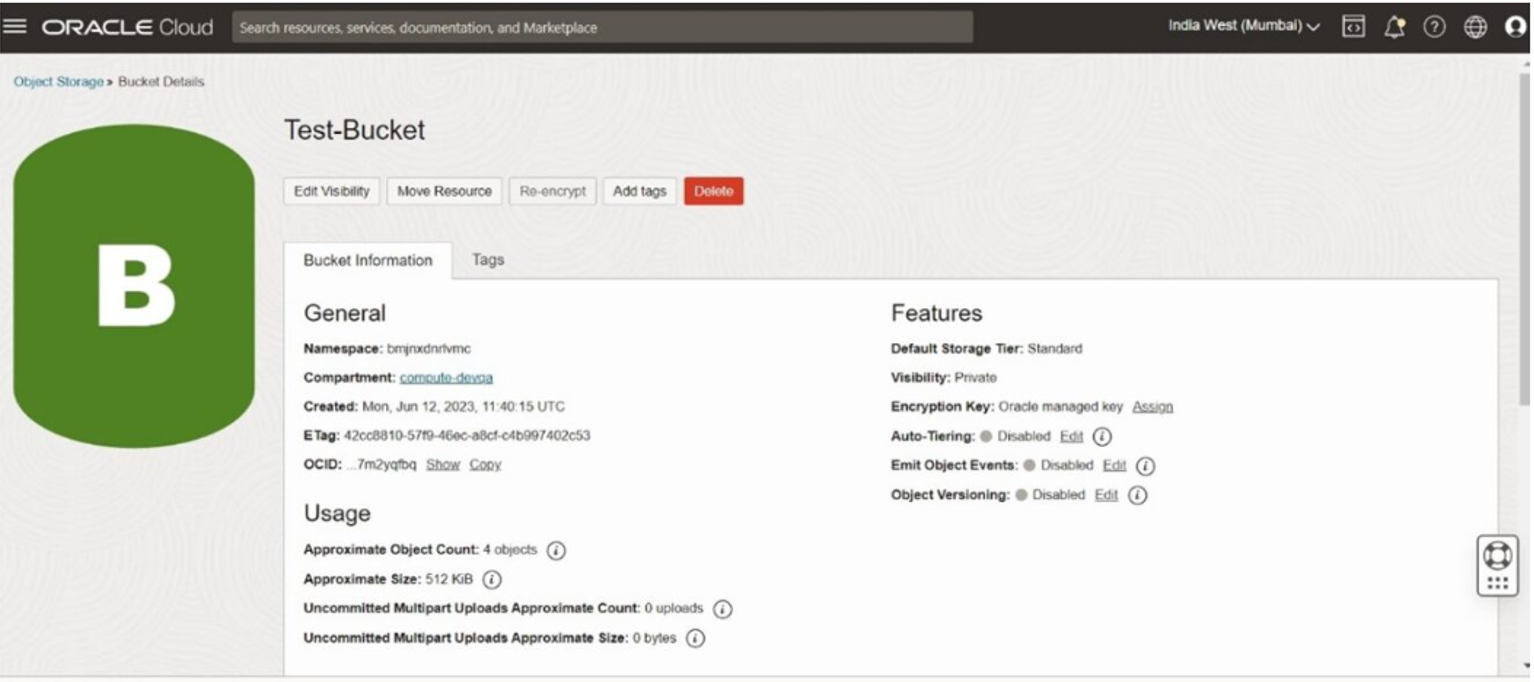
This connection becomes the reusable endpoint that any integration flow in your OIC instance can reference when it needs to read or write files to this bucket.
Part 3 — Generating a Pre-Authenticated Request (PAR) URL
A PAR URL lets OIC perform PUT and GET operations against the bucket without needing full IAM signature authentication for every call.
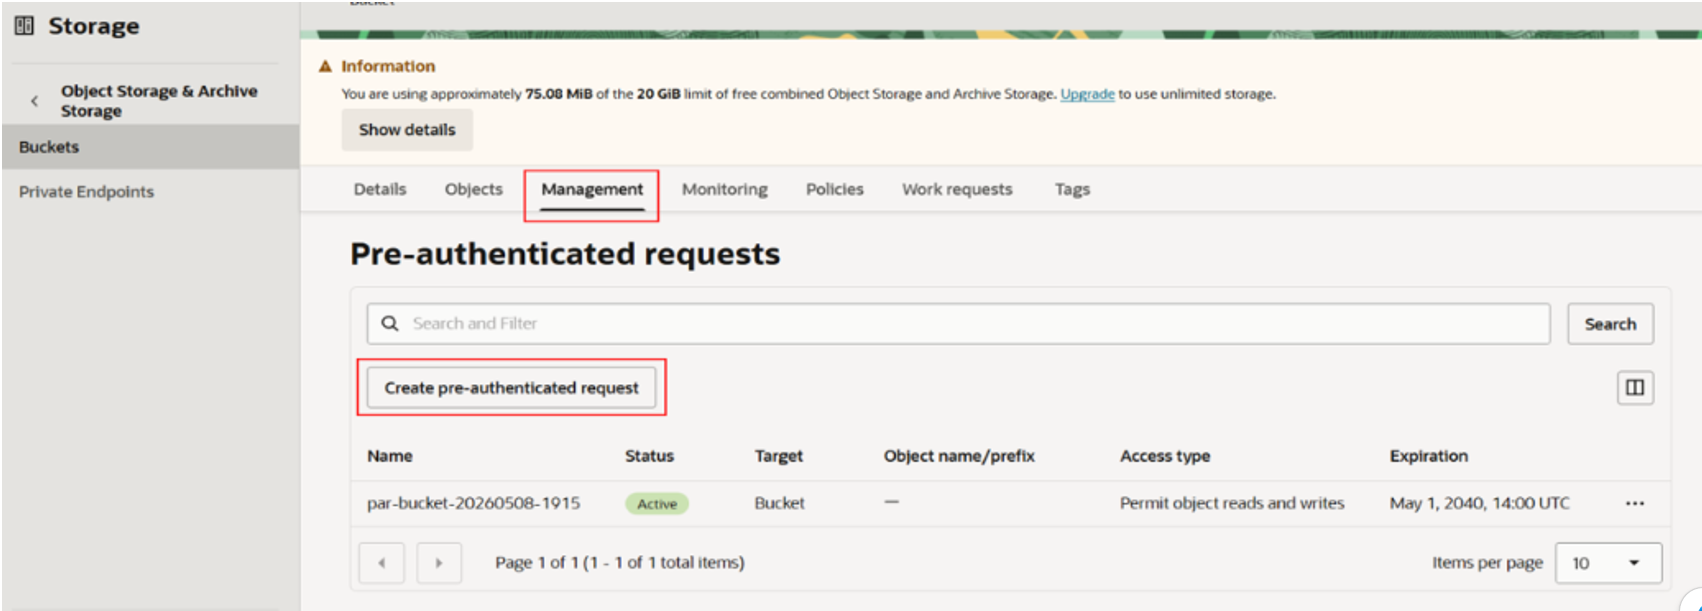
Step 1: Open the Bucket’s Management Tab
Inside the bucket, open the Management tab and select Pre-Authenticated Requests → Create Pre-Authenticated Request.
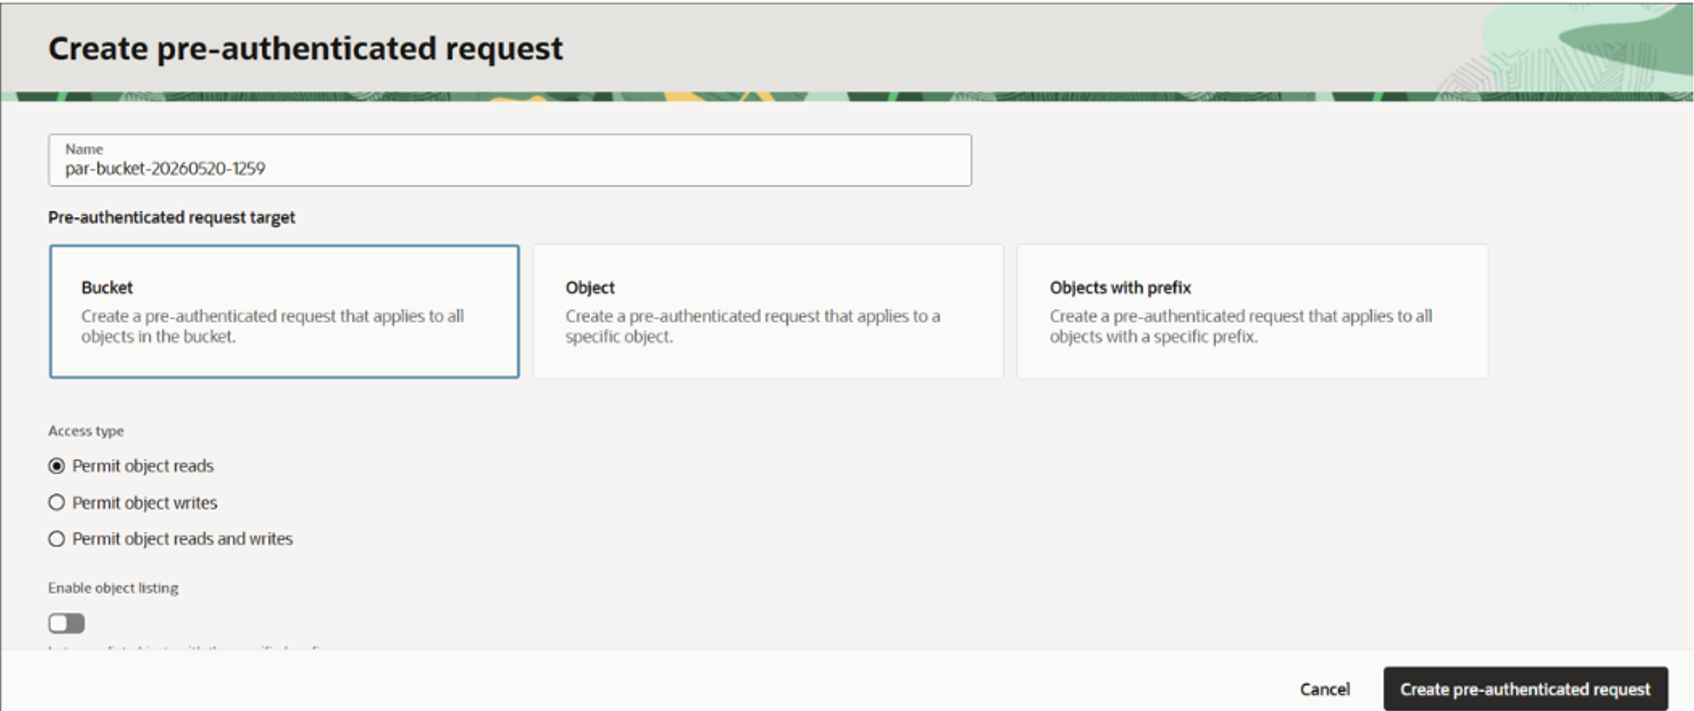
Step 2: Generate and Copy the PAR URL
Choose the appropriate access type and generate the request. The resulting URL is what OIC uses to perform PUT or GET operations.
Creating connection in OIC with Role trigger and invoke
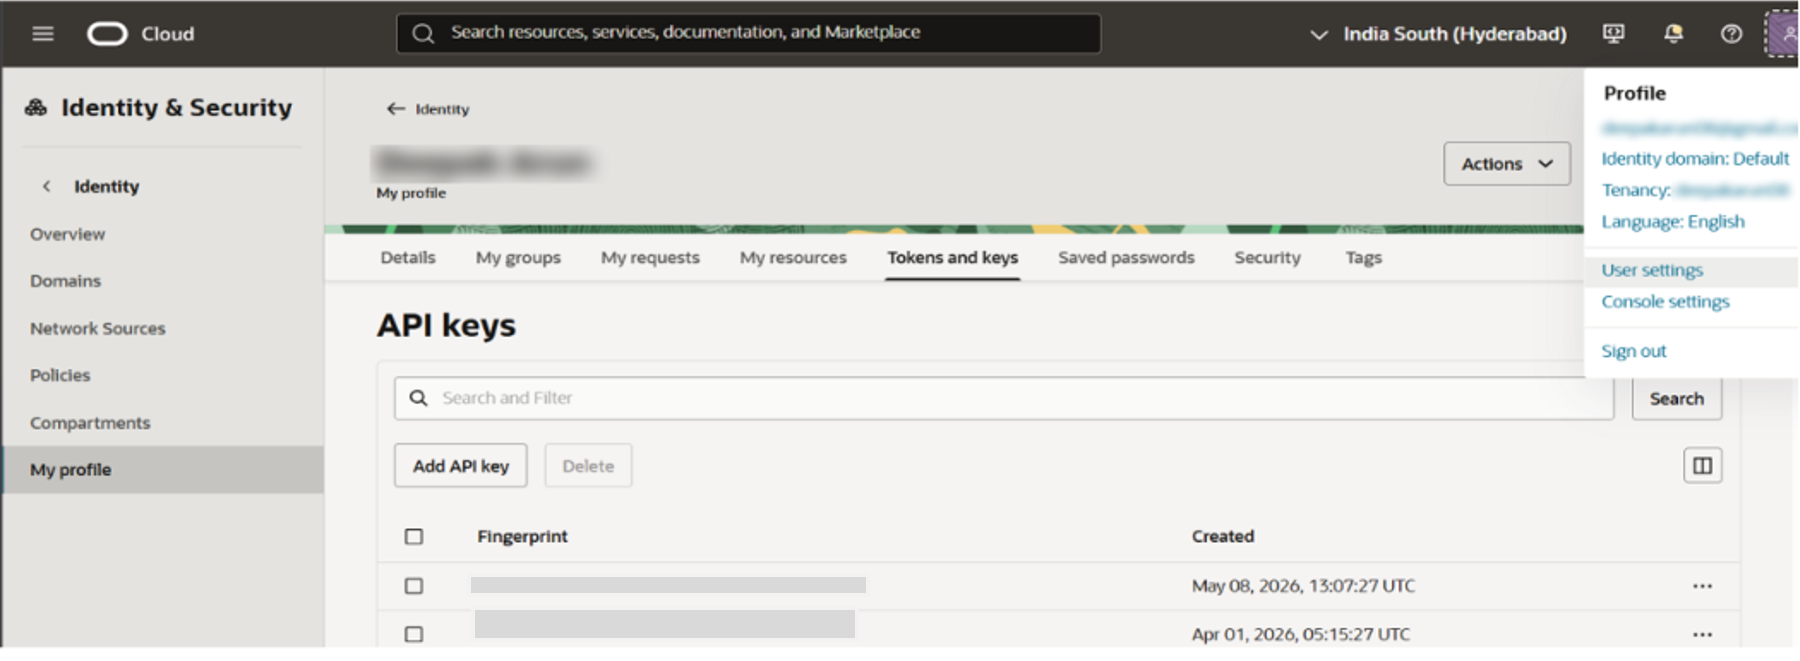
Navigation-> identity and Domain -> Domain -> select the domain where service user is there -> select the service user -> Keys and tokens.
Part 4 — Configuring Role-Based Authentication for Trigger and Invoke Connections
Connections that need to trigger an OIC integration or invoke another OCI resource require proper IAM authentication rather than a PAR URL. This involves locating the service user’s keys and tokens and wiring them into the OIC connection.
Step 1: Navigate to the Identity Domain
In the OCI Console, go to Identity & Security → Domains, select the domain that contains the relevant service user, then open that user’s profile.
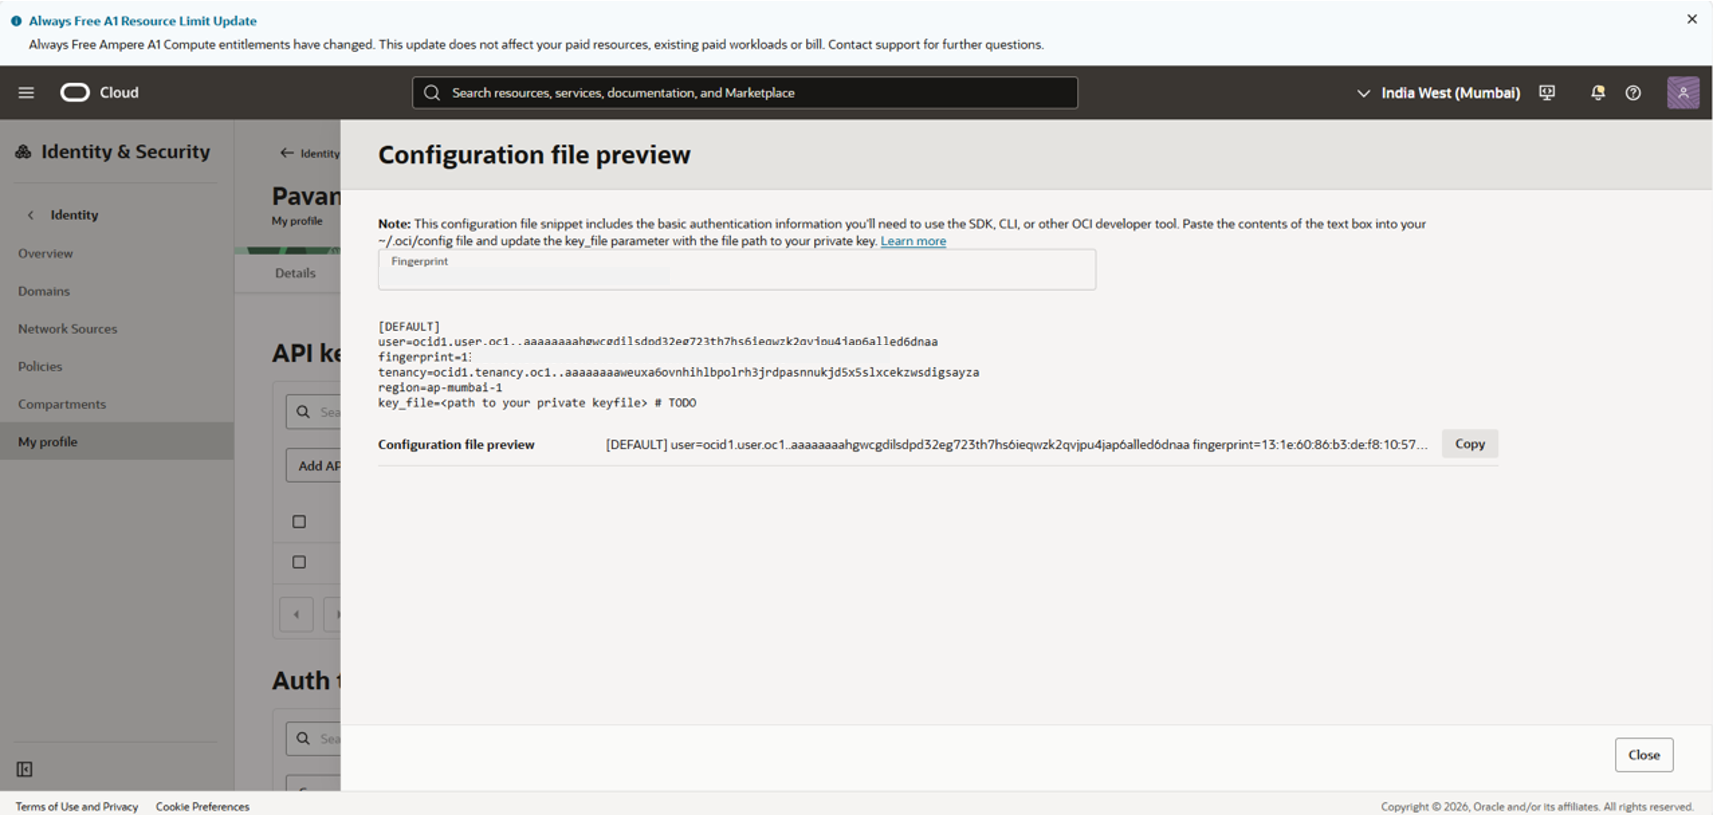
Step 2: Open Keys and Tokens
On the service user’s page, select Keys and Tokens. This is where the API signing key pair used for authenticated requests is managed.
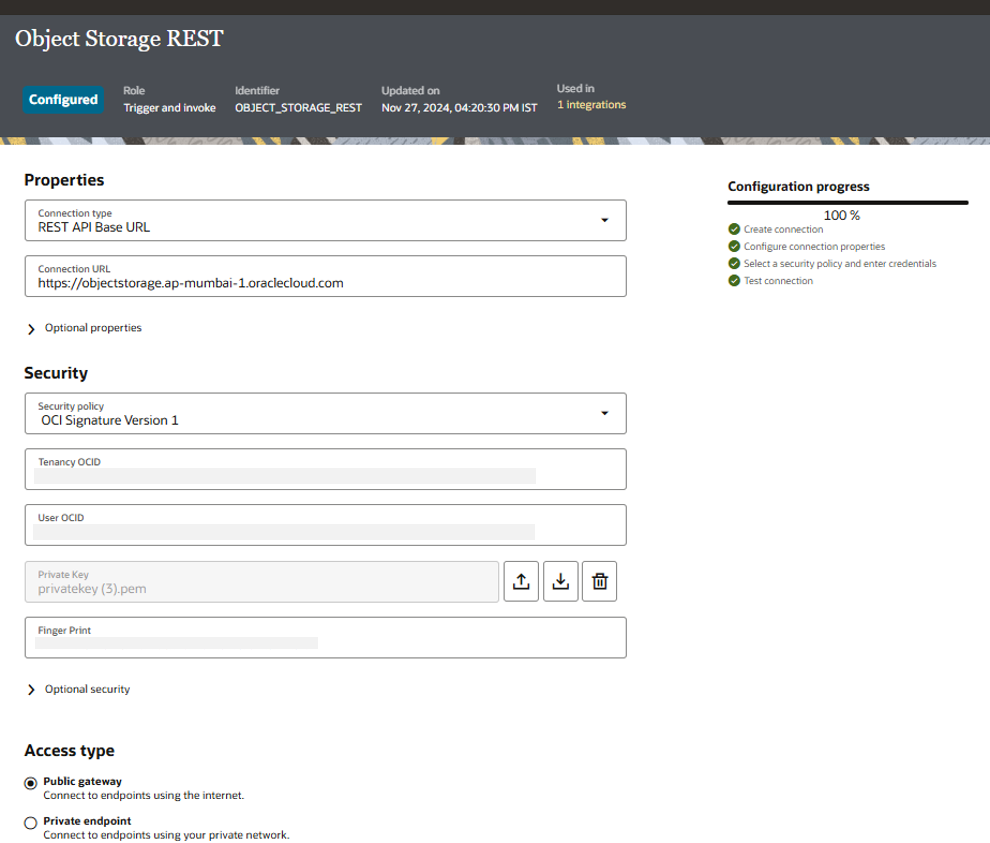
Step 3: Add or Generate an API Key
Generate a new API key pair. OCI will return a Fingerprint that, together with the private key, is required to complete the connection in OIC.
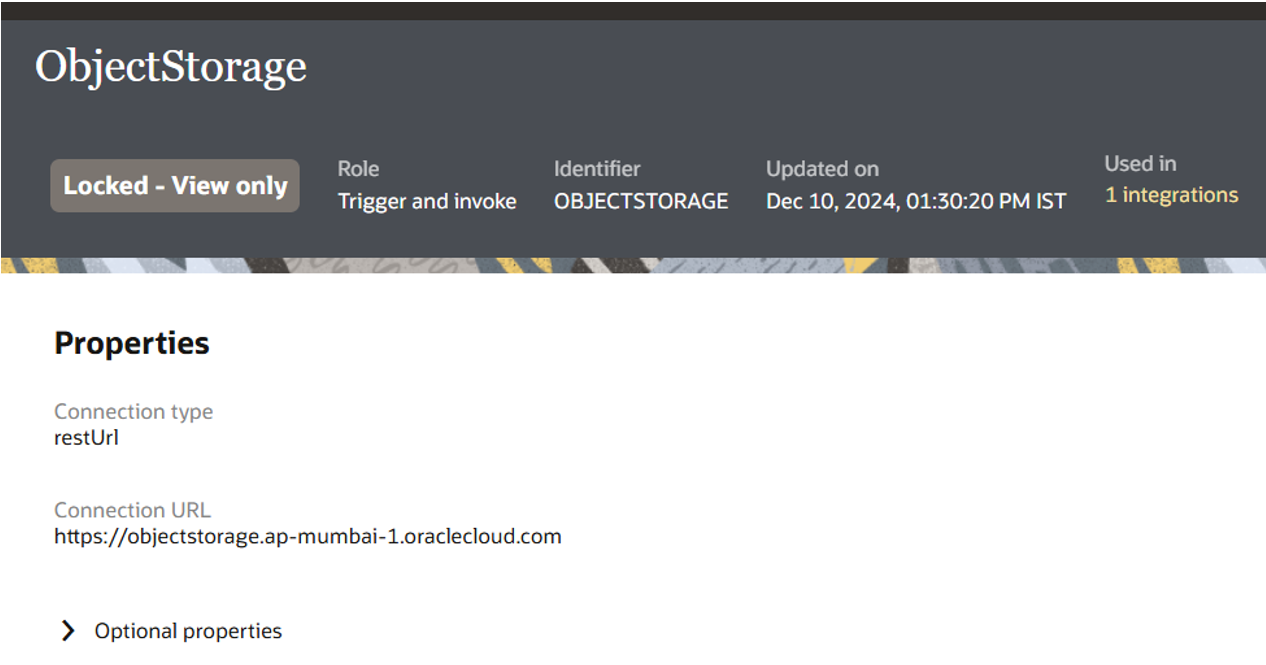
Step 4: Add the Authentication Details in OIC
Back in the OIC connection configuration, supply the Tenancy OCID, User OCID, Private Key, and Fingerprint gathered in the previous steps.
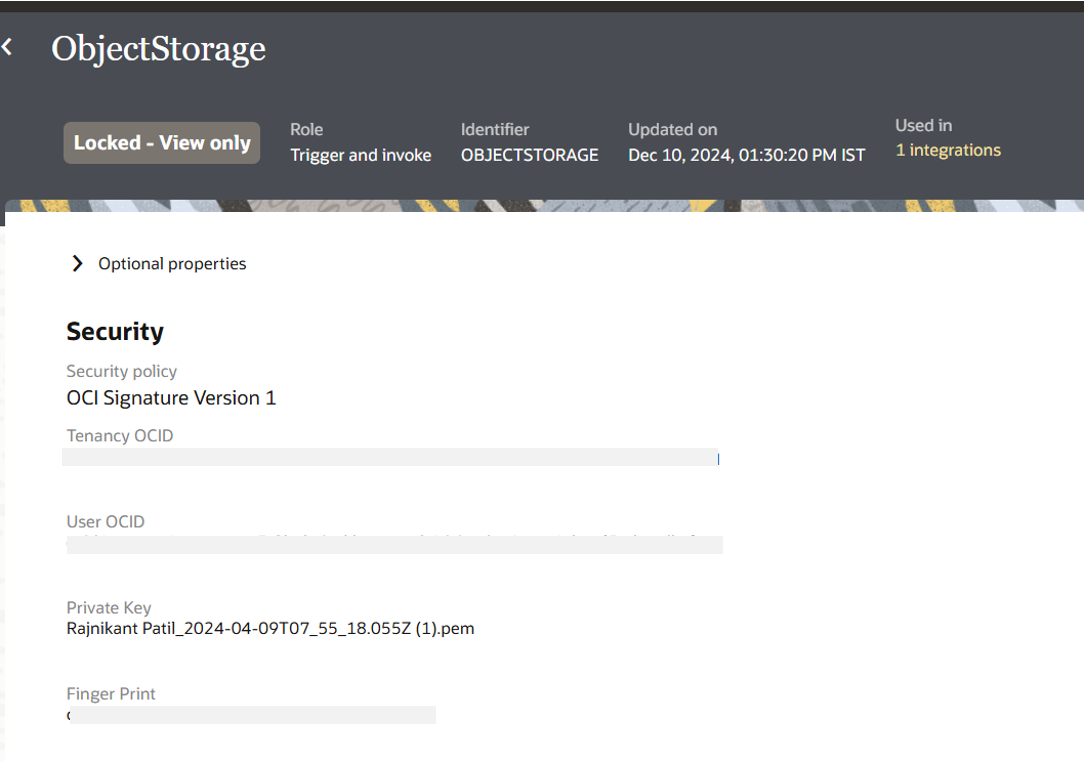
Part 5 — API Endpoints for GET and PUT Operations
Once the connection and authentication are configured, files are read from and written to the bucket using standard OCI Object Storage REST endpoints.
- API Used to GET Files (method: “GET”)
- API Used to Store Files (method: “PUT”)
https://objectstorage.uk-london-1.oraclecloud.com/n/namespace_name/b/Test-Bucket /o/SmartAP/{invoice_id}/{file_name}
| Endpoint | https://objectstorage.uk-london-1.oraclecloud.com — the OCI Object Storage endpoint for the UK London region. | |
| namespace_name | The unique namespace of the OCI tenancy. | |
| Test-Bucket | The name of the target bucket created in Part 1. | |
| /o/ | Indicates the object (file) path within the bucket. | |
| SmartAP/{invoice_id}/{file_name} | The folder structure and actual file location — for example, the SmartAP invoice automation pattern used by Conneqtion’s Oracle AP solutions. | |
Conclusion:
You have now configured a complete, production-ready connection between Oracle Integration Cloud and OCI Object Storage — from bucket creation and PAR-based file transfer to IAM-authenticated trigger and invoke connections. This setup runs entirely within the Oracle Cloud ecosystem, with no external middleware, making it well suited to organizations that want to keep file staging, invoice automation, and archival data inside their OCI tenancy.
This pattern is easily extensible: the same bucket and connection can support multipart uploads for larger files, event-driven triggers using OCI Events and Notifications when a new file lands in the bucket, or bulk folder-based processing for high-volume SmartAP invoice runs. If you have any questions about configuring the Object Storage adapter for your own OIC environment, reach out to the Conneqtion Group team.