Problem: Loading Data in ATP from BIP using OIC & Table Types.
About ATP: Autonomous transaction processing is made in an optimized manner to run transactional, analytical and batch workloads concurrently. With ATP database developers easily, rapidly and cost-efficiently create and deploy applications without affecting to its ACID properties.
Prerequisites:
1) ERP Cloud instance access and BI developer role to create BIP report.
2) OIC instance access with User having Service Developer role, Service Monitor, Service invoker role.
3) ATP database connection with wallet file, user name and password and ATP wallet password.
Solution is divided in to 4 parts.
1) Creation of a BIP Report.
2) Configure ATP connection in the DataBase.
3) Creation of Table, record type, table type and plsql procedure for inserting data in ATP database.
4) Creation of an OIC integration for invoking BIP and Loading Data in ATP from BIP using OIC & Table Types.
PART1: Creation of BIP report.
Step:1 login to ERP cloud instance, navigate through TOOLSàREPORT AND ANALYTICSàBROWSE CATELOG
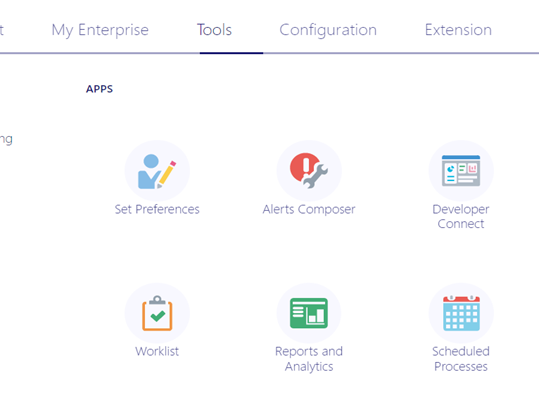

->CREATE -> DATAMODEL
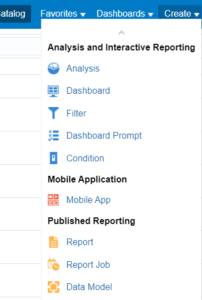
STEP:2 select data set SQL Type ,data source as application_db_fscm and write sql query and save the Data model
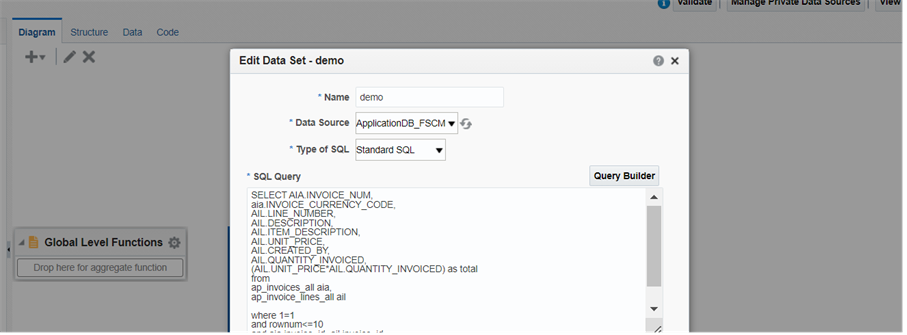
Data model should be saved inside shared folders in custom folder.
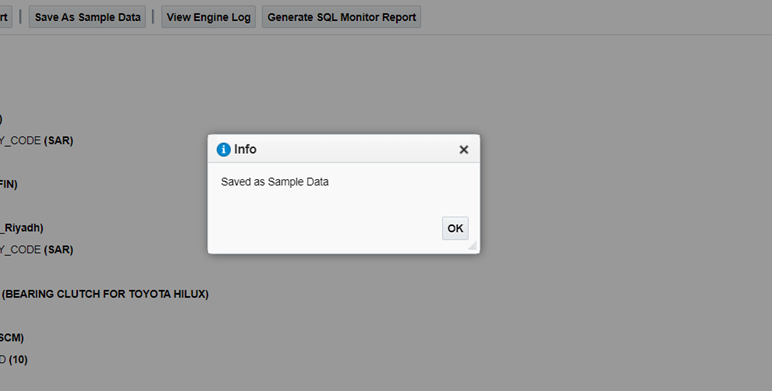
STEP:3 AFTER DM CREATION Save the DATA as sample data by clicking on save as sample data
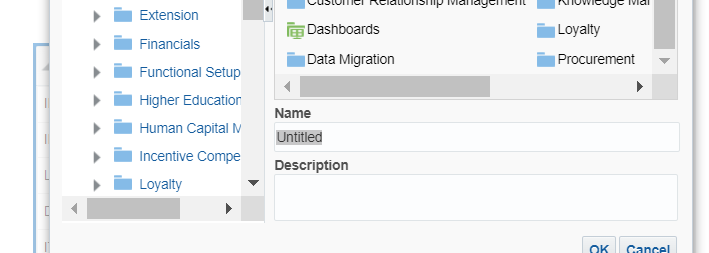
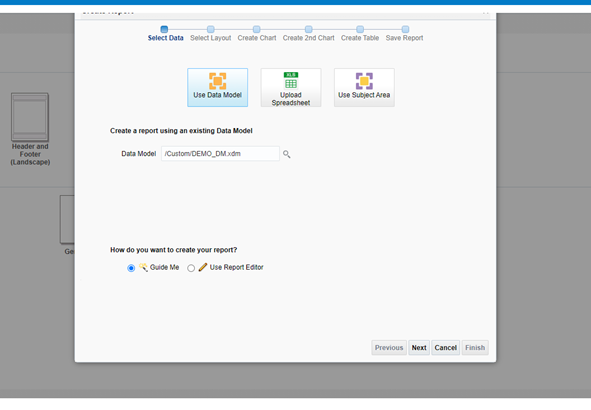
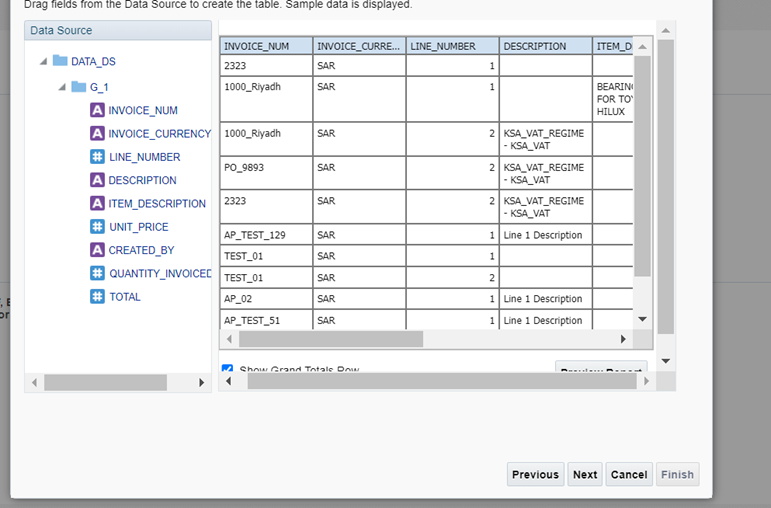
STEP:4 click on create report select Use Data Model -> DM name -> Next
Recommended For you: Difference Between eText AND RTF In Oracle BI Publisher
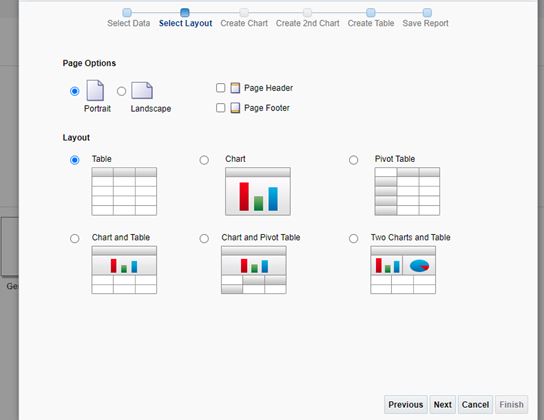
Select Page options and Layouts -> Next
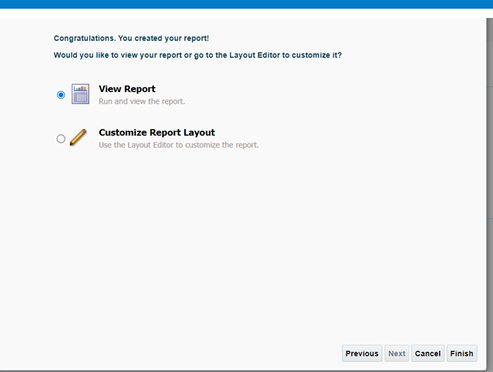
Drag and drop the columns required in the report and save the Report inside shared folder/Custom/ run the report and download it in csv format.
PART2: Creation of ATP database Connection
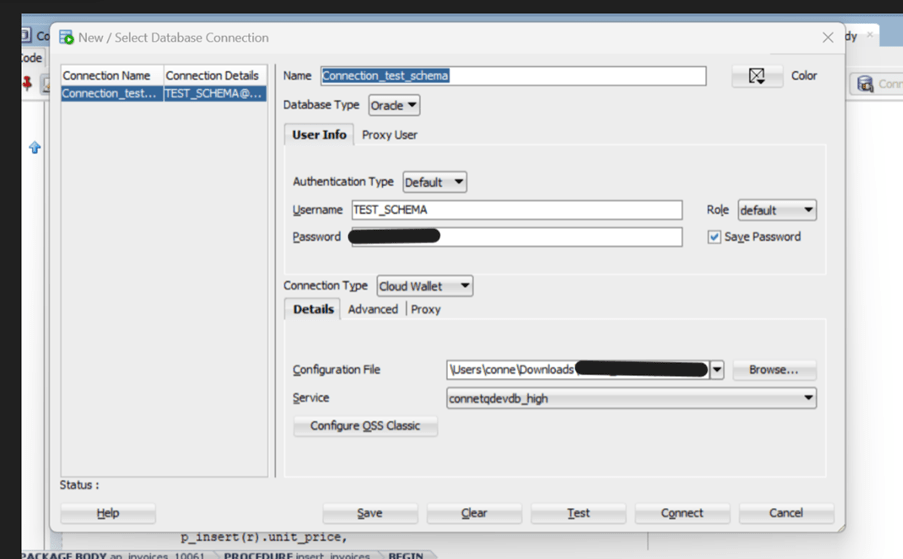
STEP:1 ATP Database connection configuration method is same as DB connection.
For creating ATP connection we require a ATP wallet file, password of wallet file ,and DB connection Username and password.(wallet file can be either client provided or can be downloaded from https://cloud.oracle.com).
Provide Name , user_name ,password, select connection type as Cloud wallet, in configuration file upload walletfile in .zip format. And provide the service name.
Test the connection and Save.
PART:3 Creation of Table, record type, table type and plsql procedure for inserting data in ATP database.
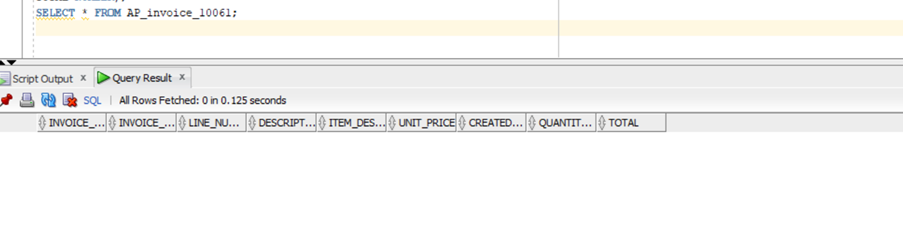
Step1: Table creation sample query
create table AP_invoice_10061(invoice_num number NOT NULL,
INVOICE_CURRENCY_CODE CHAR(6),
LINE_NUMBER NUMBER,
DESCRIPTION VARCHAR2(500),
ITEM_DESCRIPTION VARCHAR2(250),
UNIT_PRICE NUMBER(5,2),
CREATED_BY VARCHAR2(50),
QUANTITY_INVOICED VARCHAR2(50),
TOTAL NUMBER);
STEP:2 create record type and table type
record type
create or replace type “AP_invoice_10061” IS OBJECT(invoice_num number,
INVOICE_CURRENCY_CODE CHAR(6),
LINE_NUMBER NUMBER,
DESCRIPTION VARCHAR2(500),
ITEM_DESCRIPTION VARCHAR2(250),
UNIT_PRICE NUMBER(5,2),
CREATED_BY VARCHAR2(50),
QUANTITY_INVOICED VARCHAR2(50),
TOTAL NUMBER);
table type
create or replace TYPE “AP_invoice_10061_T”
AS TABLE OF AP_invoice_10061;
STEP:3 Create procedure for insertion in Table(Sample Procedue)
CREATE OR REPLACE PACKAGE BODY ap_invoices_10061 AS
PROCEDURE insert_invoices (
p_insert IN ap_invoice_10061_t,
p_status OUT VARCHAR2
) AS
BEGIN
FOR r IN 1..p_insert.count LOOP
INSERT INTO ap_invoice_10061 (
invoice_num,
invoice_currency_code,
line_number,
description,
item_description,
unit_price,
created_by,
quantity_invoiced,
total
) VALUES (
p_insert(r).invoice_num,
p_insert(r).invoice_currency_code,
p_insert(r).line_number,
p_insert(r).description,
p_insert(r).item_description,
p_insert(r).unit_price,
p_insert(r).created_by,
p_insert(r).quantity_invoiced,
p_insert(r).total
);
END LOOP;
COMMIT;
p_status := ‘SUCCESS’;
EXCEPTION
WHEN OTHERS THEN
NULL;
END insert_invoices;
END ap_invoices_10061;
PART:4 Creation of an OIC integration for invoking BIP and Loading Data in ATP from BIP using OIC & Table Types
Step:1 Create two Connections:-a) Soap Connection as trigger and invoke(or invoke) b) an ATP Connection as trigger and Invoke
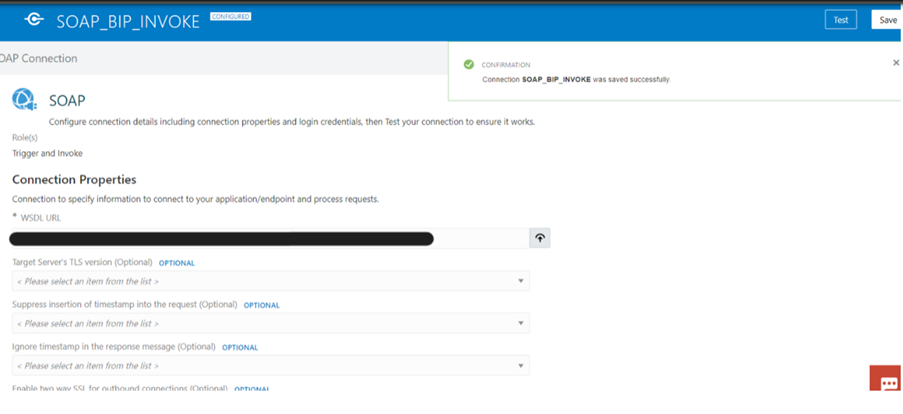
a ) create a Soap connection.
Log in to OIC/ICS instance. Navigatoràintegration -> Connections
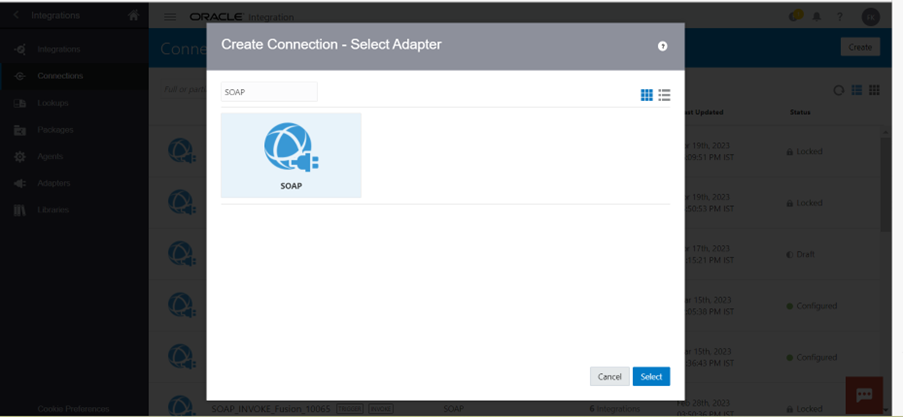
Provide Name and role and click on create
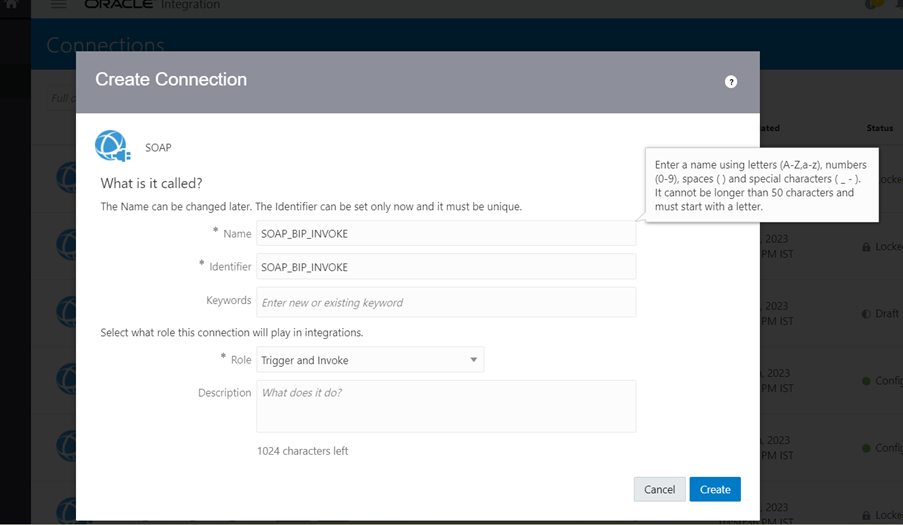
Provide the WSDL URL , provide security policy as Basic Authentication , username and password.

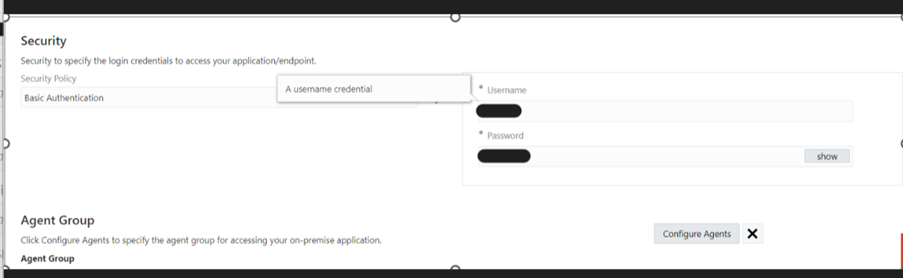
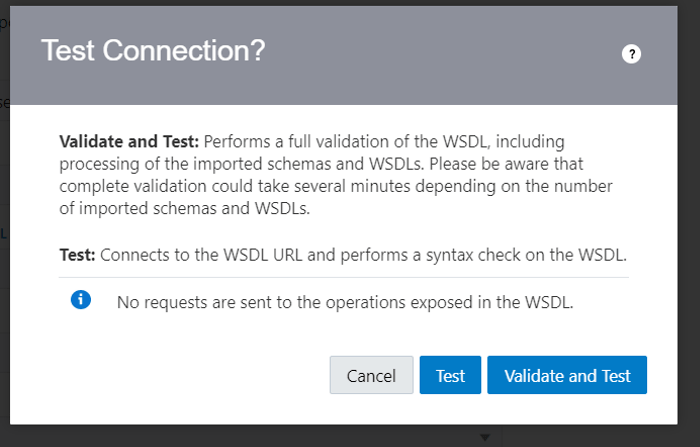
Click on validate and test, connection has been configured.
b) Create an OTP connection.

Provide name and role to the connection and create
Upload the wallet file, add security Policy as JDBC Over SSL, provide wallet file password and username and password for connection.
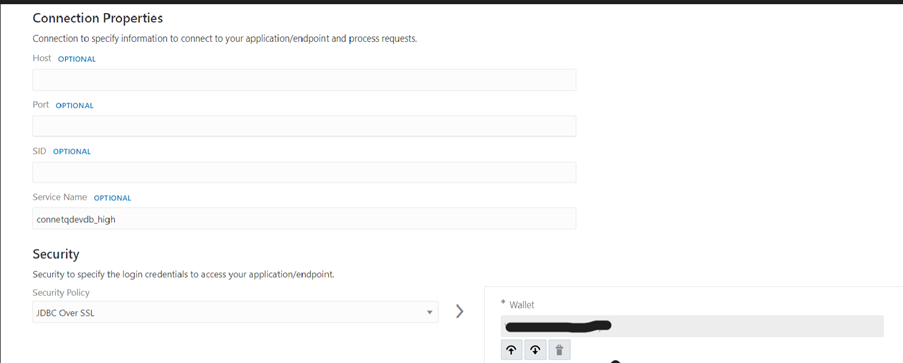
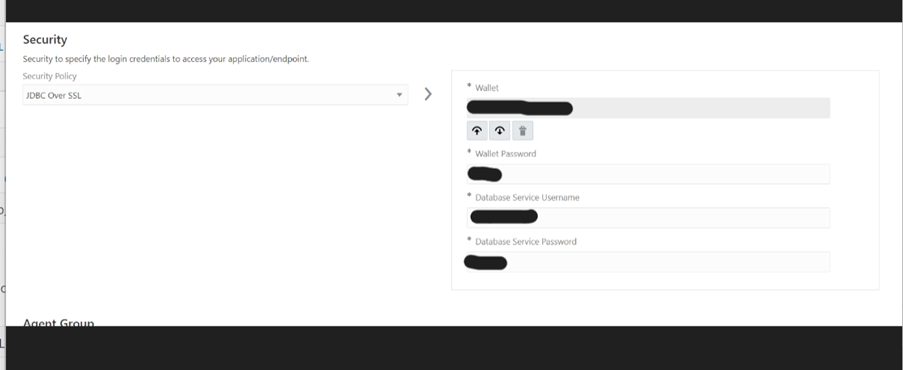
Test and save the connection

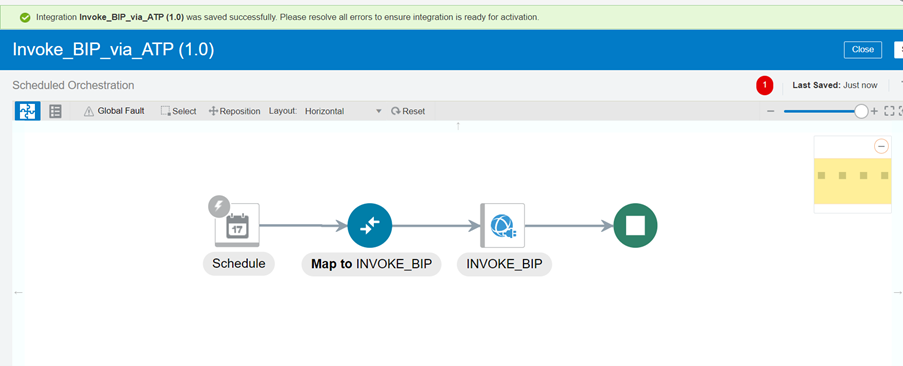
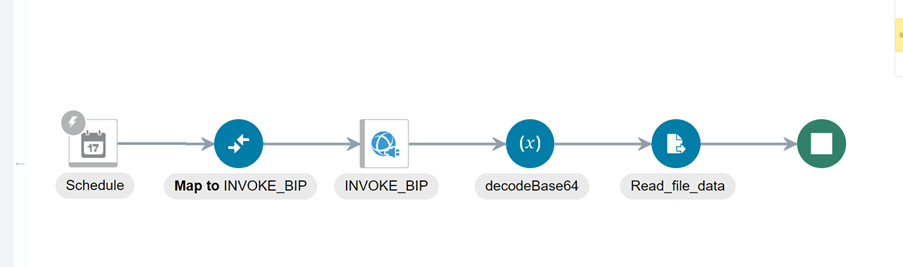
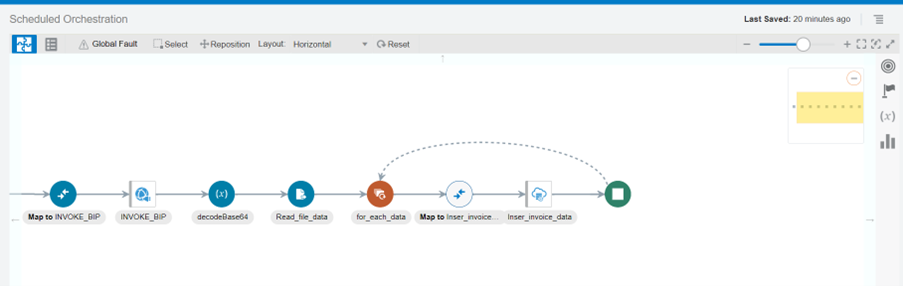
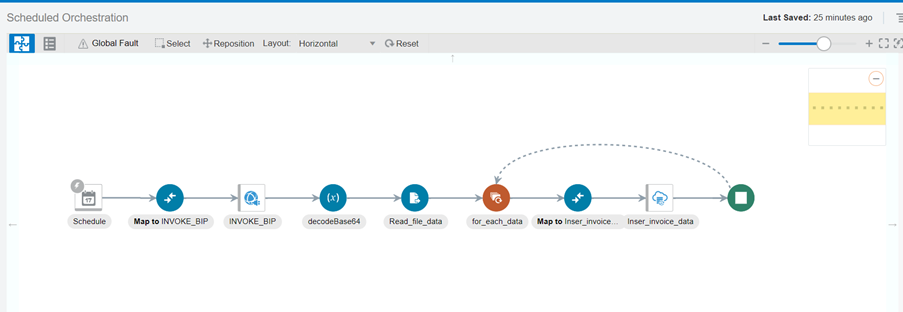
Step:2 Create an Schedule OIC integration Navigator -> integrationàcreate -> schedule Orchestration -> select
![]()
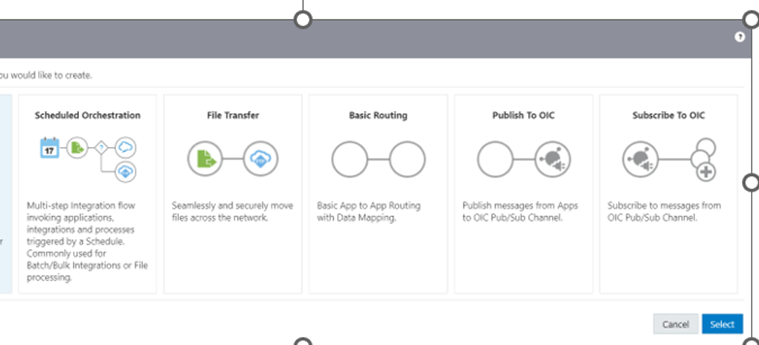
Step:3 Provide integration name and click on create.
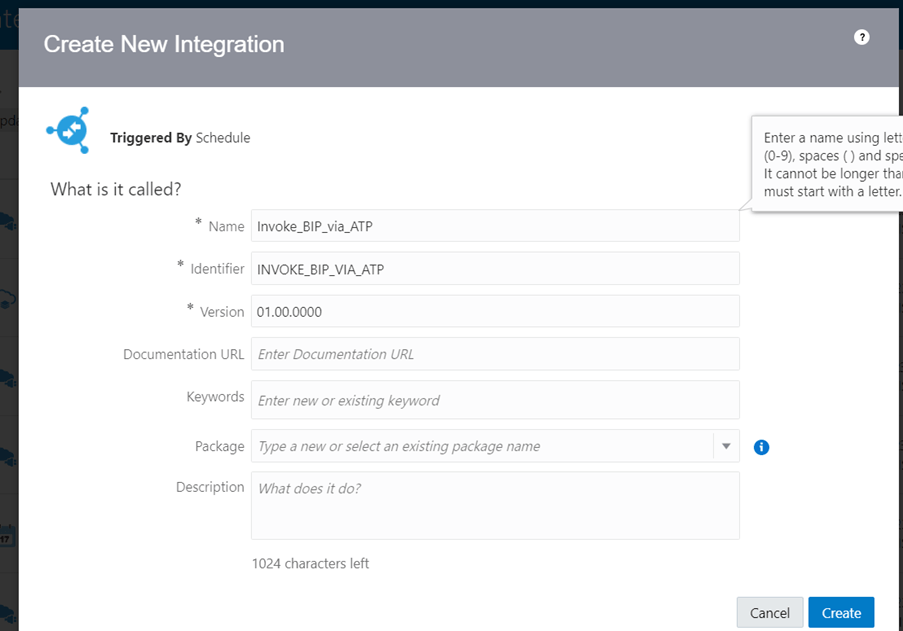
STEP:4 Select the SOAP connection for invoking BIP report from Oracle cloud, provide the name (ex:INVOKE_BIP)

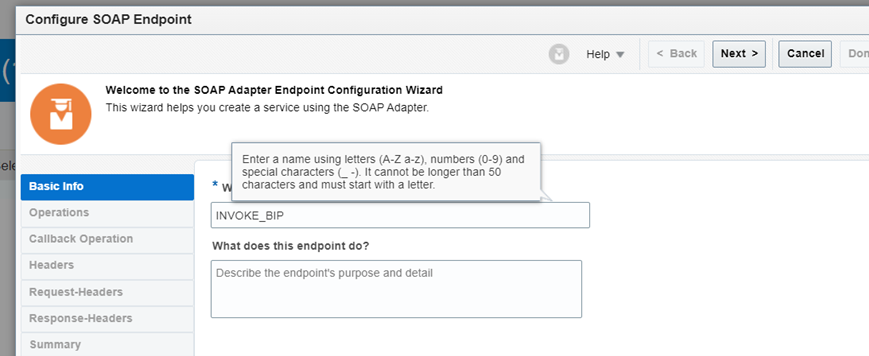
Select Operation as “runReport”

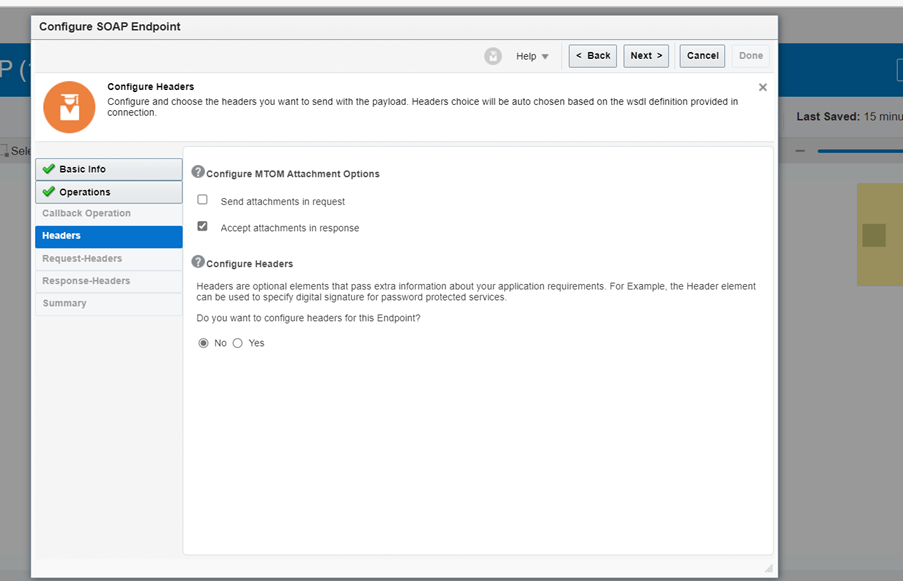
Click on checkbox “Accept attachments in response” -> Next -> Done
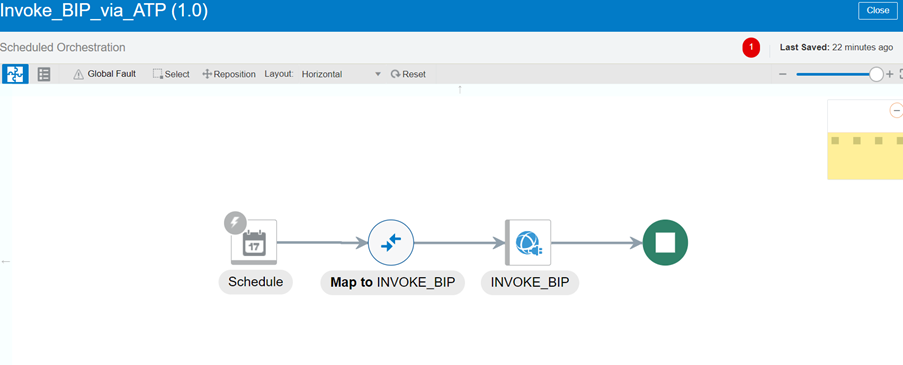
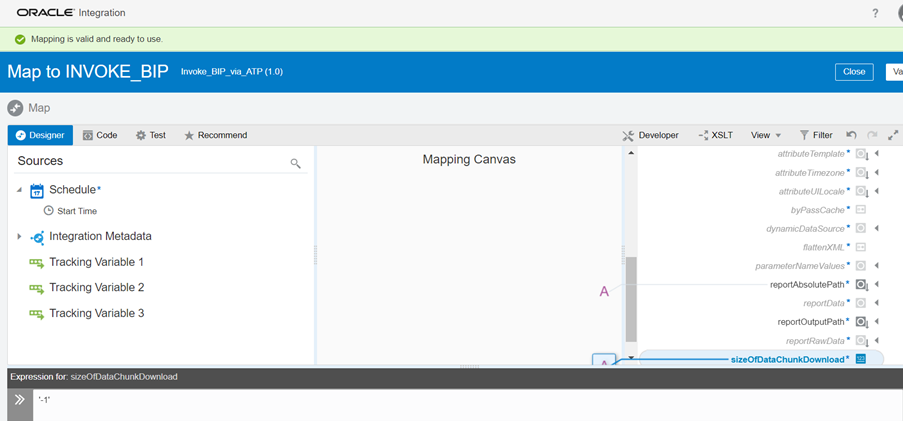
STEP:5 Add mapping in mapper provide report absolute path ,size of chunk data(-1)and attribute format(.csv).
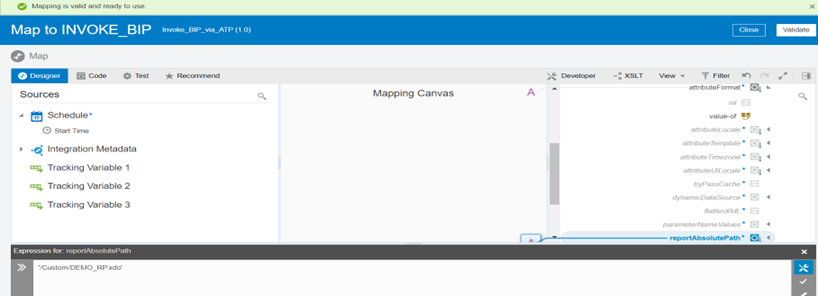
Validate and close the Mapper
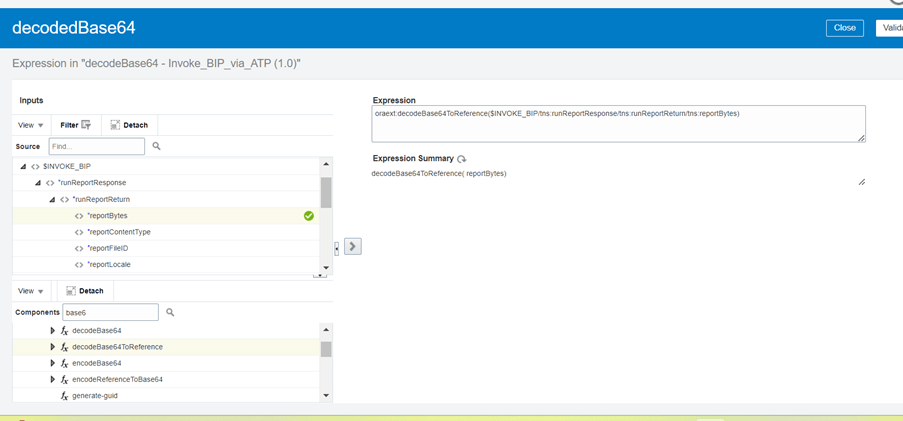
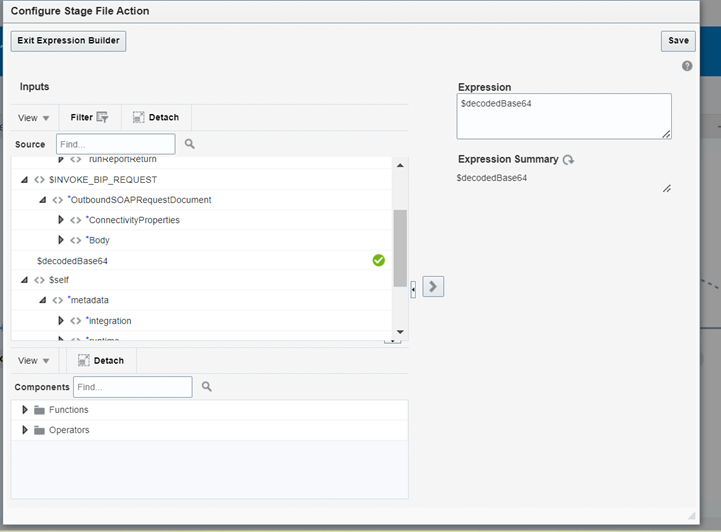
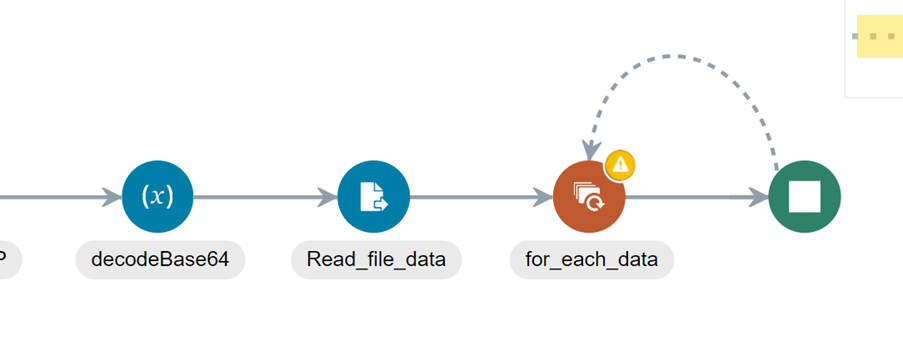
STEP:5 convert the BIP output in base64format by creating assign variable
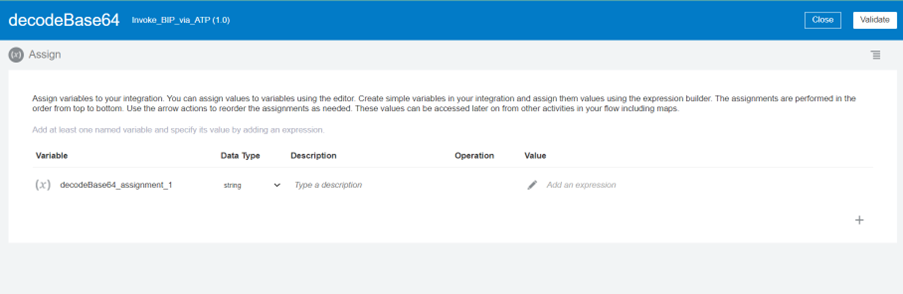
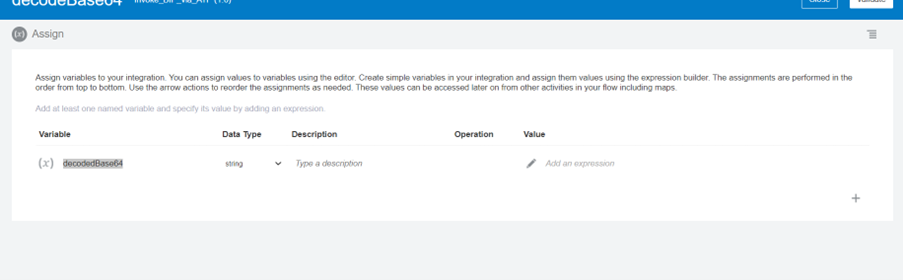
Provide variable name and provide the value by expression builder, in expression path select function as decodebase64ToReference and drop to expression pane and then drag and drop reportBytes from navigator.
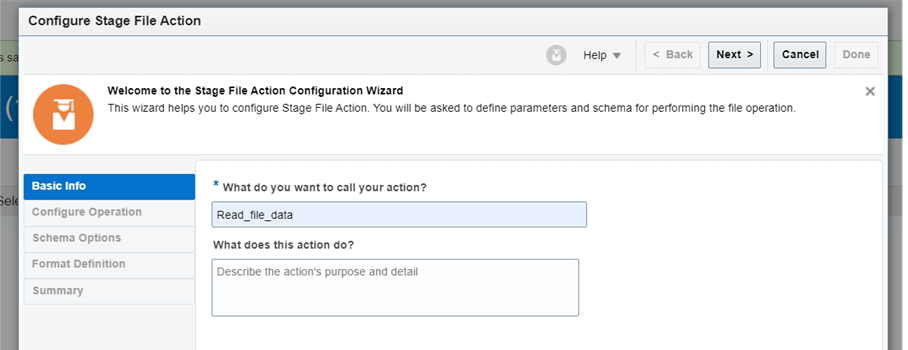
STEP:6 select stage file from collection to read the data of BIP report.
Provide the name to the stage file -> NEXT
Choose stage file operation as “Read Entire File” and configure file reference path as yes to get the data in decode base64 format
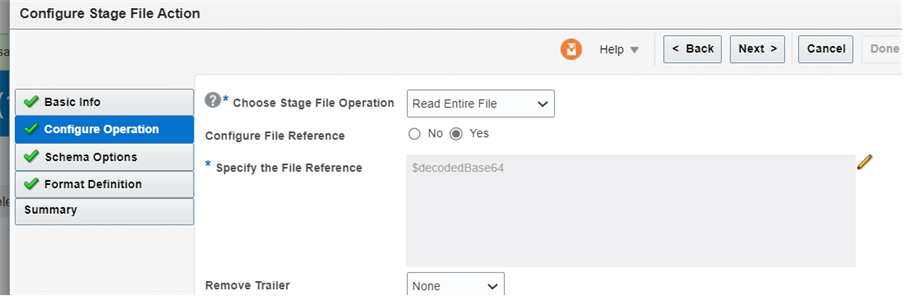
Save and exit expression builder
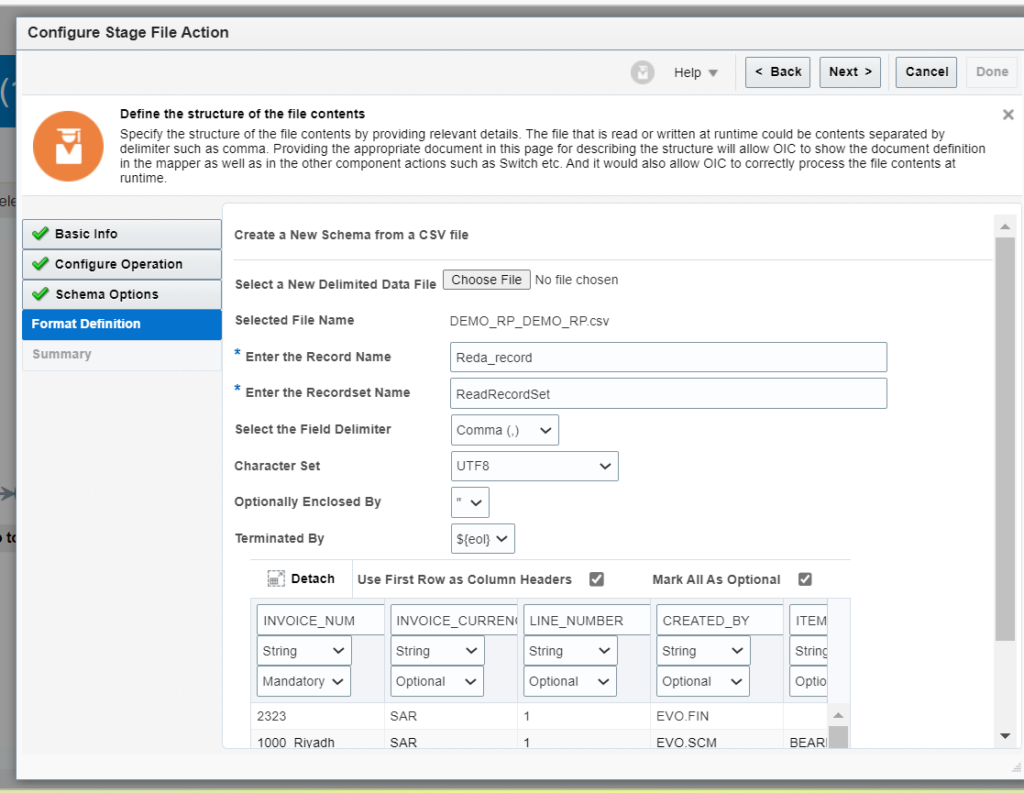
Upload the sample CSV report which has been created by BIP query.(refer part1)
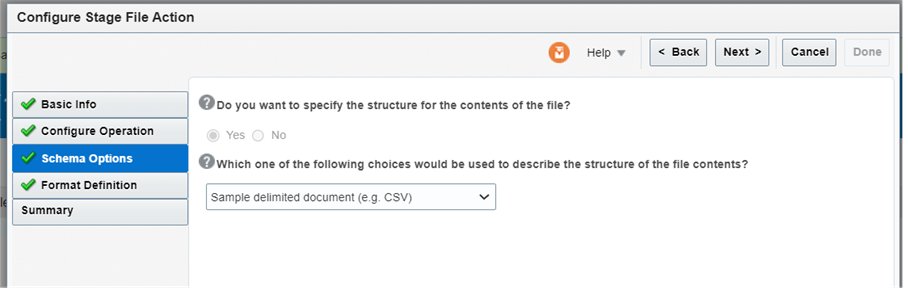
Choose csv file and uploadàadd record name -> recordset name -> keep all parameters as optional and one parameter as mandatory -> NEXT -> done
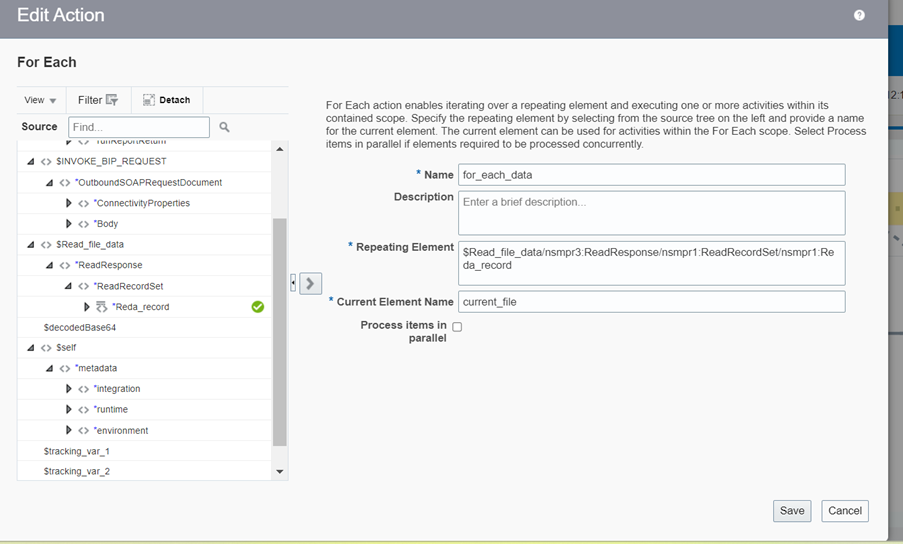
STEP:6 Insert for each loop from collection , select repeating element from read_file_response , provide the name of current element name and create the loop.
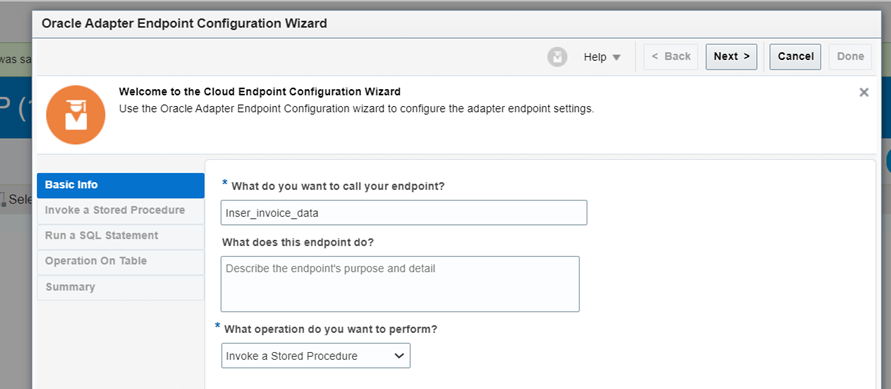
STEP:7 After iterating each record ,load/insert the DATA into Database with the help of ATP connection, provide unique name to your endpoint.

Select the operation as “Invoke a stored Procedure” as we are using procedure to load data into ATP DB.
Select Schema name -> (name of database schema)
Select package – >(which has been created for inserting/loading data)
Select procedure -> (which has been created for inserting/loading data)
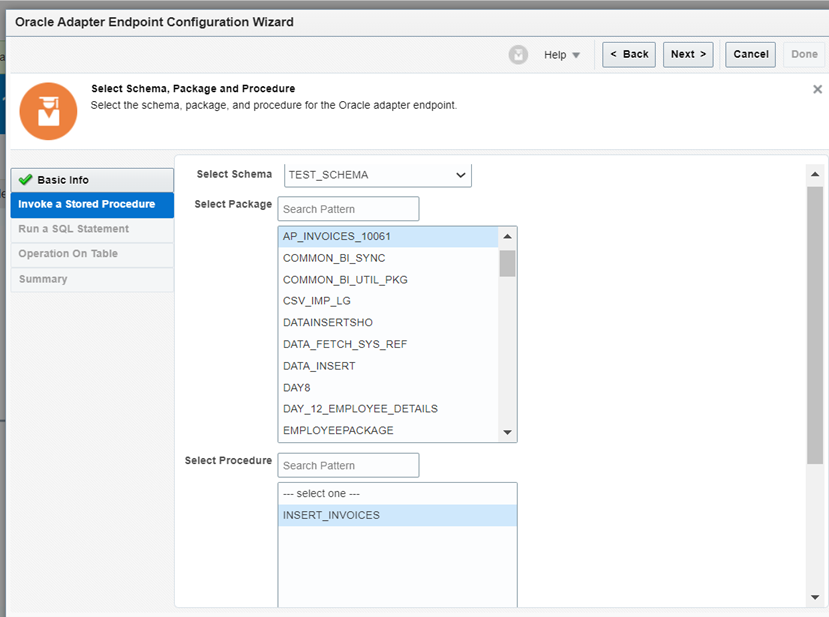
Click on Done

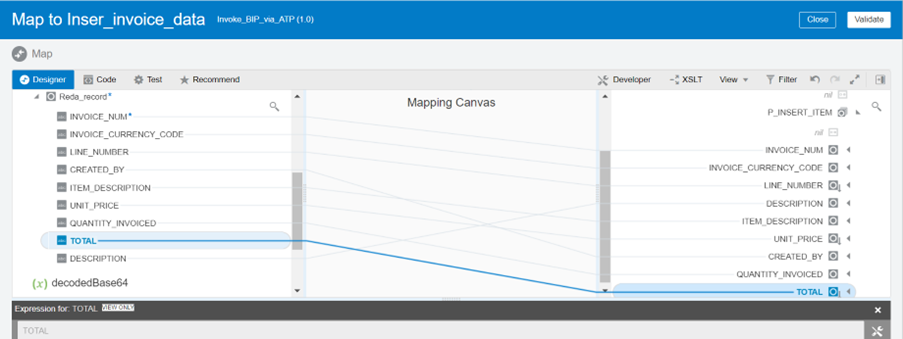
STEP:8 Inside the Mapper , Map all the parameters of current file with the request parameters of ATP connection. Validate and close.
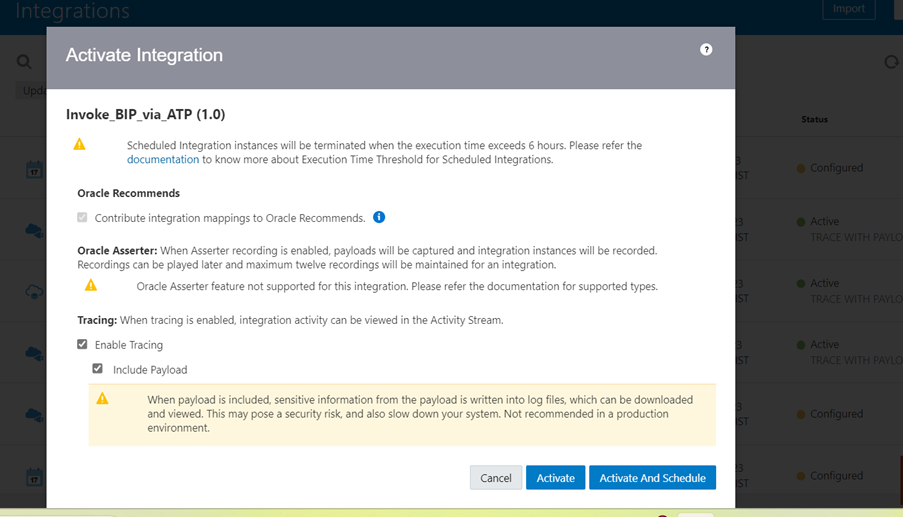
Save the integration and activate.
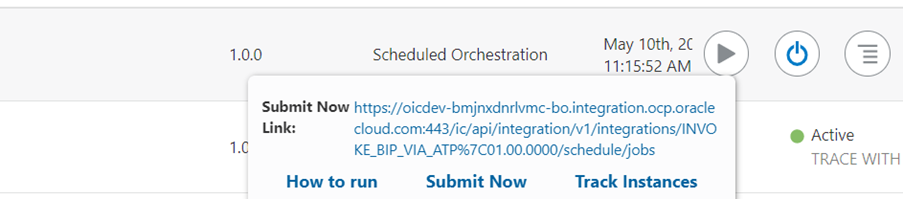
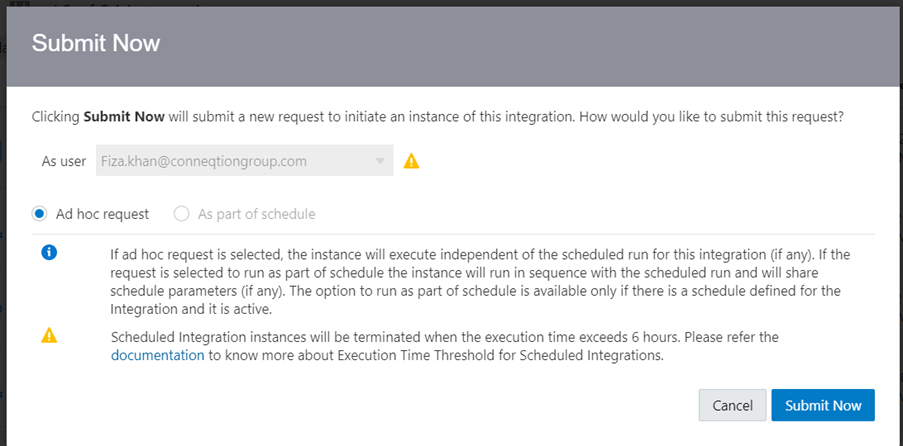
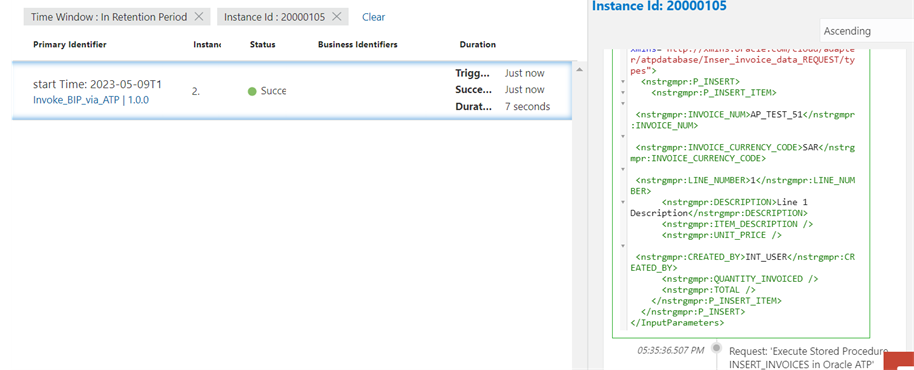
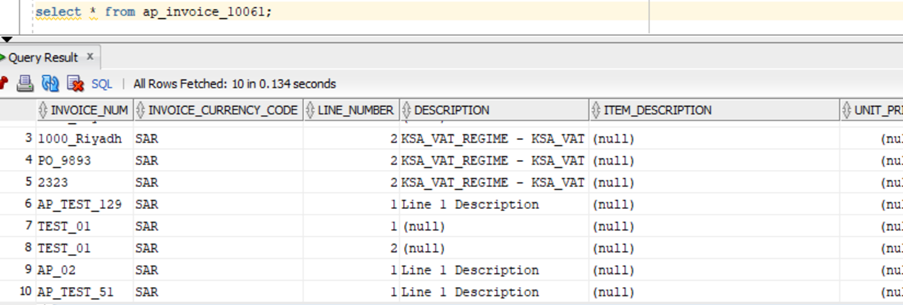
STEP:9 Submit the integration by clicking on submit now, after successfully completion of Integration data will be inserted into ATP database table which has been created(refer part:3)