Editable tables are a crucial feature for dynamic and interactive applications, allowing users to modify data directly within a grid-like interface. In Visual Builder Cloud Service (VBCS), the Buffer Data Provider (BDP) simplifies this process by enabling seamless data editing and buffering capabilities. In this blog, we will guide you through creating an editable table using BDP, ensuring efficient data handling and an enhanced user experience.
Let us go through the steps to create an editable table in VBCS.
Step 1: Navigate to the Variables tab and create a variable of type Service Data Provider (SDP) named countrySDP.
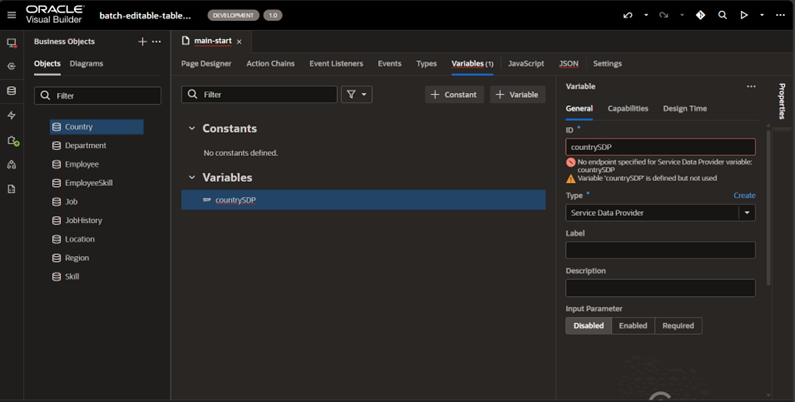
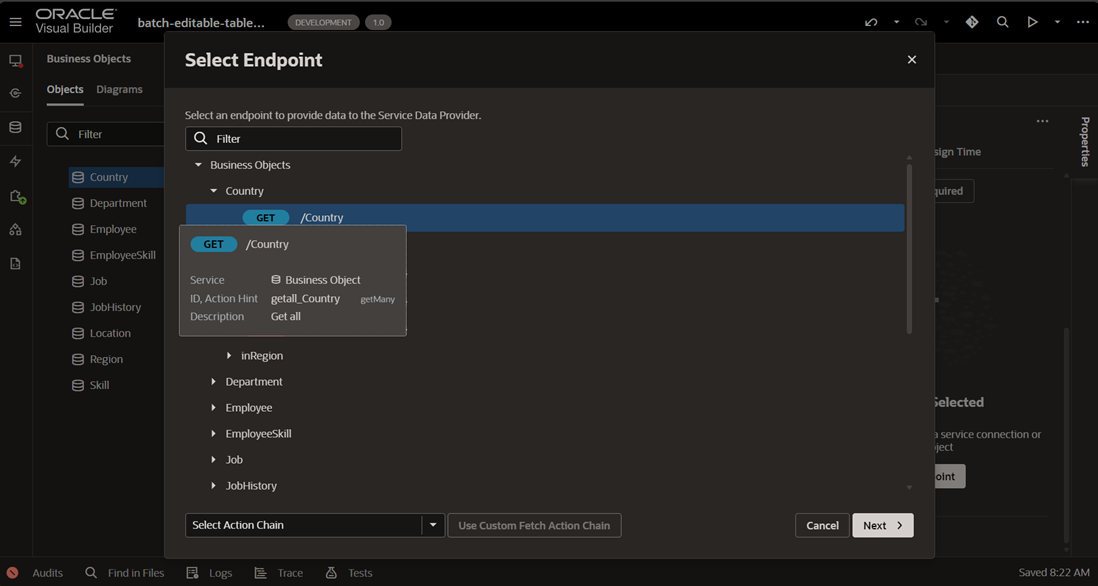
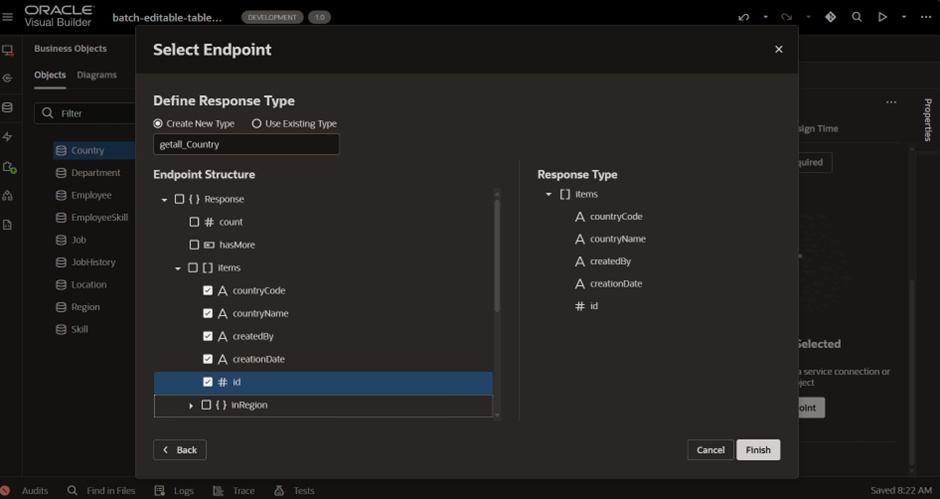
Select the desired endpoint and choose the required columns for your table.
Step 2: Open the Page Designer and drag a Table component onto the page. Under the Data tab, bind the table to countrySDP and select the columns you wish to display in the table.

Step 3: Go back to the Variables tab and create a new variable named CountryBDP. Set its type to Buffering Data Provider (BDP).
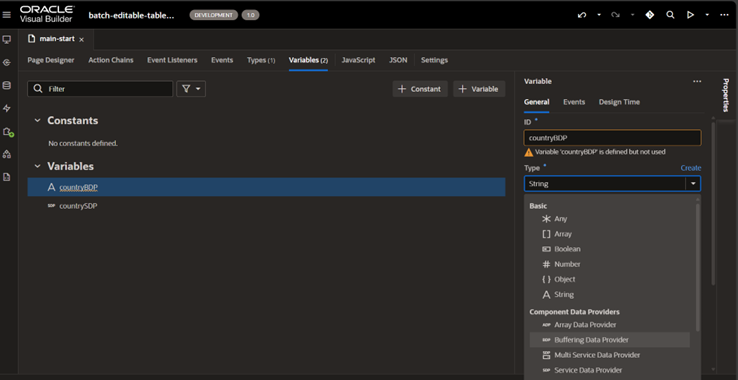
In the General tab of CountryBDP, map the Constructor Parameter by selecting countrySDP as the source and assigning it to the BDP instance as the target.
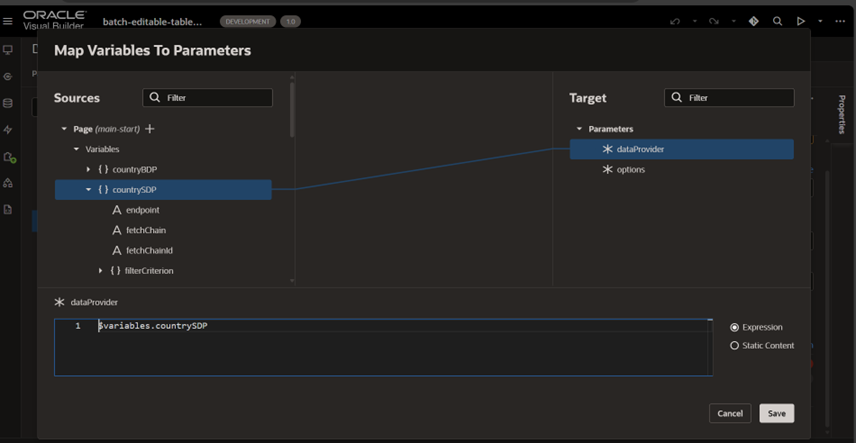
Step 4: In the Page Designer, update the table’s Data property to $variables.CountryBDP.instance.
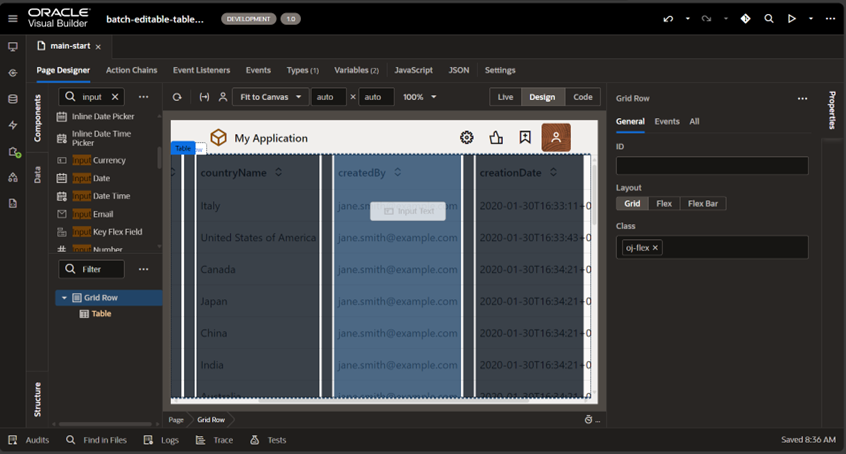
For editable columns:
- Add an Input Date-Time component in the creation date column.
- In the Code Editor, bind the column to show an Input Text for editable fields, or use bindText for non-editable fields. Repeat this process for all columns you want to make editable.
<oj-table
Added:
“string”
scroll-policy=”loadMoreOnScroll”
class=”oj-flex-item oj-sm-12 oj-md-12″
data=”[[ $variables.countryBDP.instance ]]”
columns='[{“headerText”:”countryCode”,”field”:”countryCode”},{“headerText”:”countryName”,”field”:”countryName”},{“headerText”:”createdBy”,”field”:”createdBy”,”template”:”createdBy”},{“headerText”:”creationDate”,”field”:”creationDate”,”template”:”creationDate”},{“headerText”:”id”,”field”:”id”}]’ edit-mode=”rowEdit” on-oj-before-row-edit=”[[$listeners.tableBeforeRowEdit]]” on-oj-before-row-edit-end=”[[$listeners.tableBeforeRowEditEnd]]”>
<template slot=”createdBy”>
<oj-bind-if test=”[[ $current.mode!== ‘edit’ ]]”> <oj-bind-text value=”[[$current.data]]”></oj-bind-text> </oj-bind-if> <oj-bind-if test=”[[ $current.mode === ‘edit’ ]]”> <oj-input-text value=”[[$current.data]]”></oj-input-text> </oj-bind-if>
</template>
<template slot=”creationDate”>
<oj-bind-if test=”[[ $current.mode!== ‘edit’ ]]”>
<oj-bind-text value=”[[$current.data]]”></oj-bind-text>
</oj-bind-if> <oj-bind-if test=”[[ $current.mode === ‘edit’ ]]”>
<oj-input-date-time value='[[typeof $current.data === “string” ? $current.data : null]]’ ></oj-input-date-time> </oj-bind-if>
</template>
</oj-table>
</div>
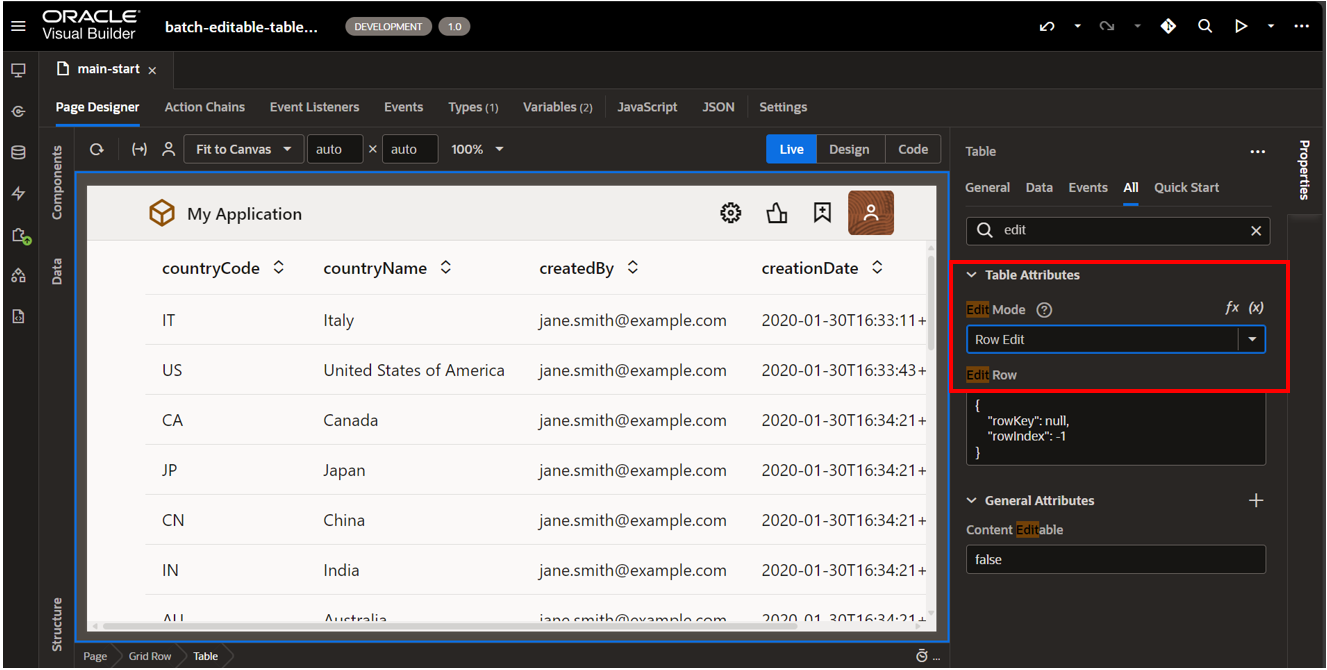
Step 5: Select the Table Component in the Page Designer. In the All tab, set the Edit Mode to Row Edit to enable row-level editing.
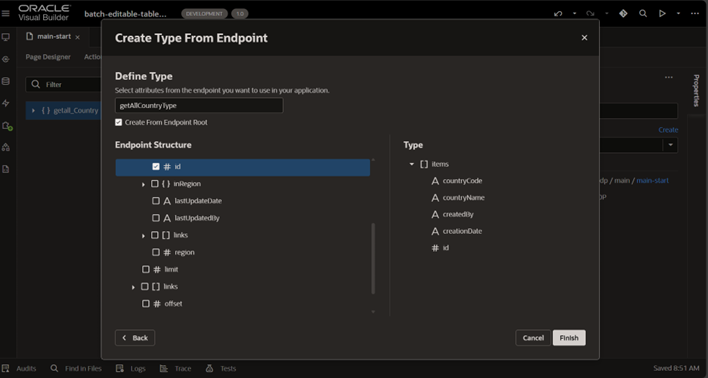
Step 6: Navigate to the Types tab and generate a new type from the selected endpoint. Open the JSON tab and ensure the object structure matches the endpoint’s data structure. Remove any unnecessary brackets or elements to align with the expected format.

“countryCode”: “string”,
“countryName”: “string”,
“createdBy”: “string”,
“creationDate”: “string”,
“id”: “number”
}
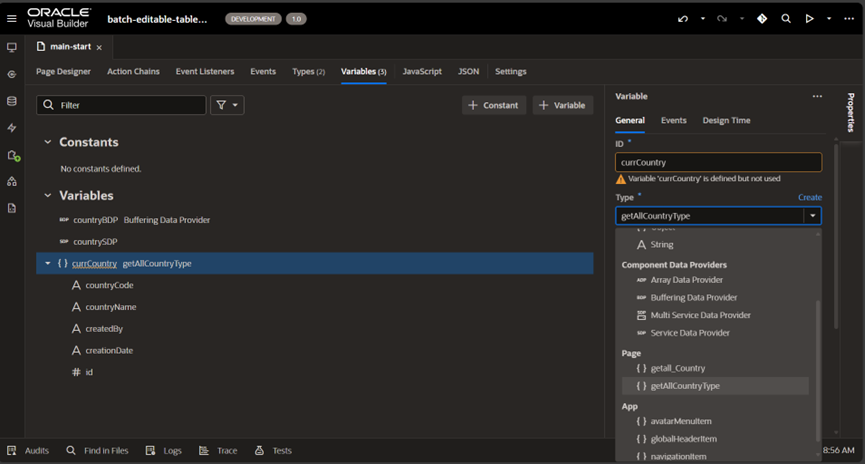
Step 7: Define a variable named currCountry of type getAllCountryType.
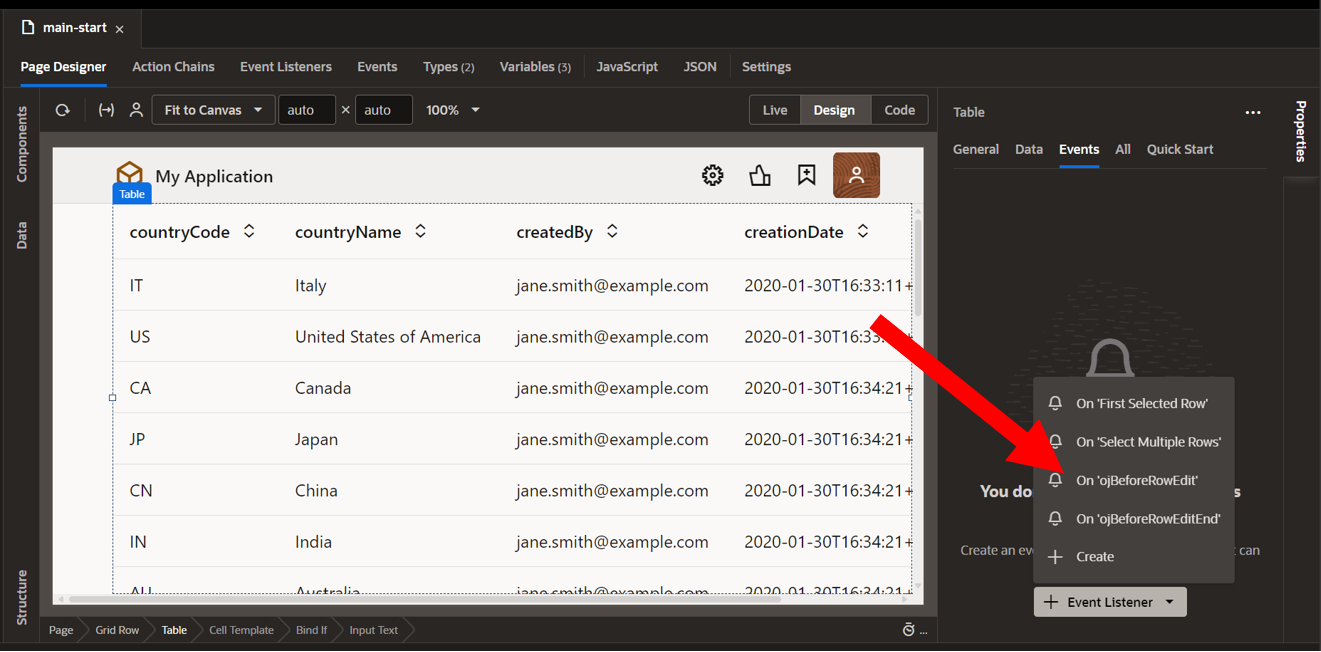
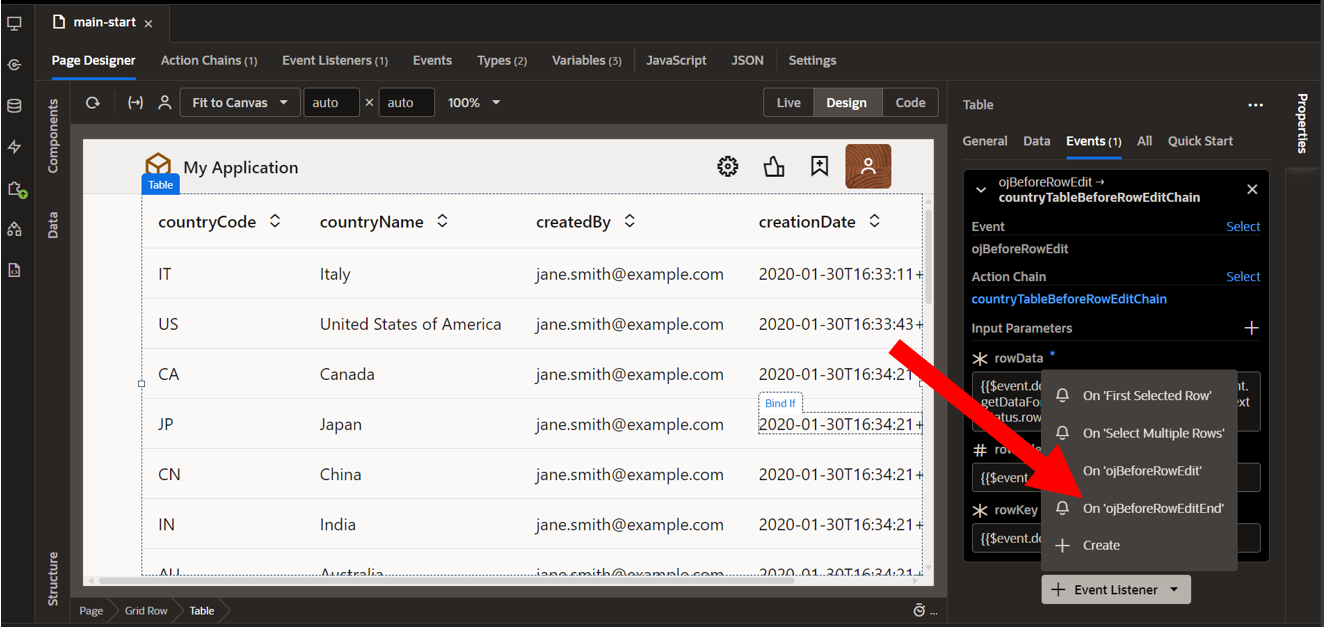
Step 8: Go to the Page Designer tab and create an ojBeforeRowEdit event for the table to handle pre-editing actions.
Drag and drop an Assign Action form Action tab and assign currCountry to rowData.

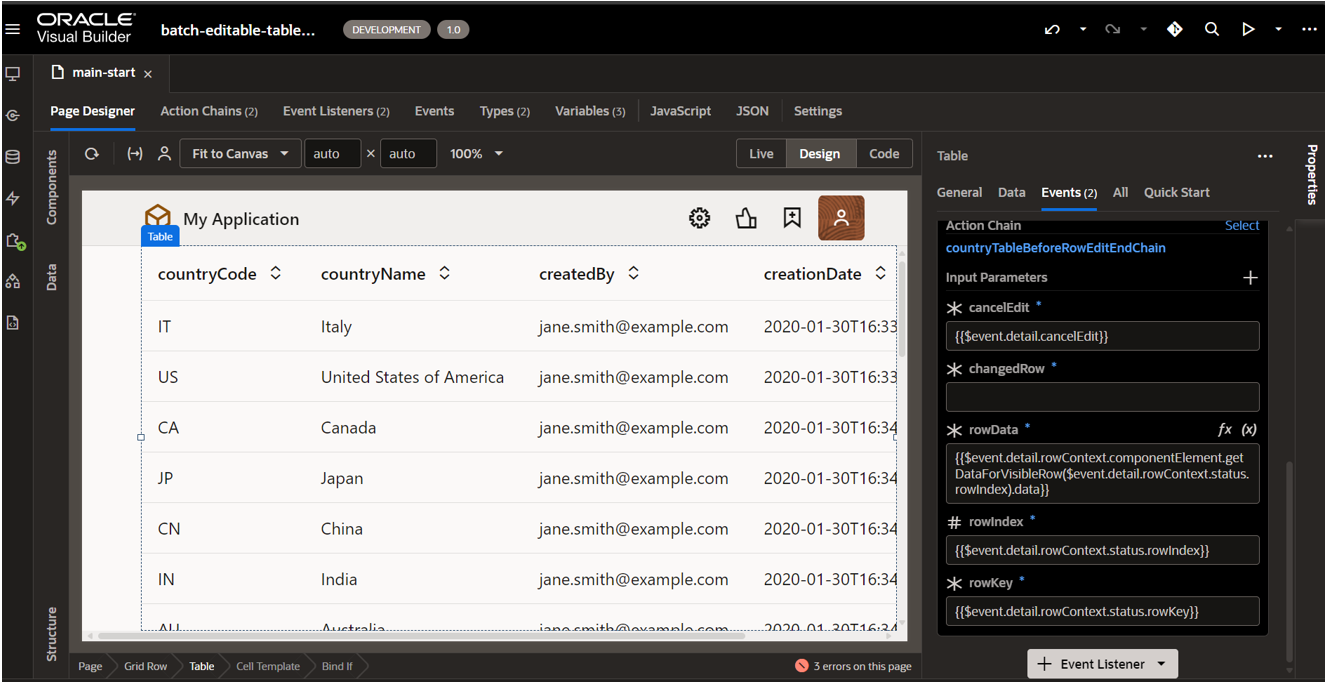
Step 9: In the Page Designer, create an ojBeforeRowEditEnd event for the table to handle post-editing actions.
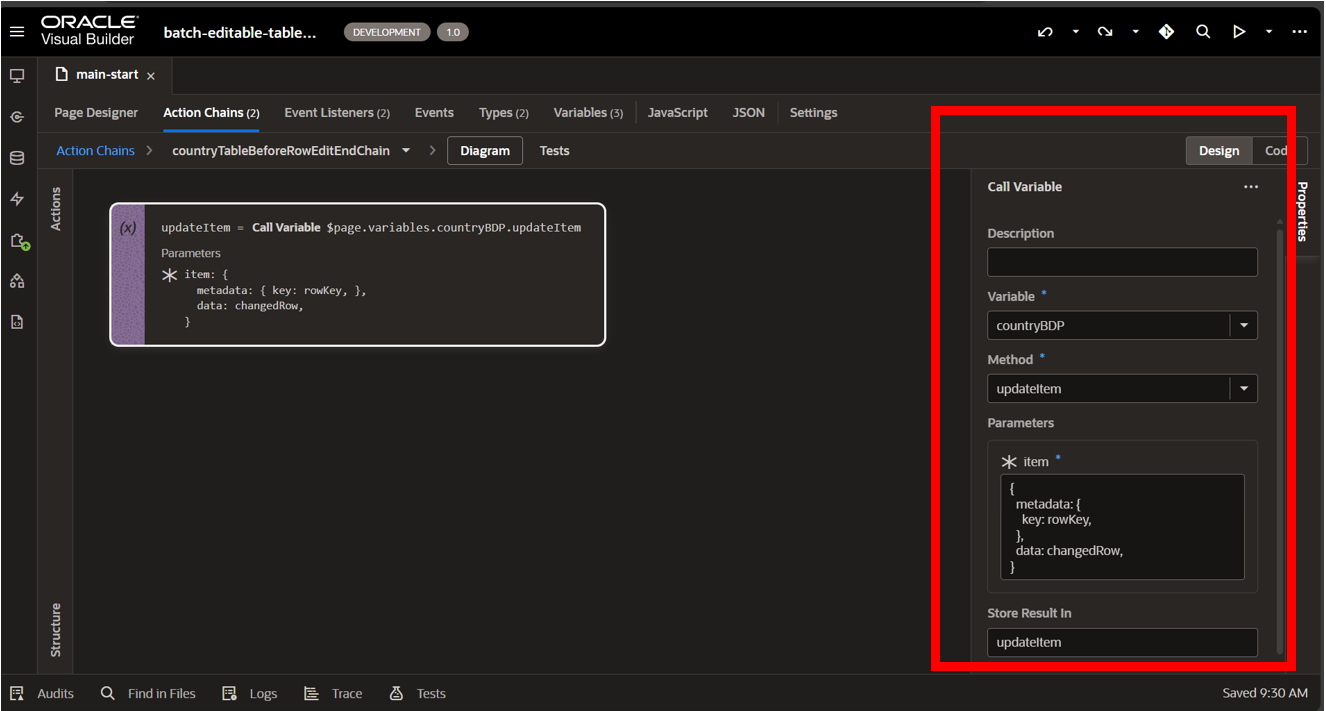
Define a variable named changedRow as an input parameter in the associated action chain. Pass the currCountry variable as the input parameter.
Under the Actions tab, drag and drop a Call Variable action. Then, select the CountryBDP variable and choose the updateItem method to perform the update operation. For the items’ parameter, provide the necessary data.
Meta data: {
Key: rowKey,
},
data: changedRow,
}
Step 10: Place a Button component at the top of the table and configure its ojAction event. Select the CountryBDP variable and use the getSubmittableItems method to fetch modified records (created, updated, or marked for deletion) that are ready to be submitted.
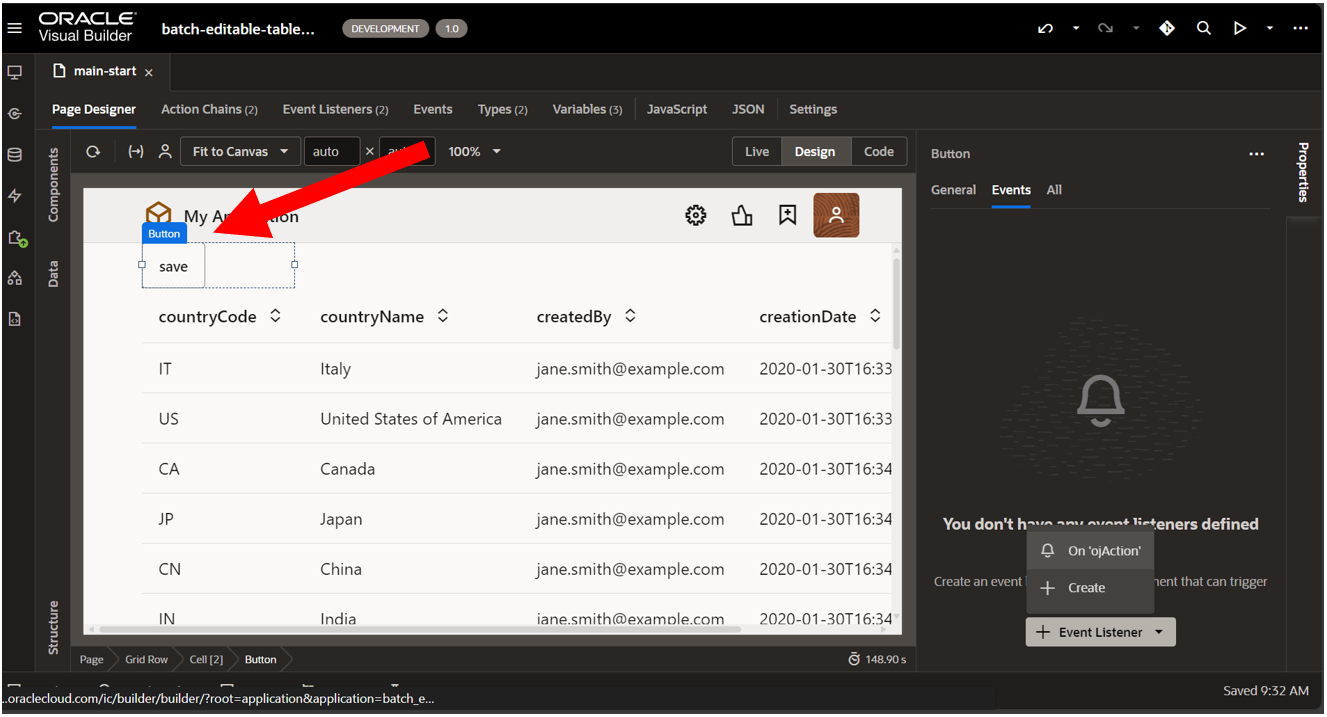
Drap and drop a call variable action, select the CountryBDP variable and in methods, choose getSubmittableItems.
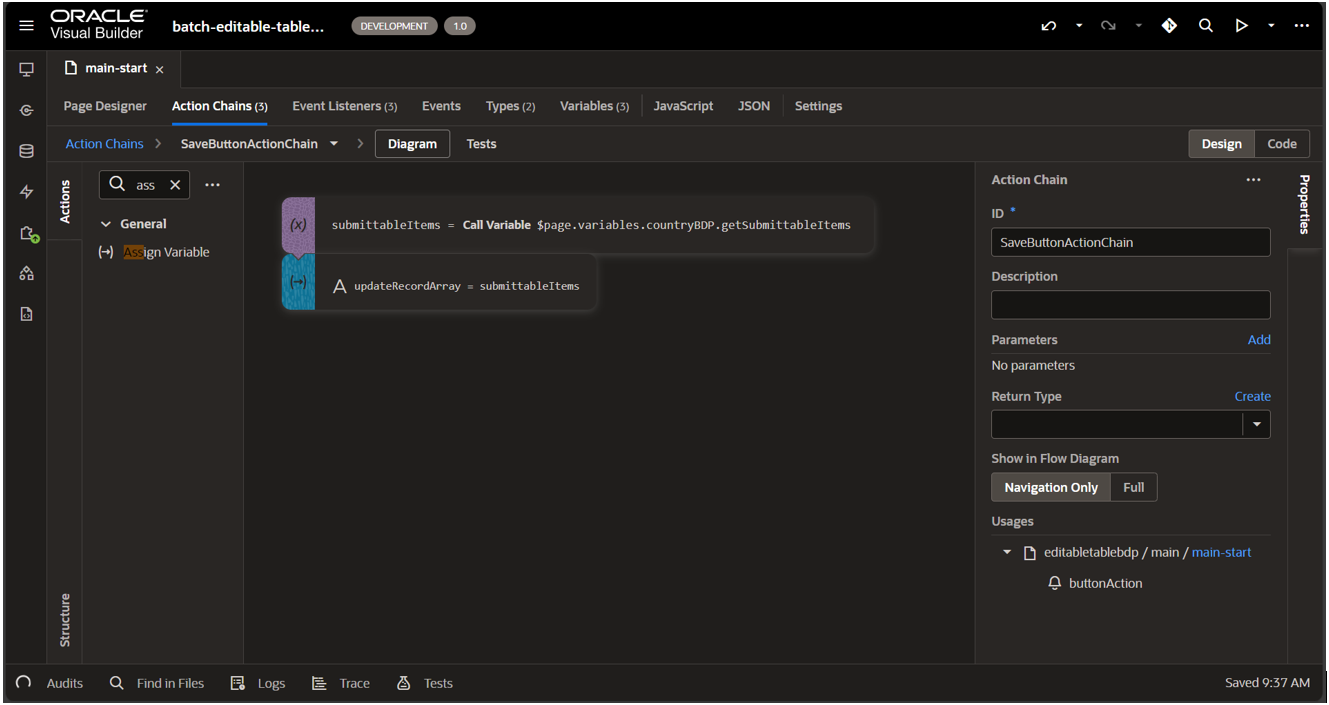
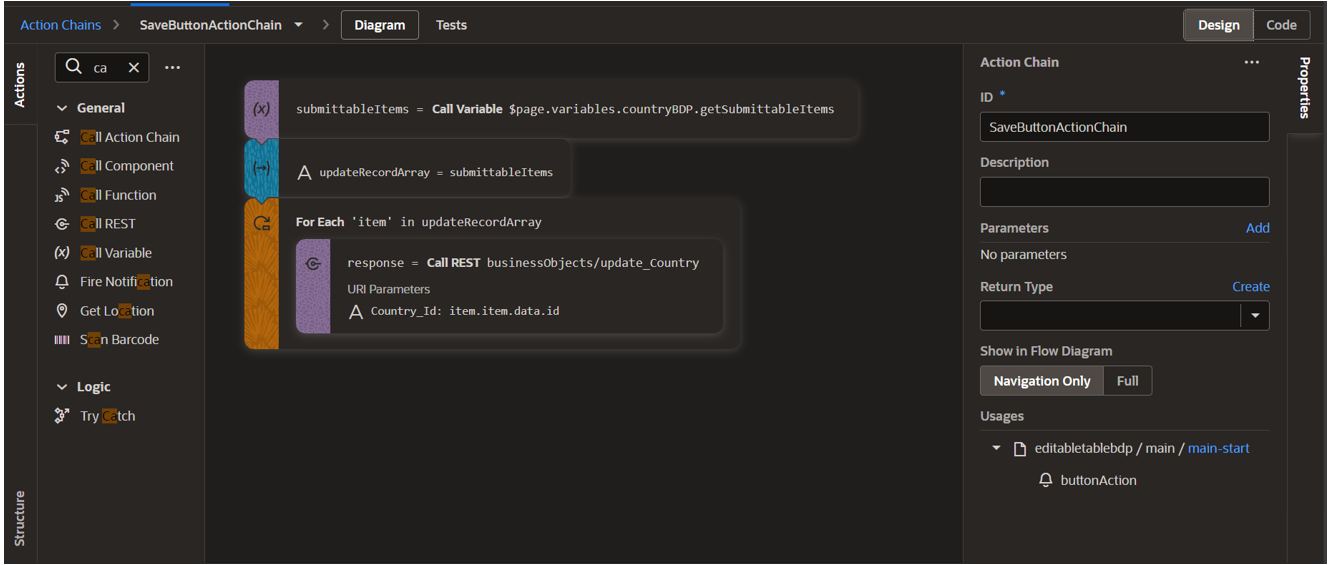
Now in updateRecordArray, we have the updated data which can be passed in REST endpoint to save in the database.
By following these steps, you’ll implement seamless editing and submission functionality for your VBCS table, ensuring smooth data handling and updates.
Here, are some of the common use cases of Buffering Data Provider:
- Consolidate all user changes into a single operation for streamlined processing.
- Validate and process data before submission to ensure accuracy and consistency.
- Submit only the modified records to the backend, optimizing data transactions.
- Enable pagination with SDP and BDP by using fetchFirst() to load the initial page and fetchNext() to dynamically retrieve subsequent pages as users navigate or scroll.
Conclusion
By leveraging the Buffer Data Provider in VBCS, you can build robust and user-friendly editable tables that streamline data management. This approach not only enhances interactivity but also provides greater control over data validation and submission. Start implementing this feature today to elevate your application’s functionality and usability. If you have any questions or concern, please get in touch with us on [email protected].