Requirements to perform the operation:
- Oracle Visual Builder Cloud Service (VBCS)
- Oracle Integration Cloud Instance
- Oracle SQL Developer
Once you have all the above requirements you can follow the below steps:
- Create a new application and name it.
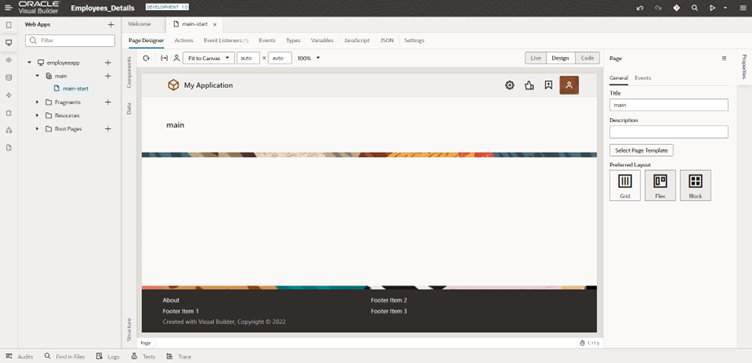
- Create the structure of your application using the components.
- After creating the service connection, add the endpoints.
- Create the necessary types and variables for your application.
- Develop the button’s events and action.
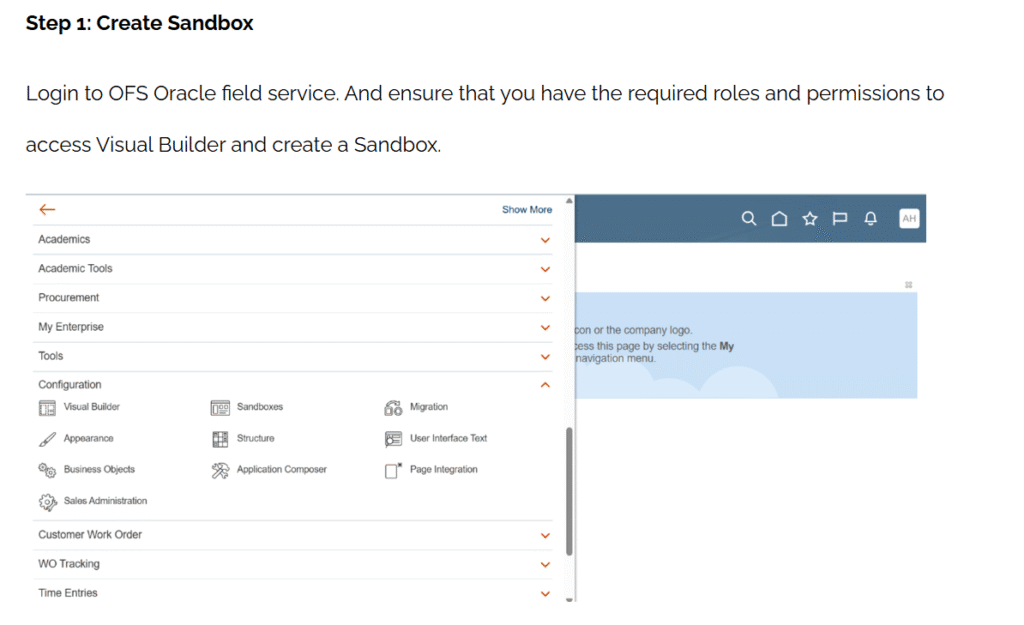
STEP 1:
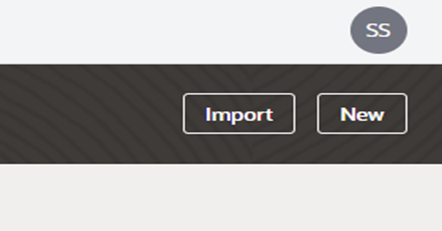
Open the VBCS application and choose “New”.
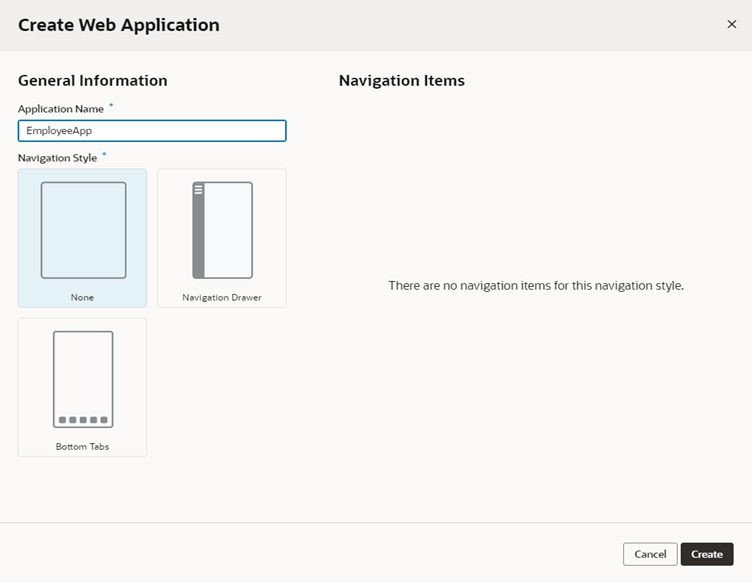
Add the name of your application after clicking “new application” on the creation screen.

Select a navigation style when creating a web application once again inside a VBCS application.
STEP 2:
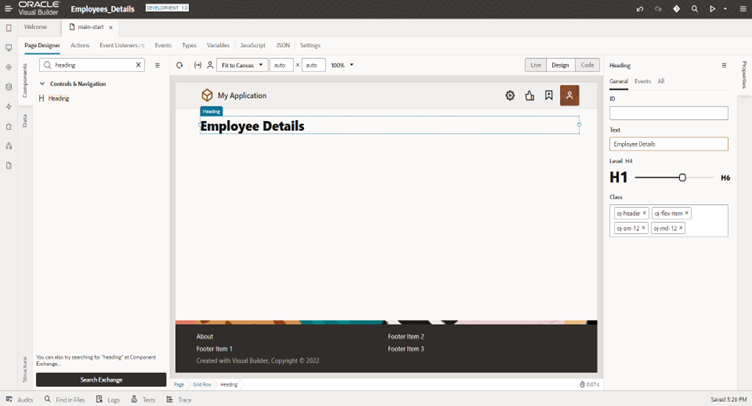
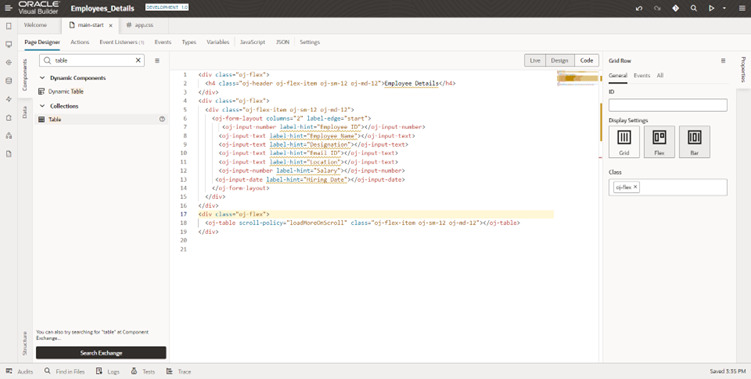
To add a heading, drag it from the left-side component list.
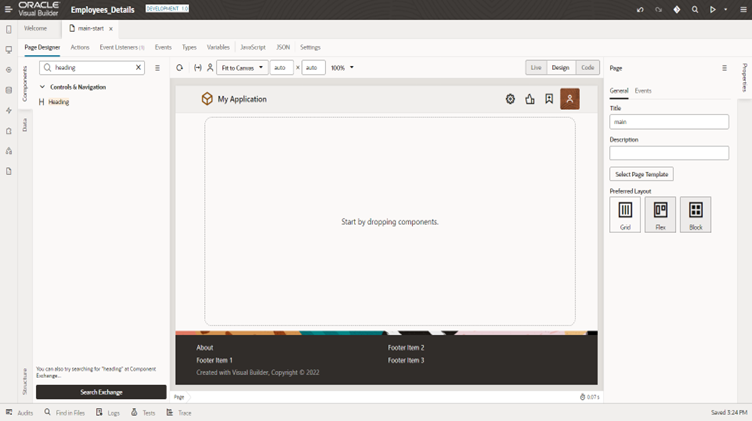
Utilize the properties in the right-hand side to change the heading size.
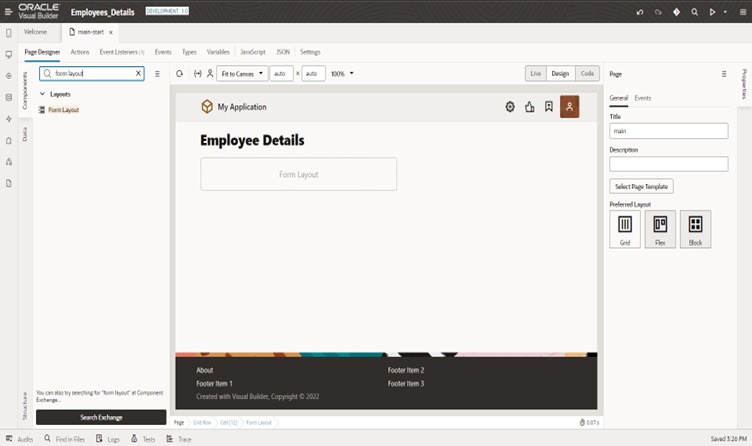
It is preferable to use the form layout when creating forms because it has better alignment and properties.
Also Read: How to Invoke PCS Workflow Using VBCS?
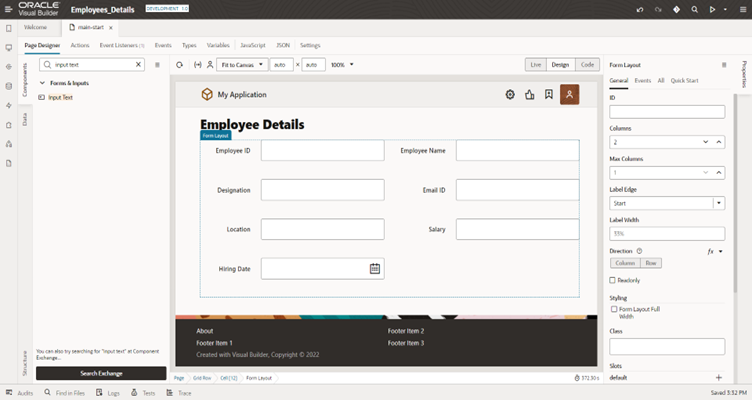
Add the necessary input fields now, including text, numbers, dates etc based on the project requirements.
Always try to create your application in coding mode rather than design mode.
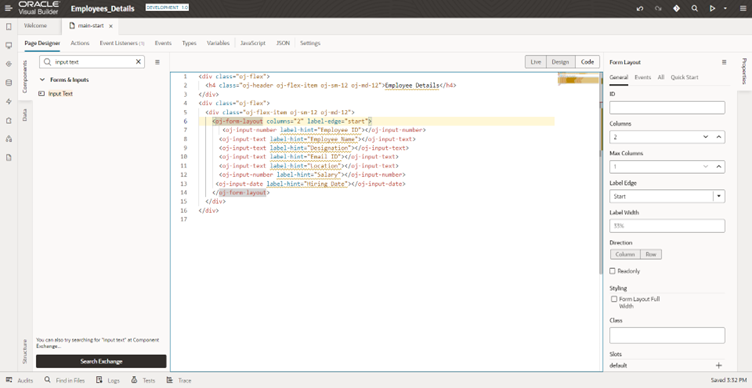
If a label is necessary, include it; otherwise, describe the names of the fields in the label hint / placeholder.
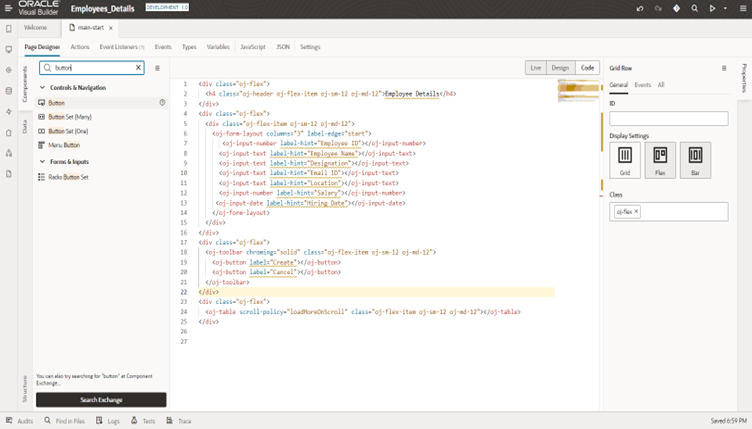
Drag table from the components. Before that we need to add toolbar.
The buttons in the toolbar are used for actions like creating, cancelling, resetting, searching, and so on. The user doesn’t need to apply any CSS because the toolbar makes the button alignment and properties better.
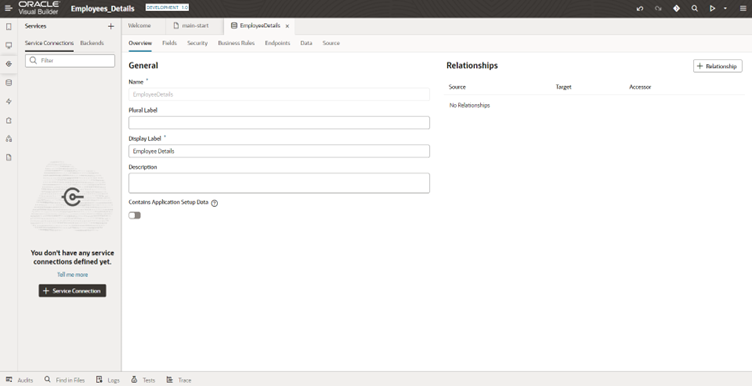
STEP 3:
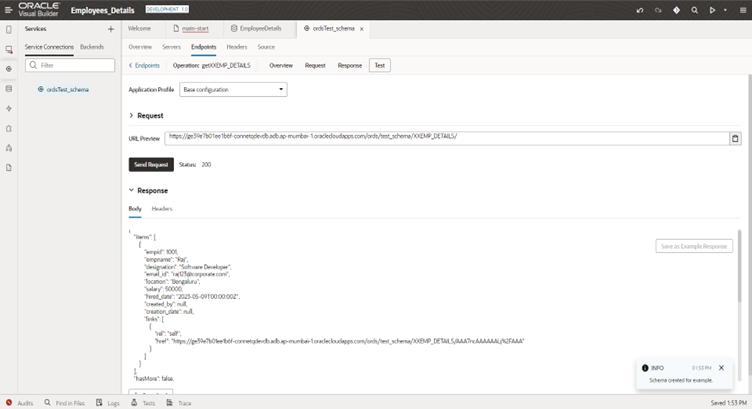
Create an ORDS connection now to store or retrieve data from a database. Select a service connection.
Add the URL select method as a Get and the Action hint as Get Many after that. This method is used to retrieve all the employee data from the employee Table. Add your database schema username and password after choosing basic authentication in the Authentication section.
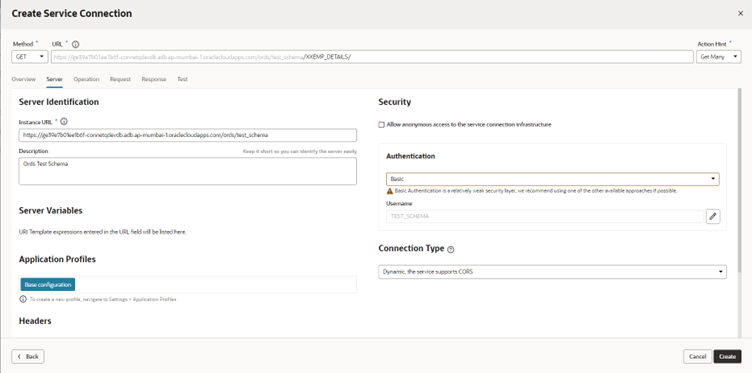
After entering the login and password, click “send request” to test it, and then save the outcome as an “example response” for later use.
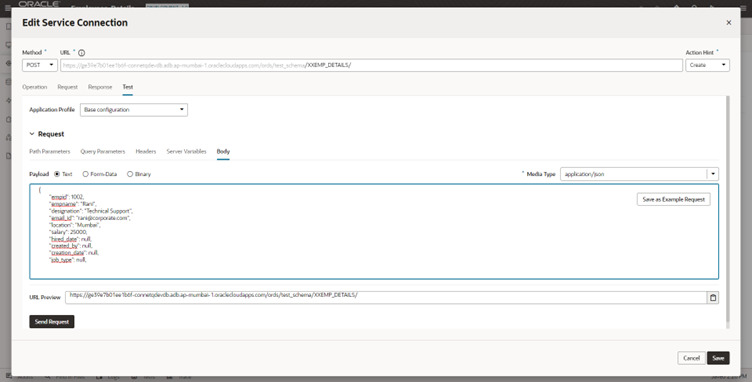
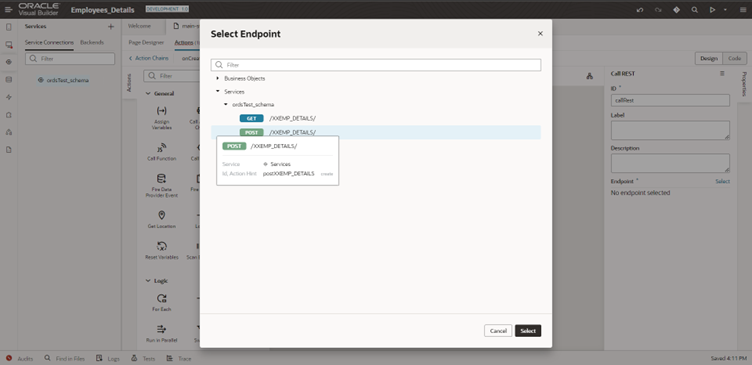
To post/store data to a database, call the post method, choose the Create as action hint, and then include an example of posting data in the body of the request.
Include all essential field information, test the request, and save the answer as an example.

STEP 4:
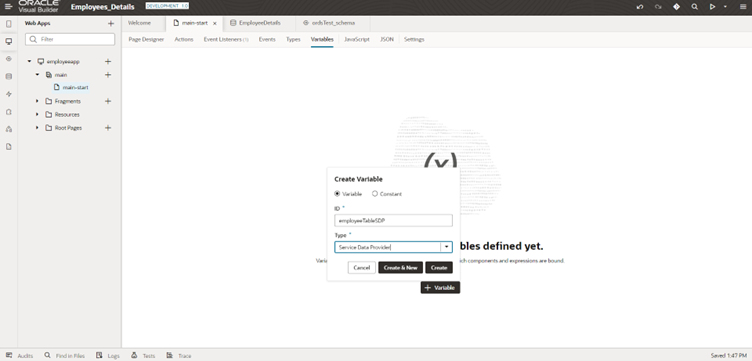
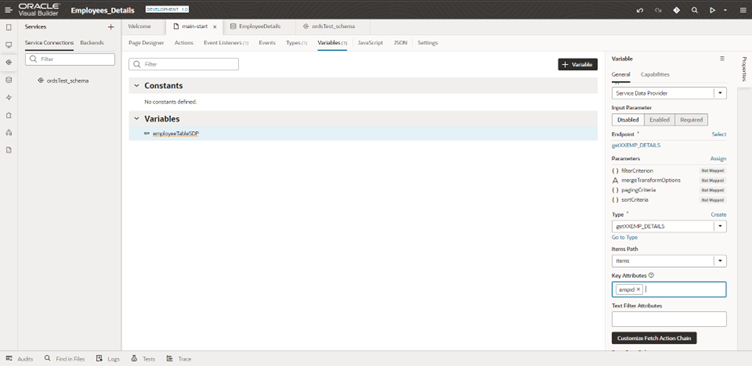
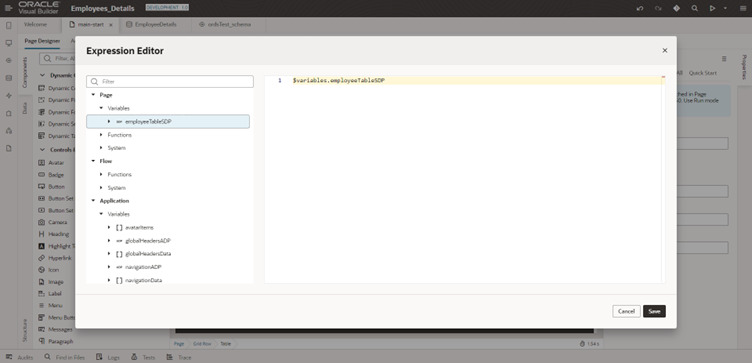
Create the variable that will be used to store or fetch the data.
Create a variable for the employee table mention type as a service data provider (SDP) now.
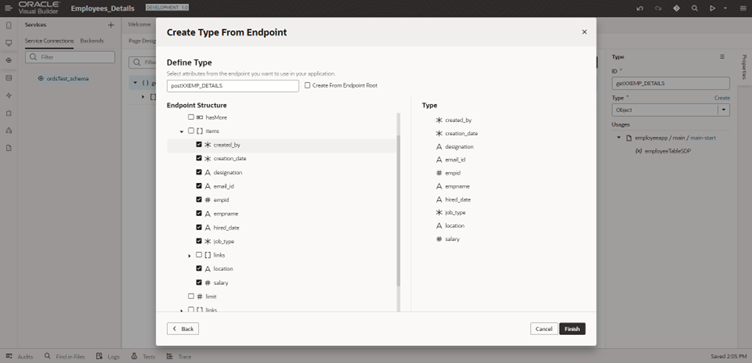
After creating SDP then we need to select the Types from service.
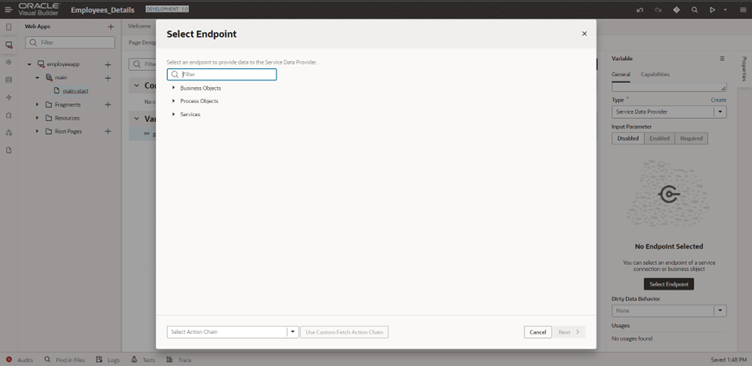
In that you need to select ordsTest_schema: Get Method
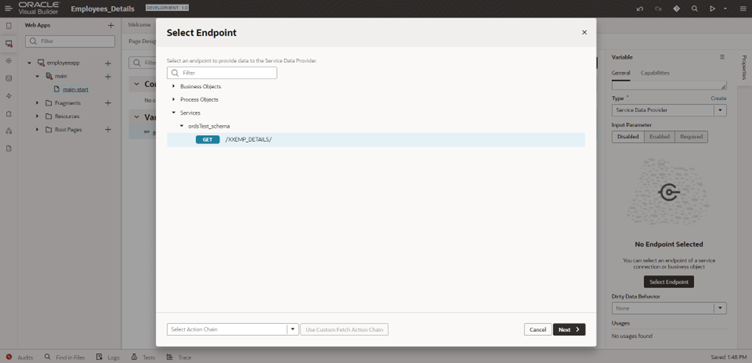
After the selection of the endpoint, you must select the fields and complete the activity.

Now, set the employee table’s primary key as the key attribute.
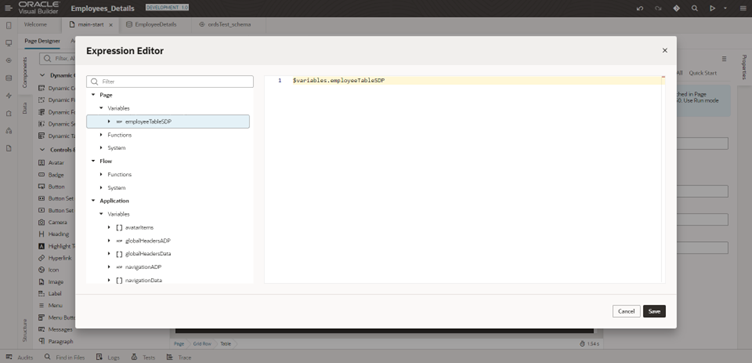
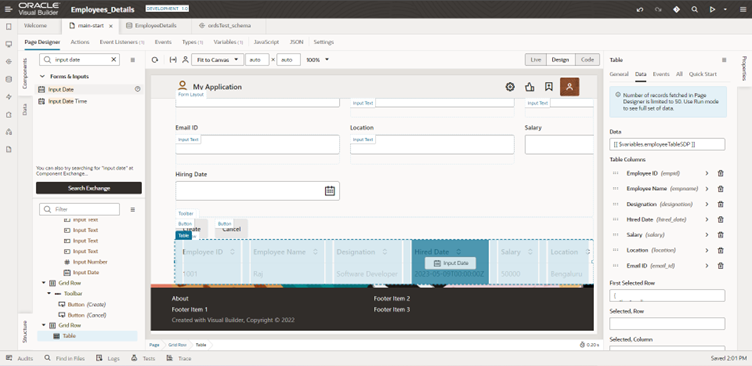
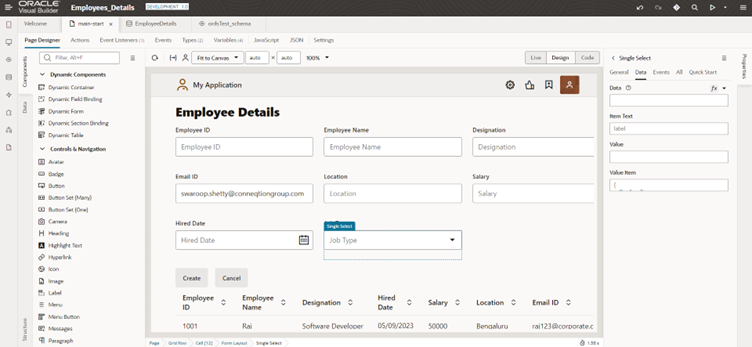
Select the table now, and then on the right side of the desktop, under Table Properties, click data inside drag EmployeeDetailsSDP mention it as data value.
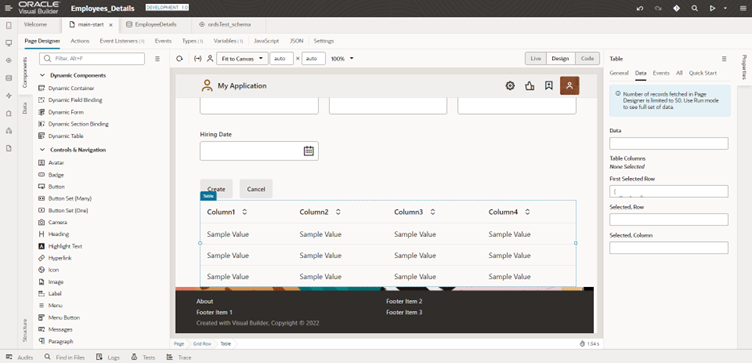
After choosing the data, choose the columns that should be visible to your user.
Change the name of a column by define it in the properties/code mode.
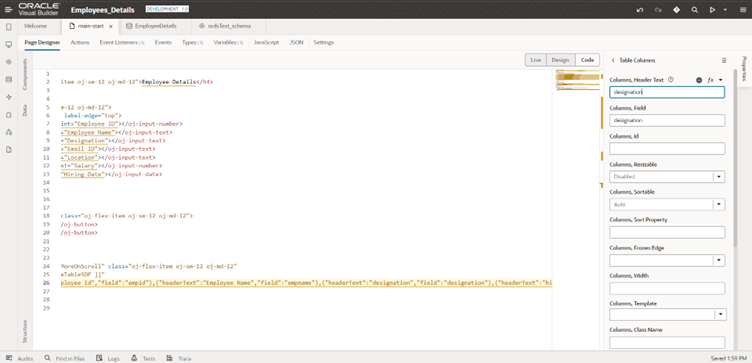
To display standard time to the user, add a template for the hire date field.
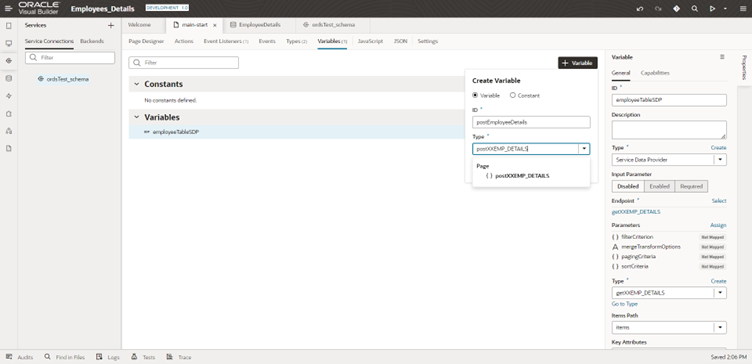
Create one more type. Uncheck the create from endpoint box; this type is used in postEmployeeDetails.
Create a variable for publishing the data to the database and select the previously defined type postXXEmp_Details.
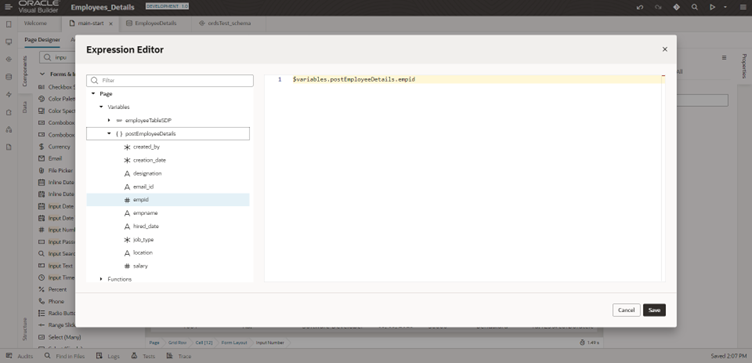
Now we must set a value for each field, with each component having a property in that mention it under data value.

Now drag and drop the proper field names, for example, Employee ID needs to be stored in the empId variable, so similarly in our application we have 8 fields. For all the fields we need to assign a proper value.
Without a value, the user is unable to save the data to database, which is mentioned in the front end.
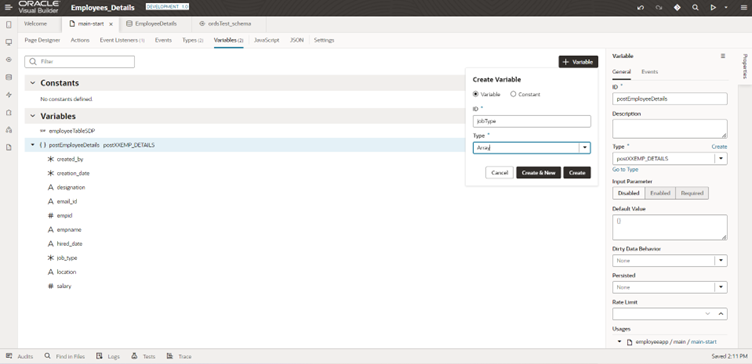
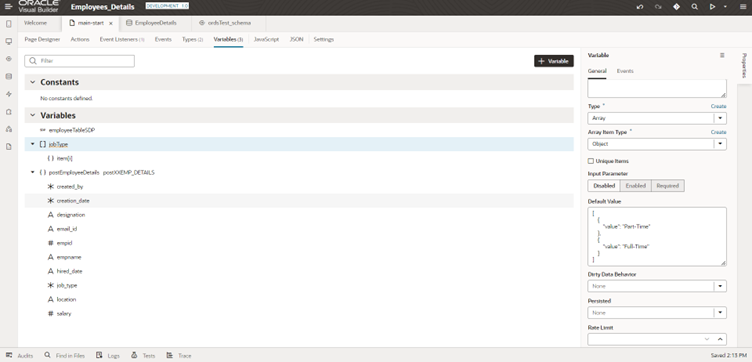
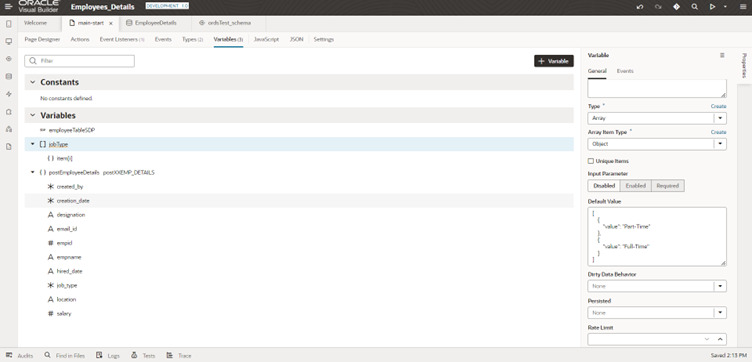
Now, create jobType and set its type to array. Mention values within the default value.
We must refer to it as an array of objects.
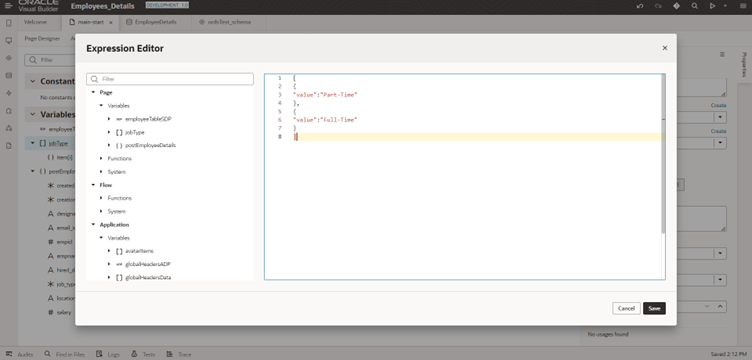
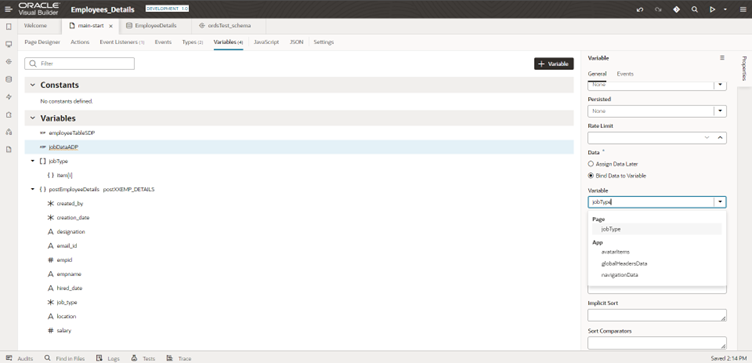
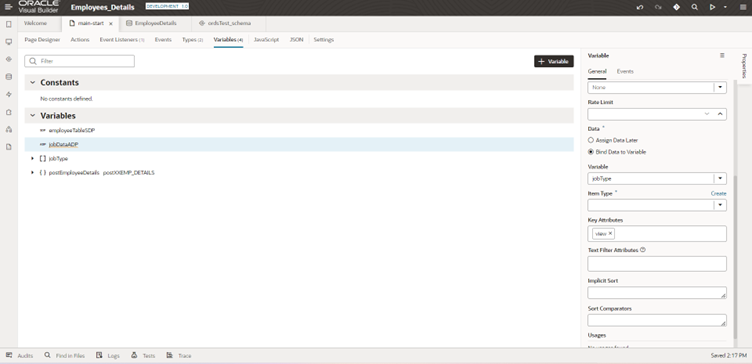
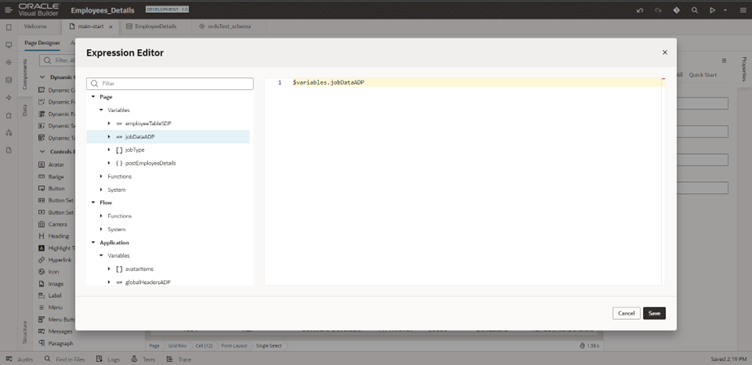
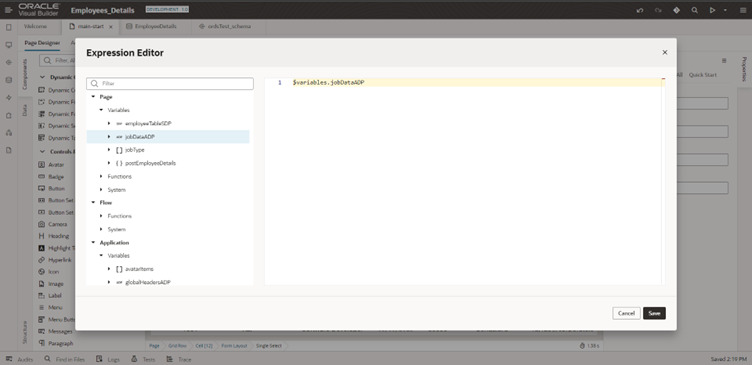
Create one ADP – Array data provider after assigning the default value to display it in the UI and later save it in database.
Then choose Data as a bind data in variable and variable as jobType.
Mention the key attribute as value now.
Use that ADP within the data of single select properties and within the item text to mention value.
Related article: How to Invoke PCS Workflow Using VBCS?
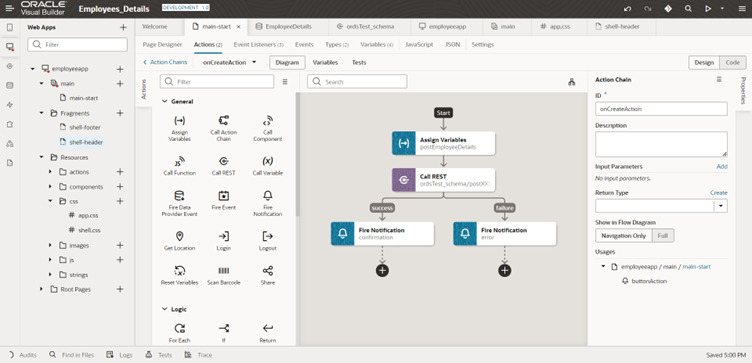
STEP 5:
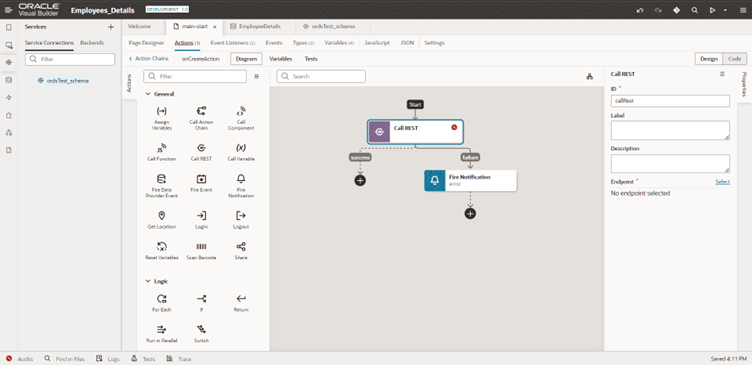
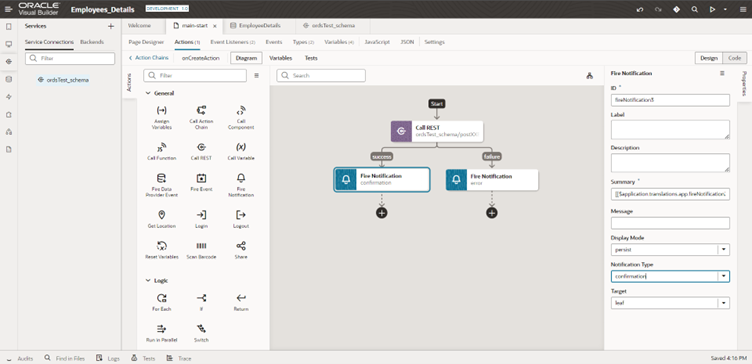
Create an action to save the data in the database – In the events options, choose new event.
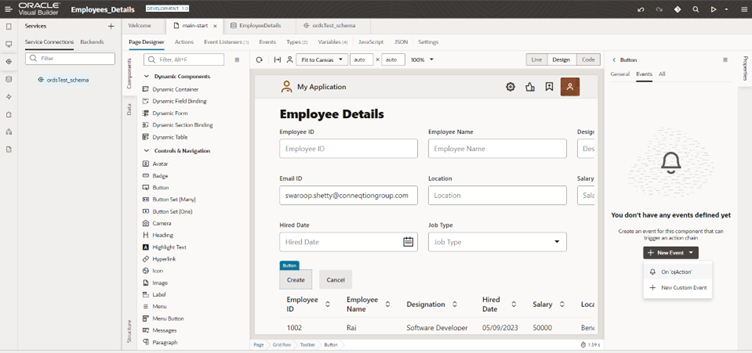
Call the rest endpoint from the left side action, then choose the endpoint method as a post on the right-side properties.
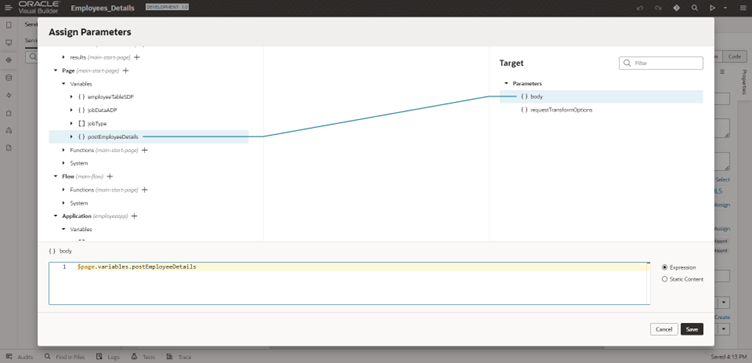
After adding the endpoint, map the object to their body, with that object containing the data values entered by users.
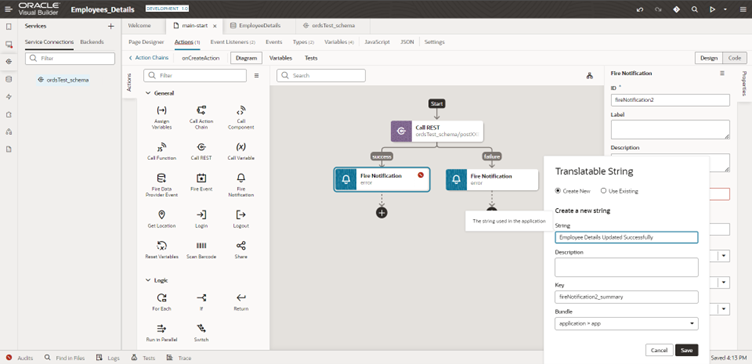
Add a success response notification to the left side of the rest endpoint. Mention the notification type as a confirmation and the display mode as a transient that is visible for a short period of time.
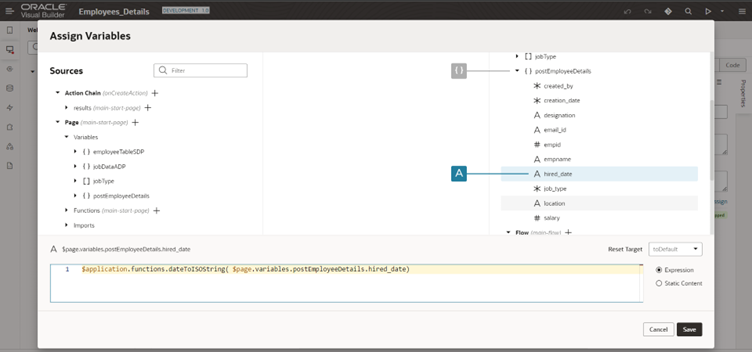
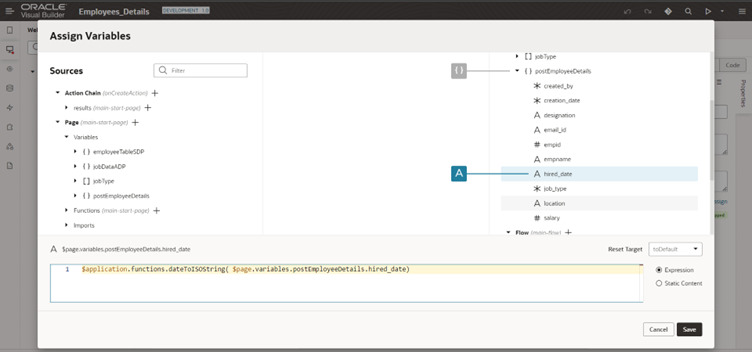
To save accurate dates in databases, add the dateISOString script to hiredate value.
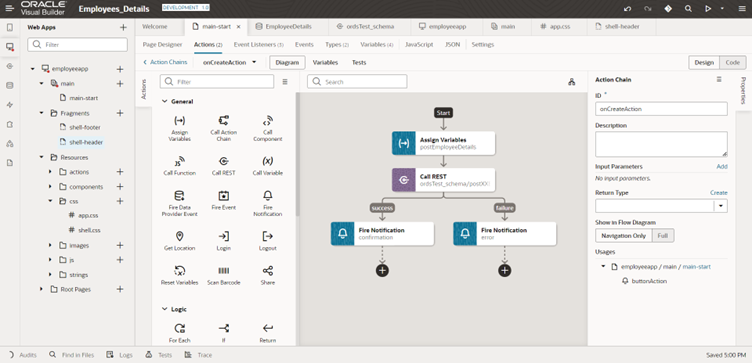
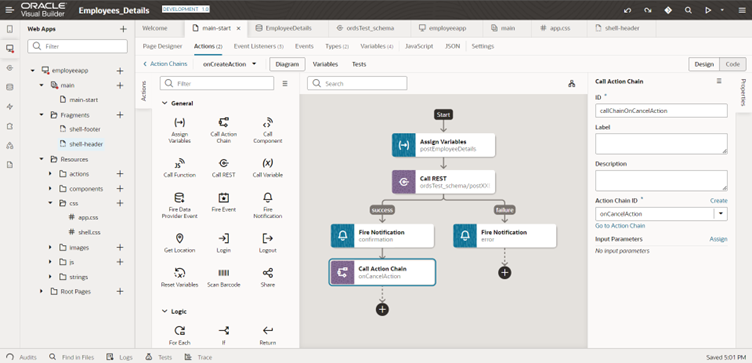
This is another action chain for the cancel button action.
This action is performed to reset the variable and refresh the SDP.
Add cancel action chain in create button action by using call action chain then in the right-side properties mention the action chain ID.
Variables are reset and the table is refreshed each new creation. As a result, the user can see the newly assign data in the UI.
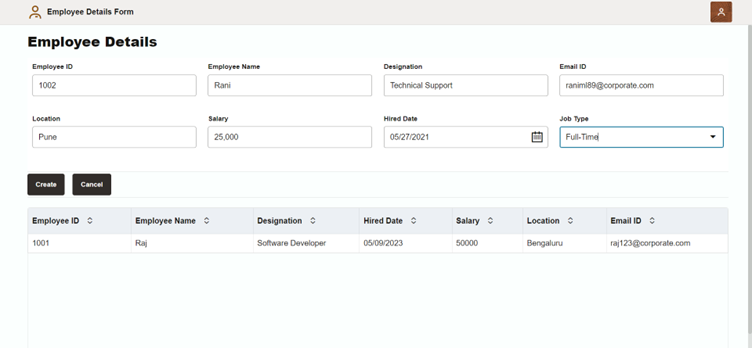
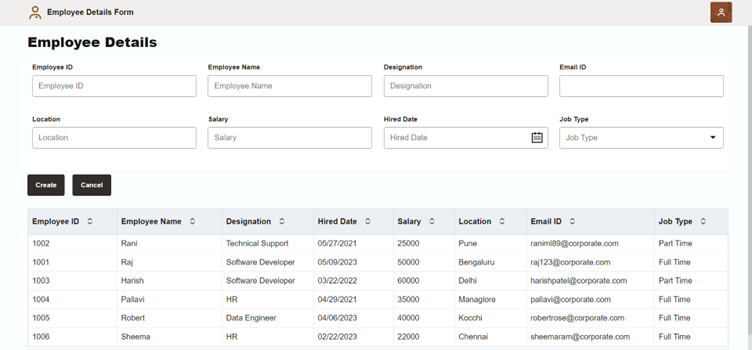
This is the final look of the user interface, with each field containing valid data.
After hitting the create button, data is saved in the database and displayed to the user in UI.
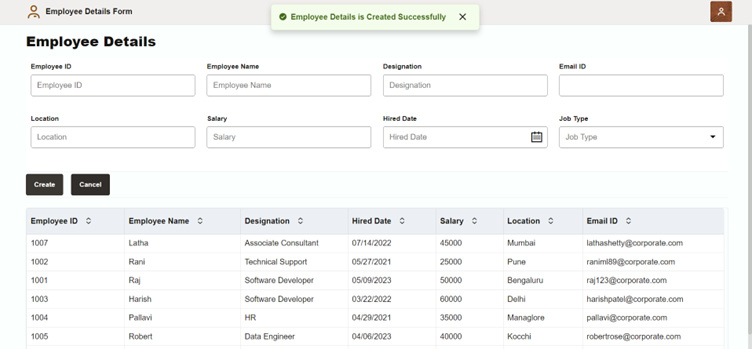
Later, we can use CSS to improve the appearance of the UI.
Conclusion:
By following these steps, you can develop a simple VBCS application that meets your specific requirements and provides an effective solution to your business needs. if your are looking for oracle visual builder service then contact conneqtion group for your business digital transformation.